How to add media to a catalog
Summary
You can upload new media files or new versions of existing media files to a catalog. Users with access to the catalog can open the media files with their virtual machines. This article describes how you can add media to a catalog.
Prerequisites
An active Copaco VMware Cloud subscription;
An account with administrator permissions on the Copaco VMware Cloud environment;
One or more catalogs.
Getting Started
Login to the customer tenant environment from Copaco VMware Cloud.
Go to Libraries, click Media & Other in the left panel of your screen and click ADD.

Use the drop-down menu to select the catalog you wish to add media to and click the Upload button.
(Optional) provide a name for the media file. If you do not enter a name, it will be named after the file.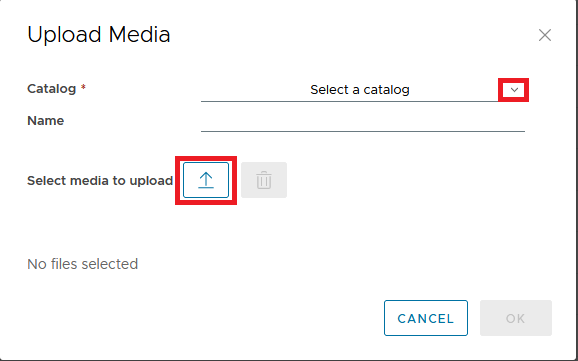
Click OK
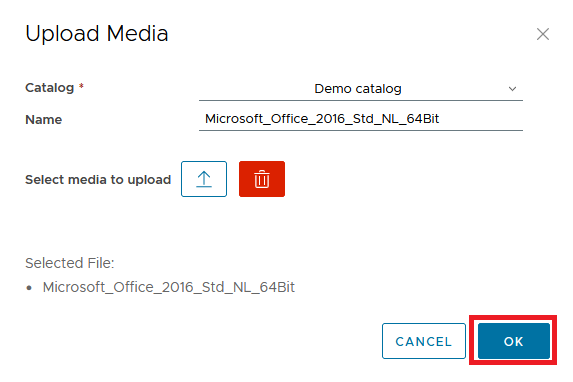
The file will now be uploaded. After the upload starts, the media file appears in the grid.
This Article describes how to create a catalog and upload your media.
When you want to use your own media within vCloud Director you can create a catalog where you can upload your media to.
When you are logged in to vCloud Director go to setting in the menu and choose 'Libraries'
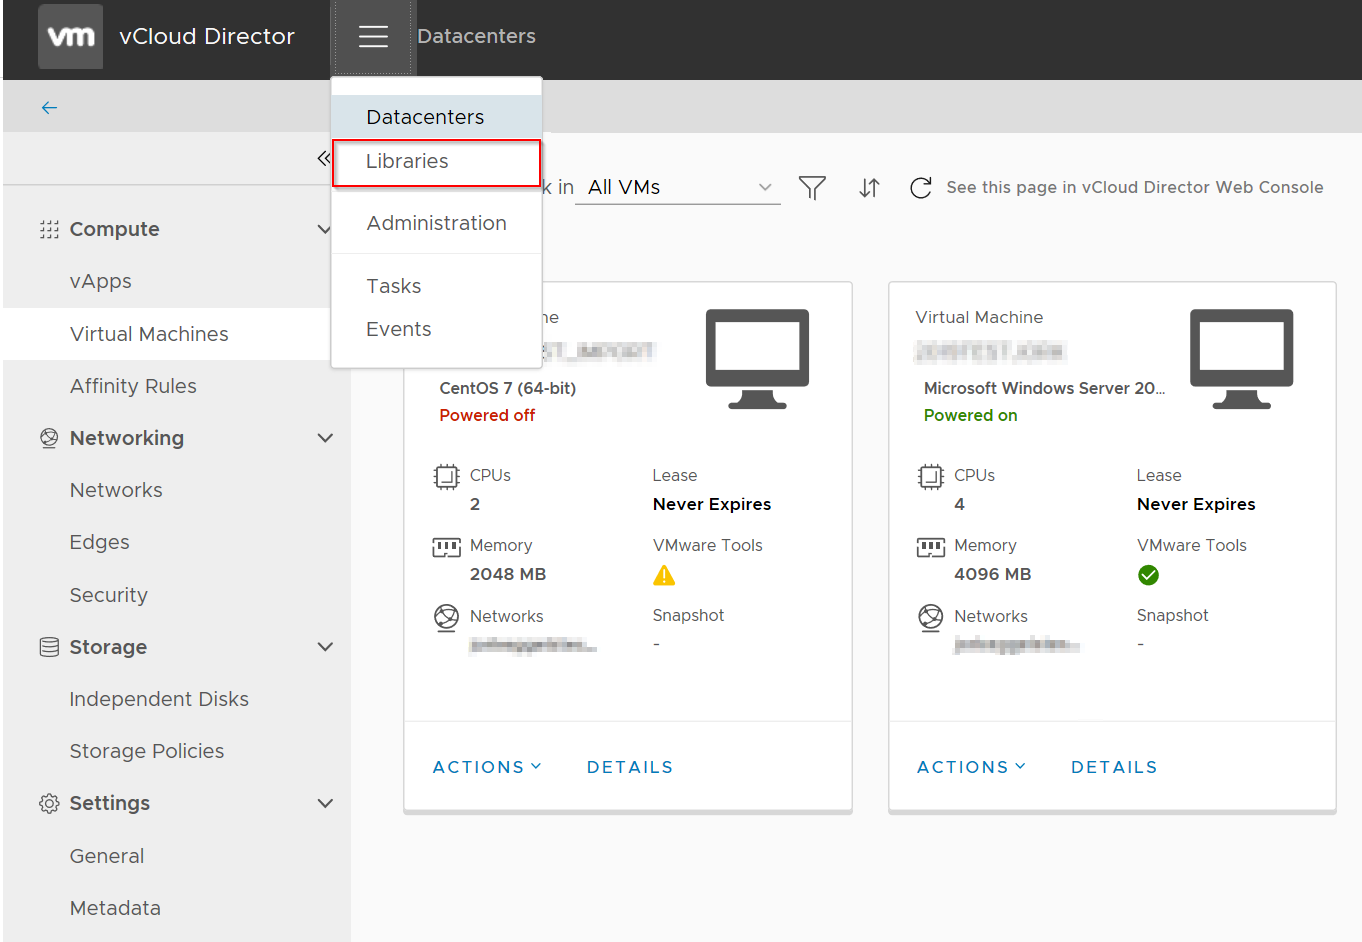
Here you see an overview of all the existing catalogs. Use the New button to create a new catalog
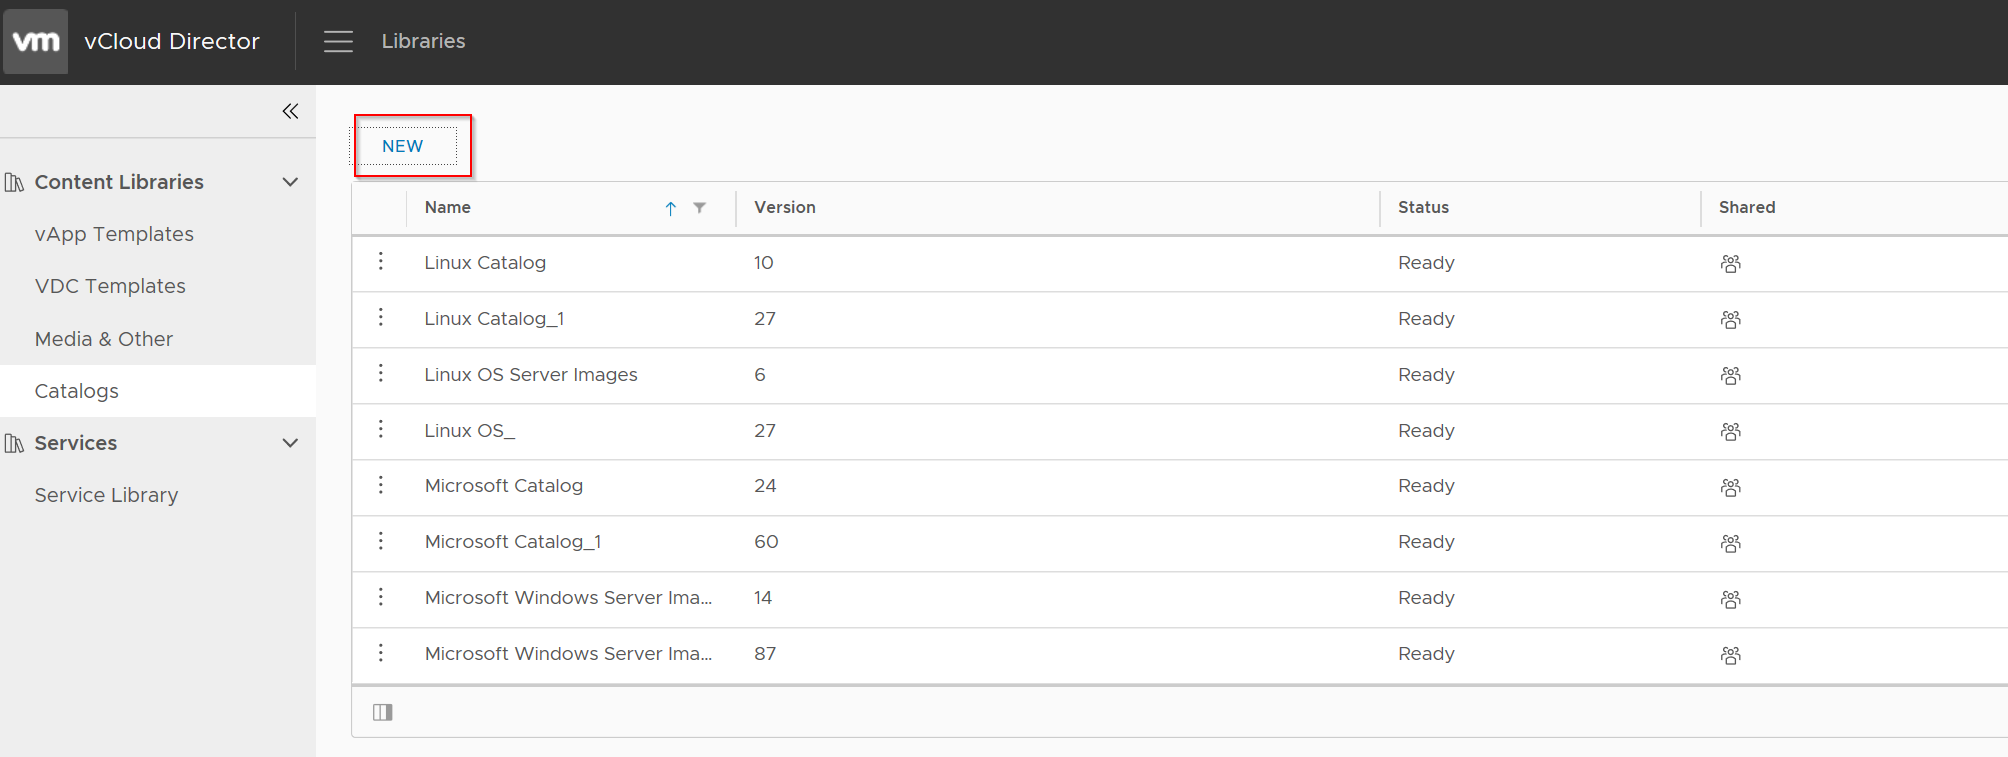
Now you have to give the catalog a name and specify the storage location for your catalog
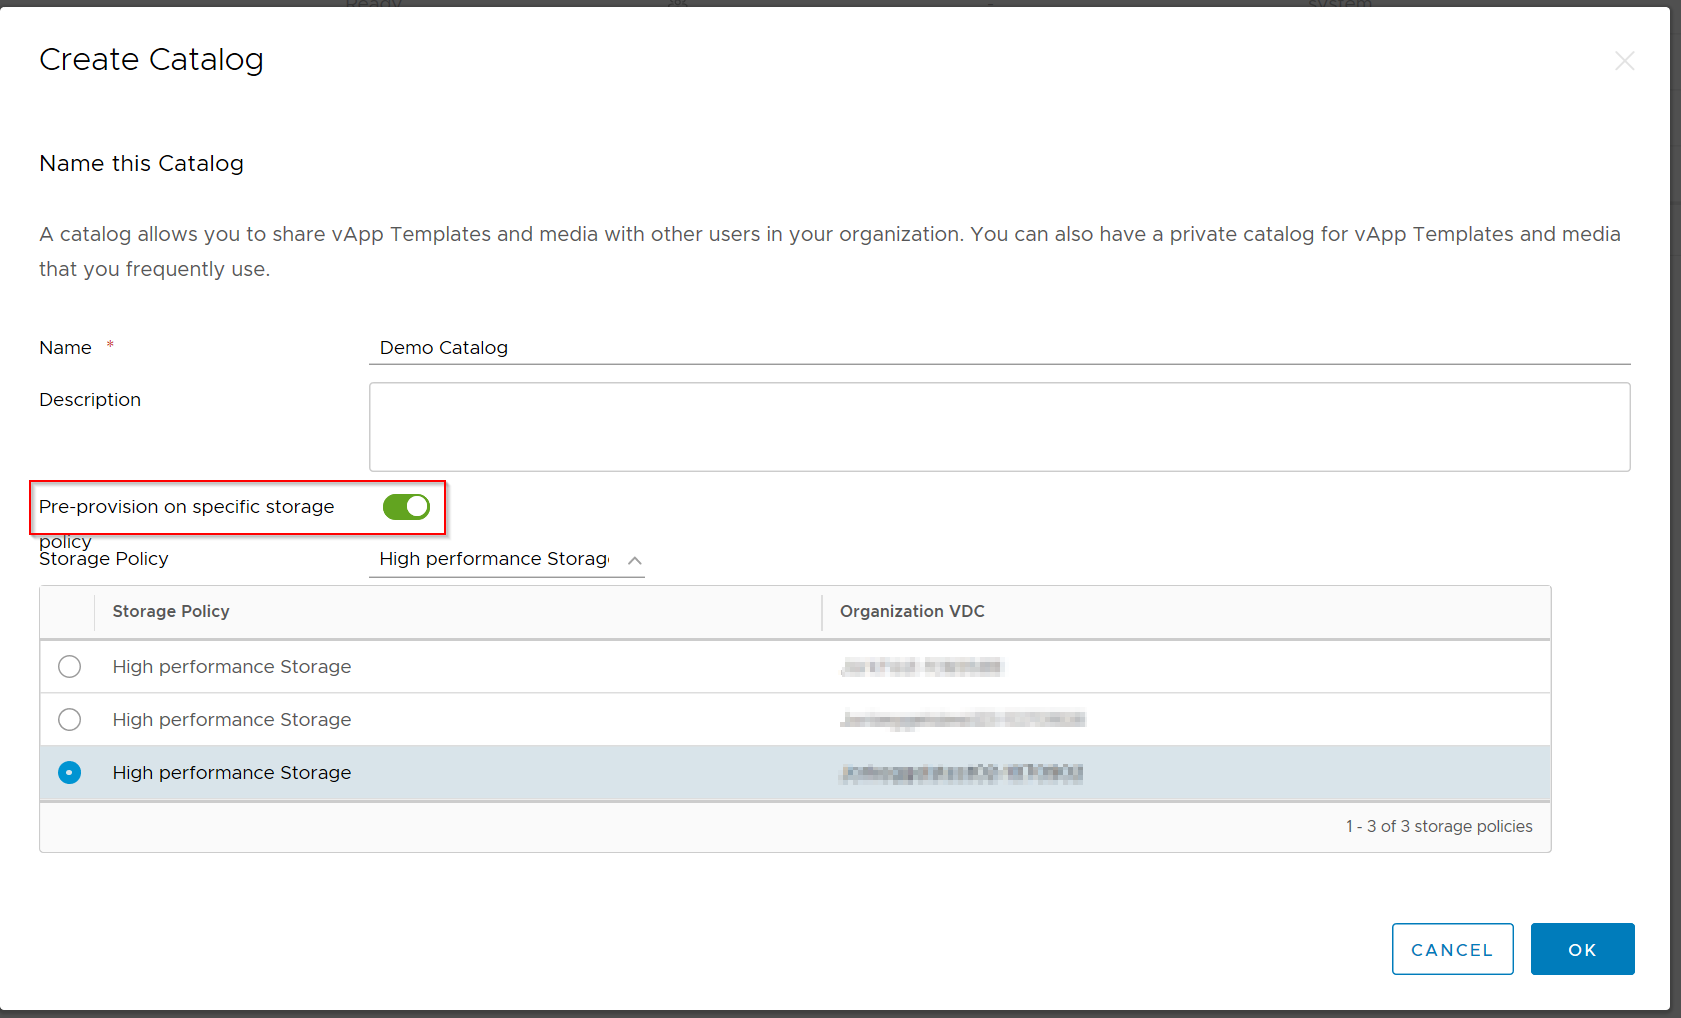
After you have pressed the OK button you can see that the catalog is created

Now you have created the catalog you can upload your media to it. Go to Media & Other and click the add button
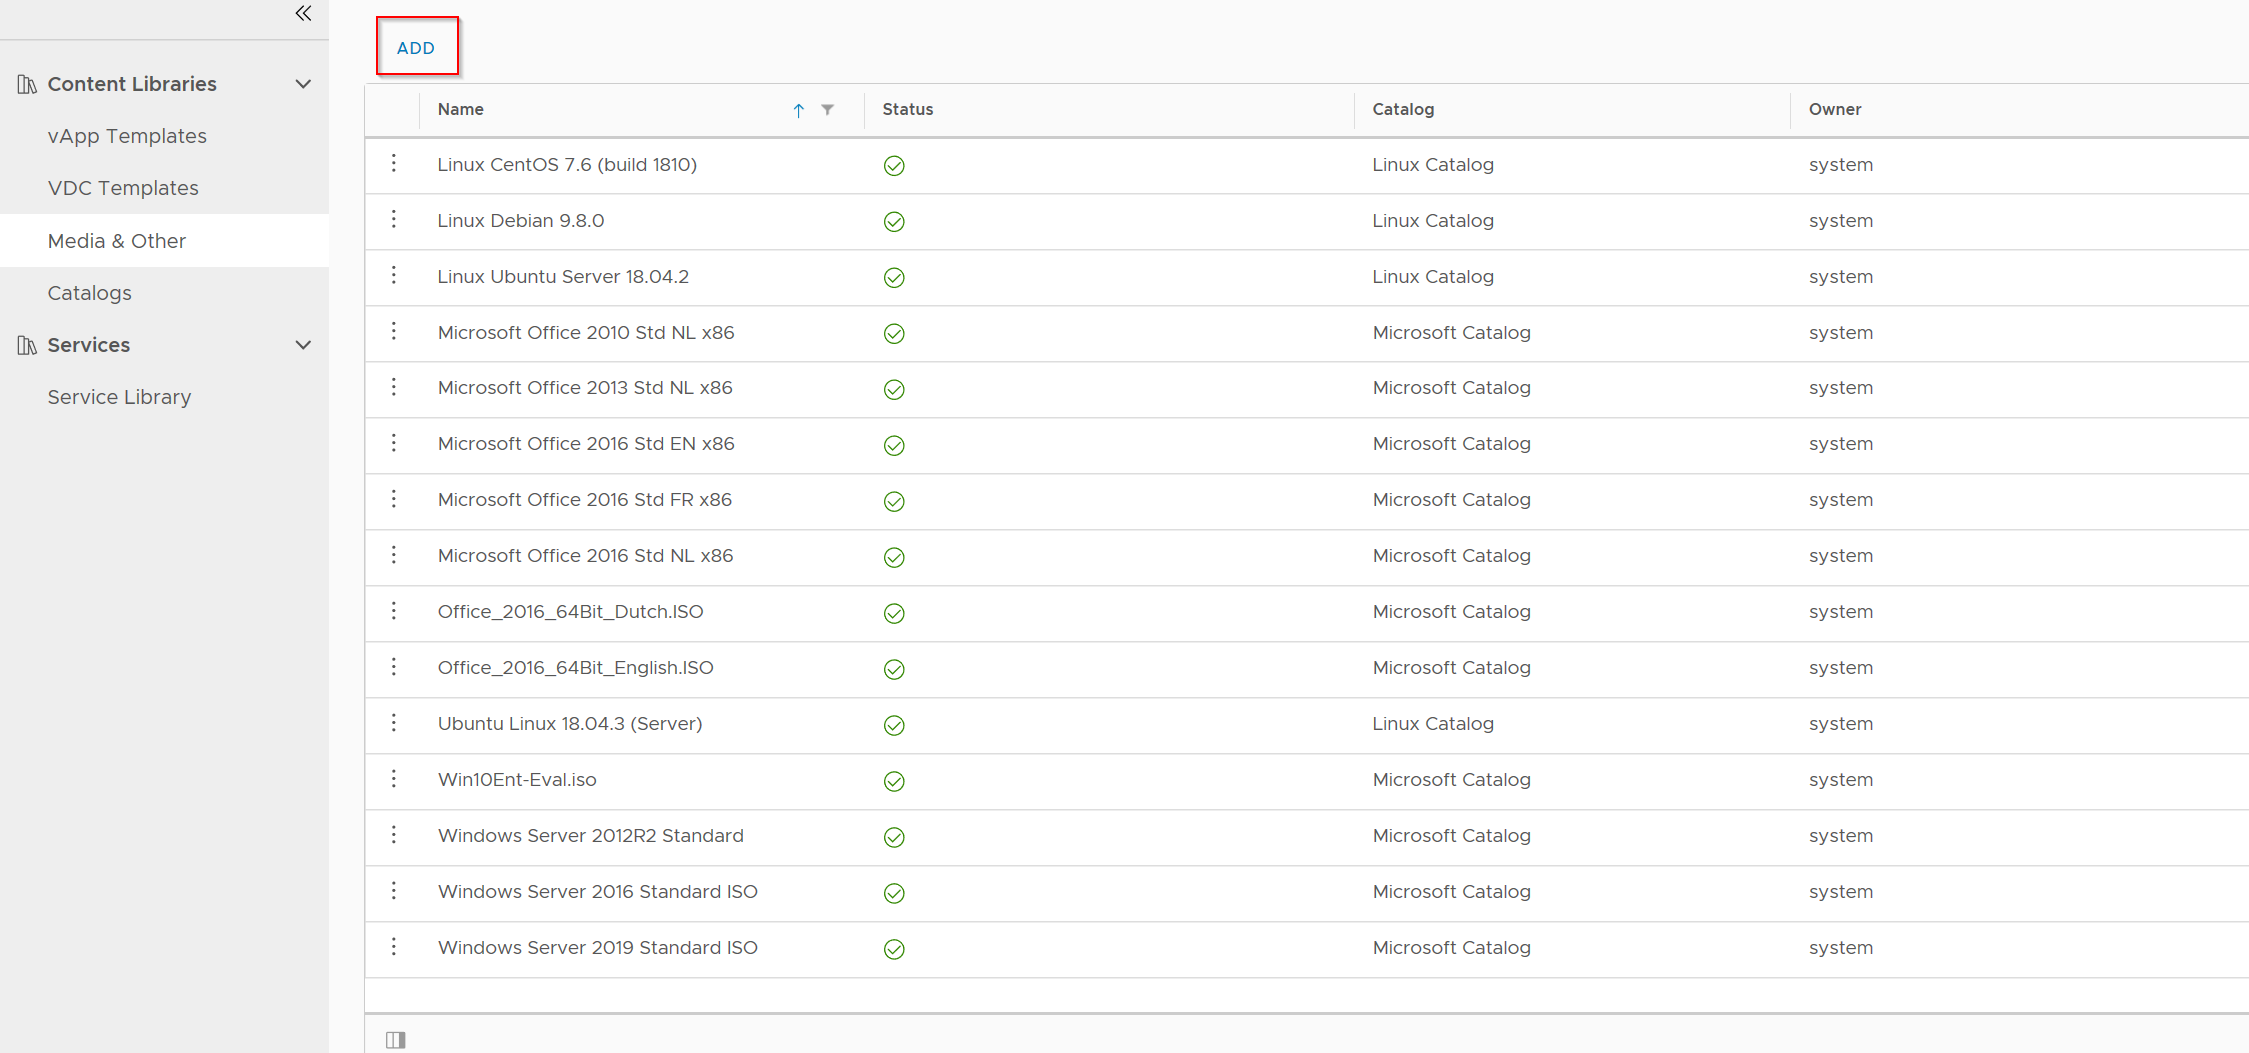
Here you have to select the catalog you have created and click on the upload button to browse for the file that you want to upload.
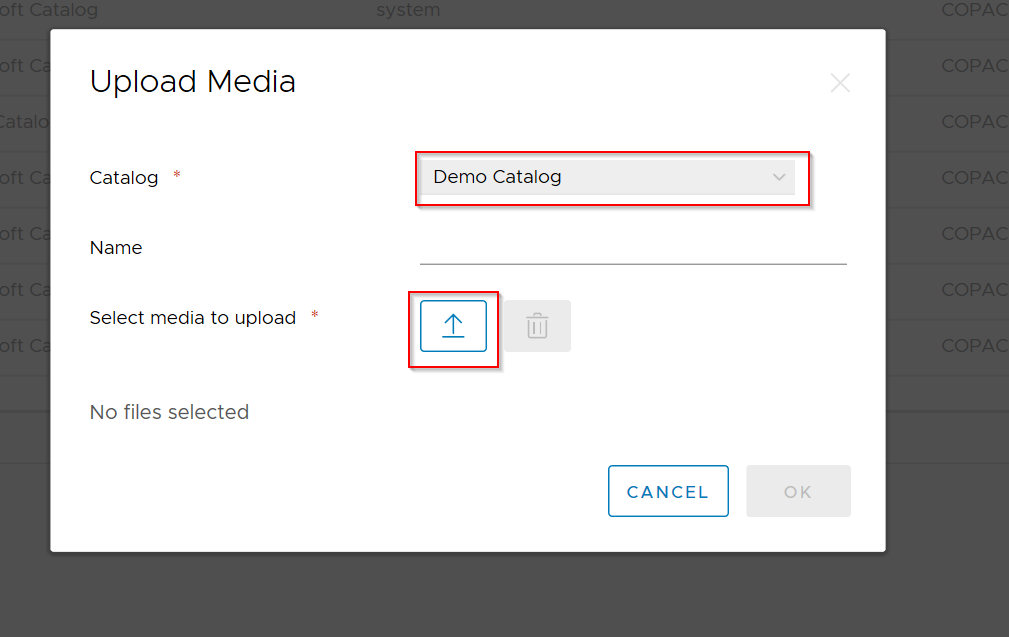
After you have uploaded you media you can attach your media to your VMs you have deployed.
