
How to configure a domain forward
Summary
This article describes how to configure a domain forward to a website hosted elsewhere.
Prerequisites
An active Domain Forward subscription.
Getting started
Login to the customer tenant environment via https://webhosting.cloudnet.services/portal/
In the top right of your screen, hover over your name and click Services.

Click the cog icon next to the Domain Forward option and click Add Domain.

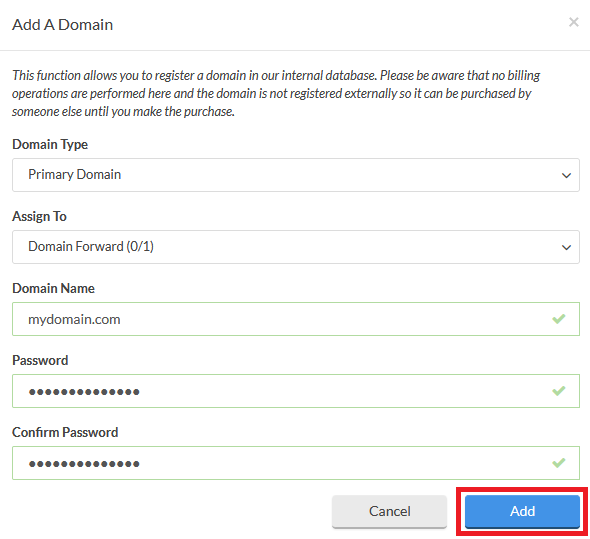
Fill in the fields and click Add.
Domain Type = Primary Domain
Assign To = Domain Forward
Domain Name = Domain you wish to forward
Password = Generate something random
Confirm password = Generate something random (matching with the other password)
Expand Domain Forward and click the cog next to <domainname> (R) and click Manage.

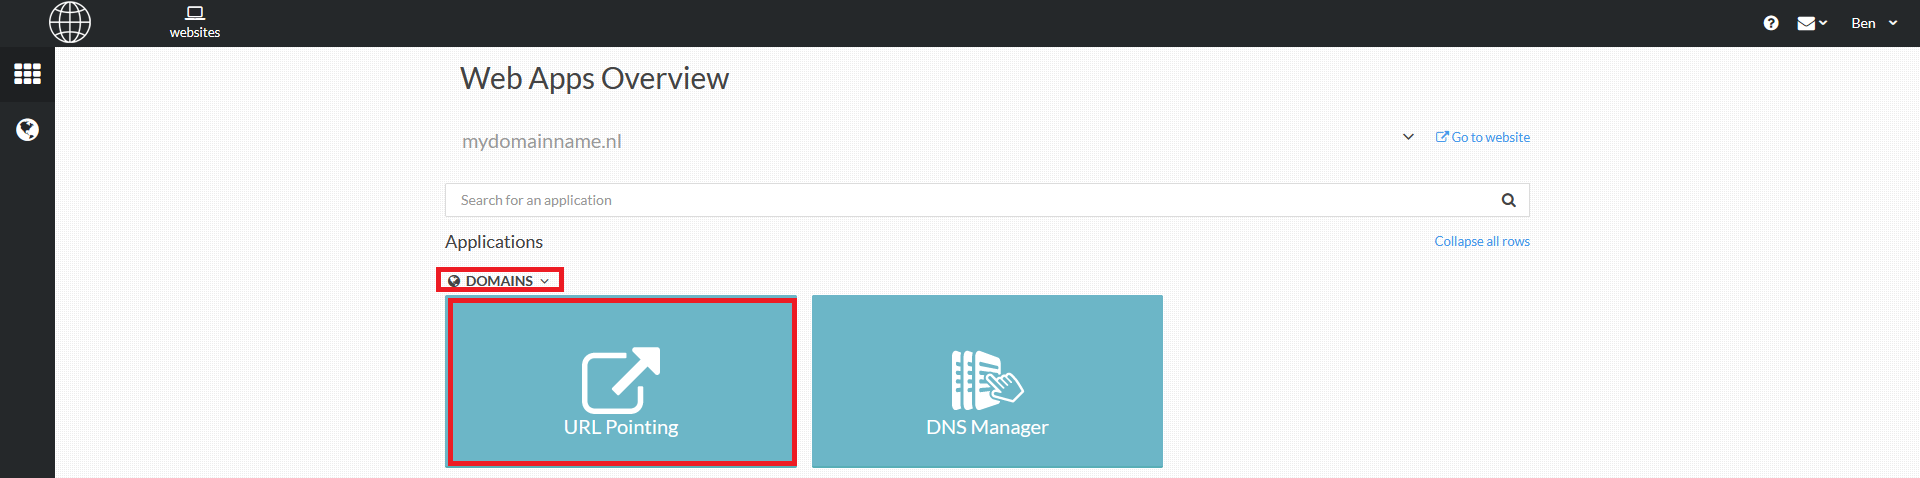
Expand Domains and click URL Pointing.
Enter the URL you wish to forward the domain to in the Point To URL field.
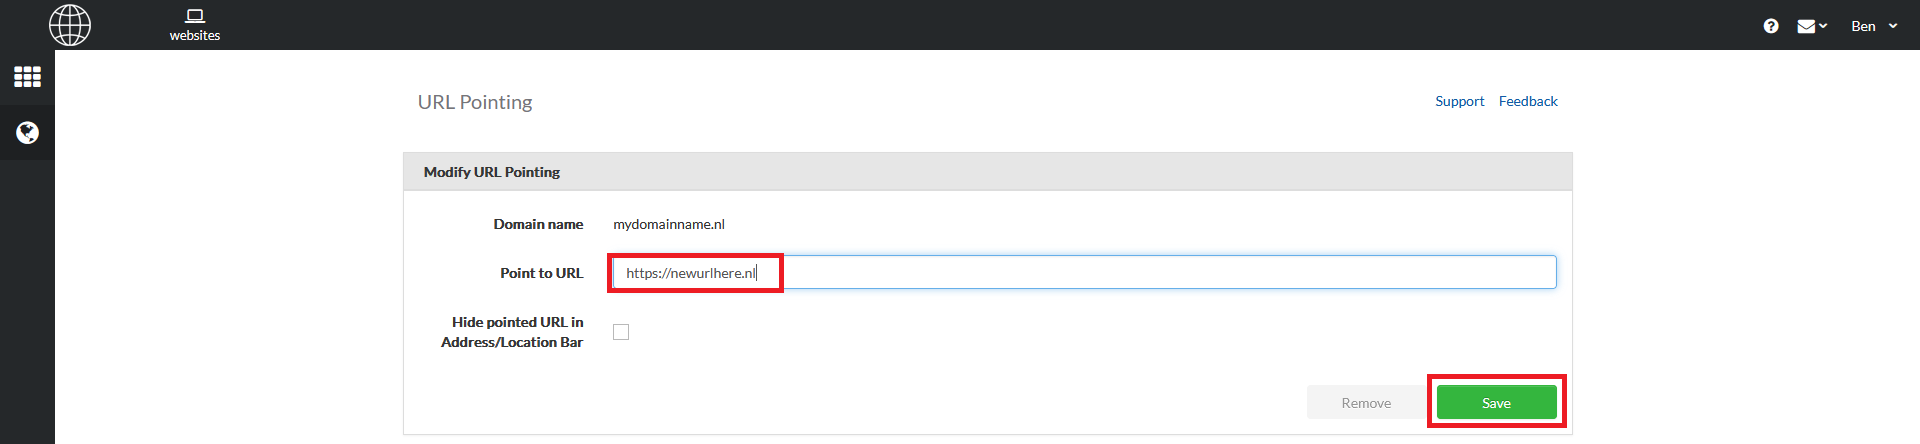
Click Save
Note: Once you created this forward, it’s not possible to make any changes to the domain name from step 4. Please contact the support department by raising a ticket to support@copaco.cloud. Our engineers will investigate the issue.
Now the domain forward is set you need to make sure the A record from the domain is pointing towards the HostPapa environment. The correct IP address is: 91.136.8.128