How to configure client to site VPN with openVPN
Summary
This article describes how to install and configure VPN using openVPN in Copaco VMware Cloud.
Prerequisites
An active Copaco VMware Cloud subscription;
An account with administrator permissions on the Copaco VMware Cloud environment.
Purchased the amount enough licenses. See: https://openvpn.net/access-server/pricing-1/;
OpenVPN Applicance. Click here to download.
Getting Started
This article contains 3 parts. In the first part will explain how to create a vApp and the second part will explain the firewall rules that need to be created and the third part will explain how to configure the vApp.
Creating the vApp
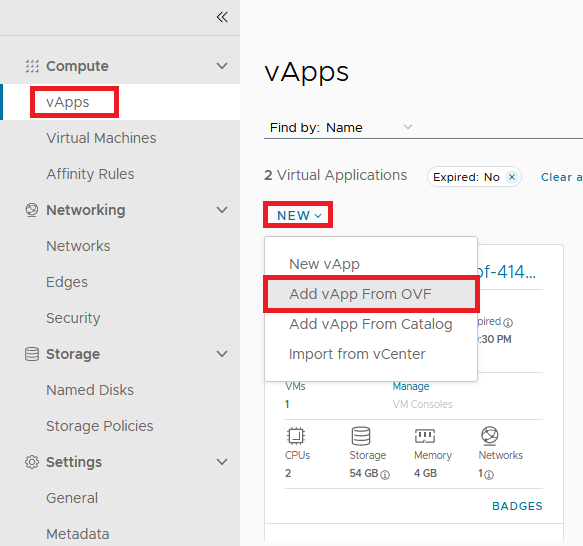
Login to the customer tenant environment from Copaco VMware Cloud.
Click on vApps, click NEW and click Add vApp From OVF.
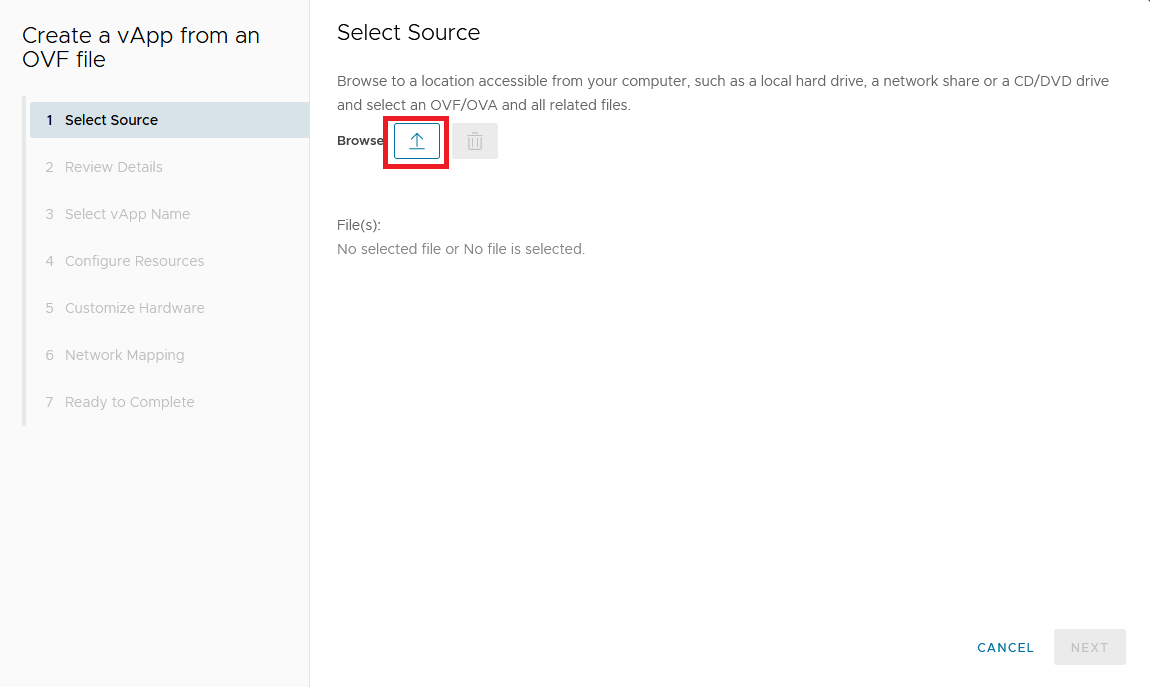
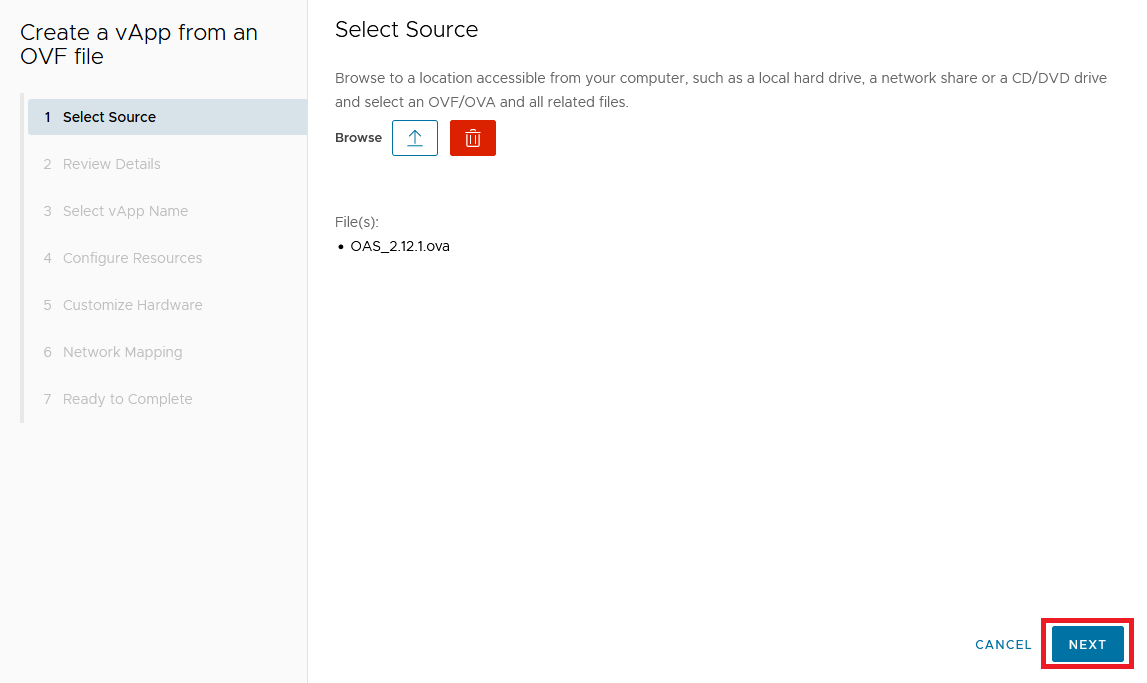
Click upload to select the OpenVPN OVF file.
Click Next.
Review the details and click Next.

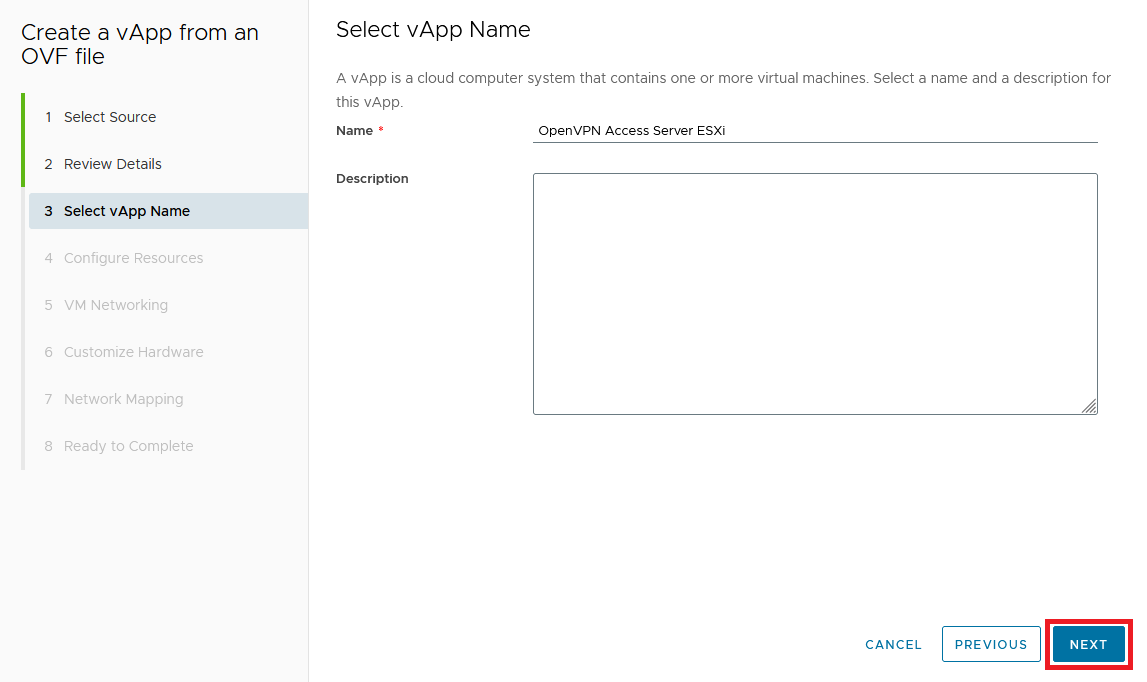
Provide a name for the vApp and click Next.
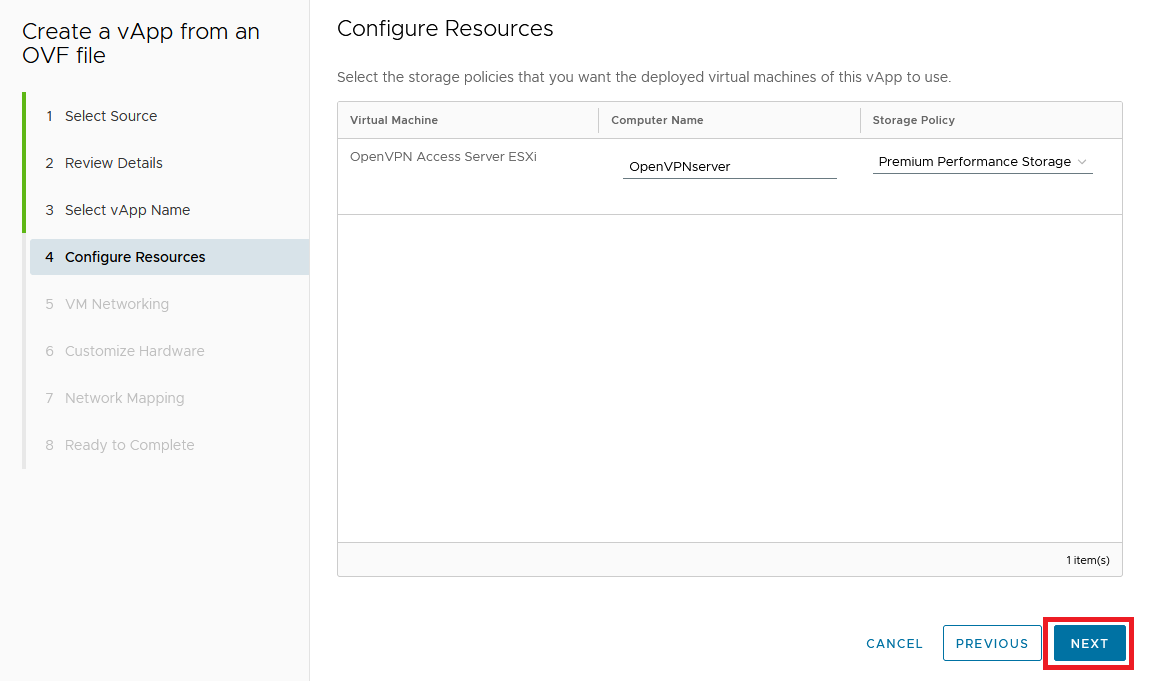
Change the Computer Name so it meets the requirements shown.
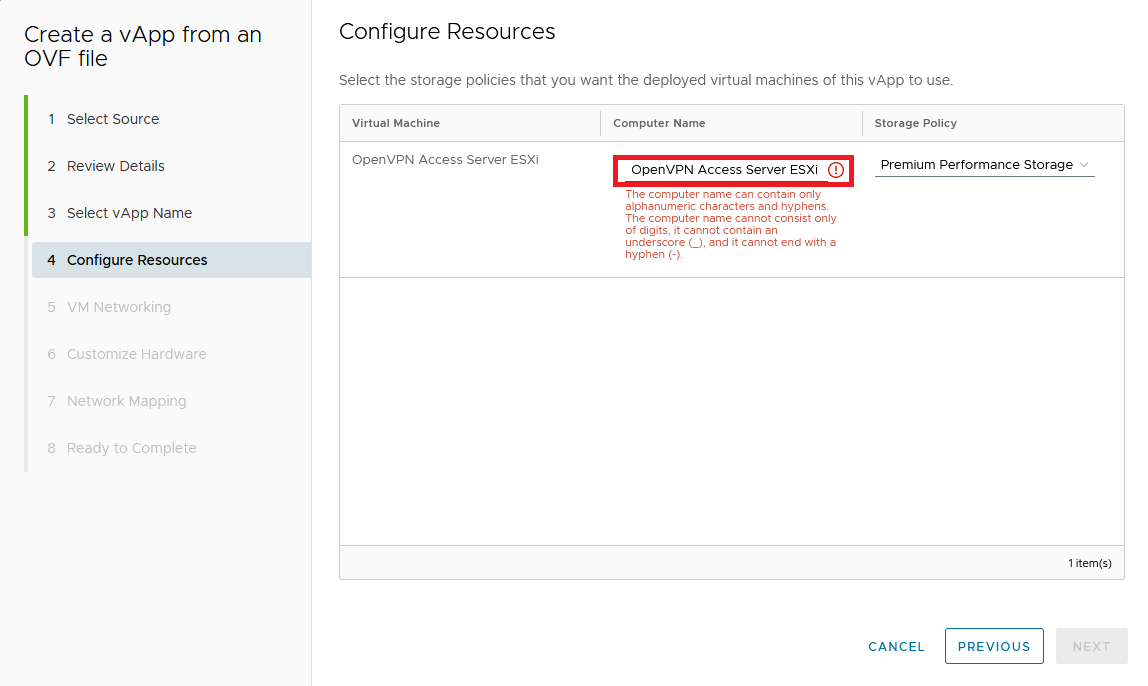
Click Next.
Click Next.
(Optional) Specify the primary NIC, Network Adapter Type, vApp Logical Network and IP assignment.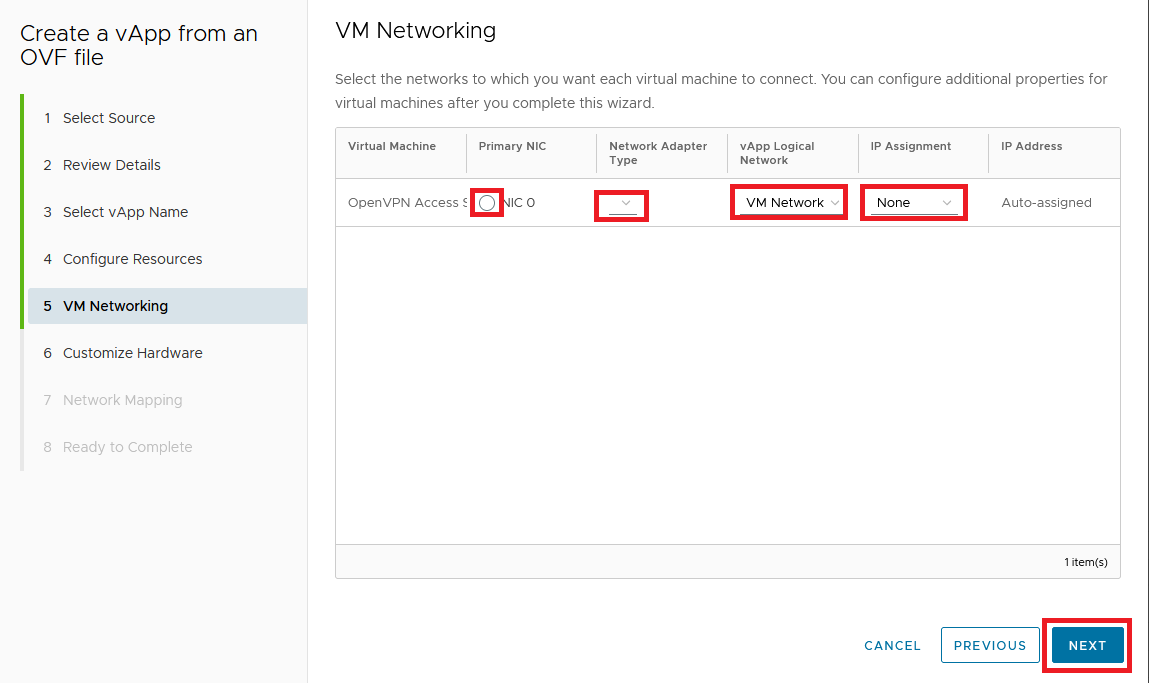
Click Next.
(Optional) Adjust the hardware settings.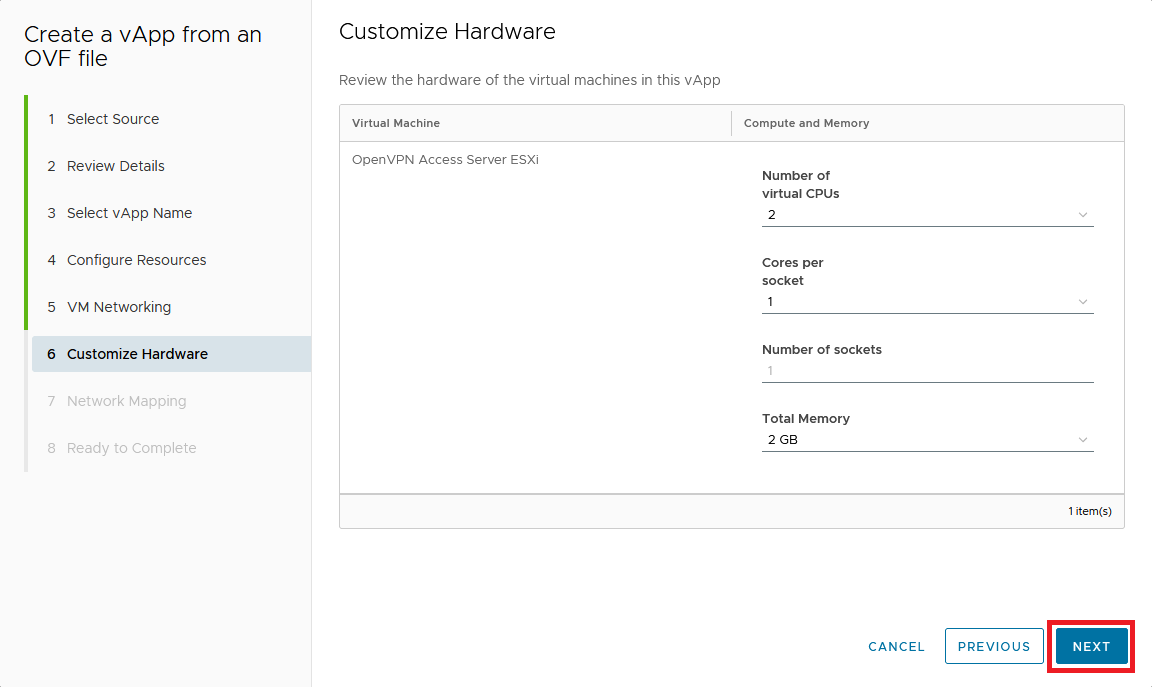
Click Next.
(Optional) Change the Destination and IP Allocation.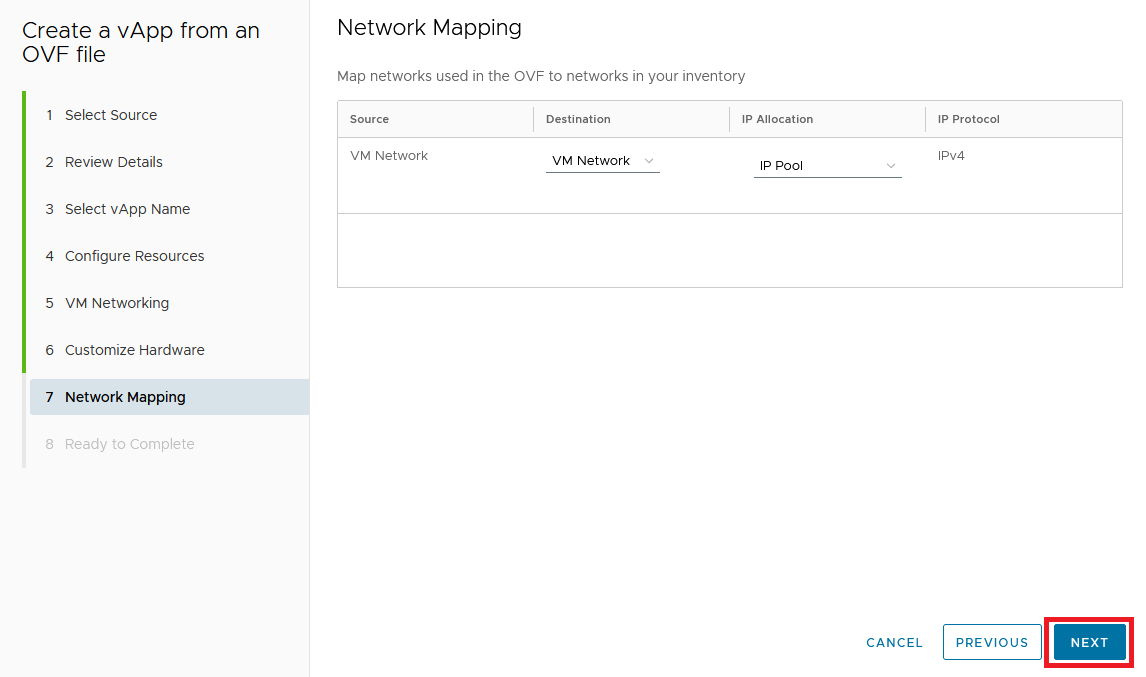
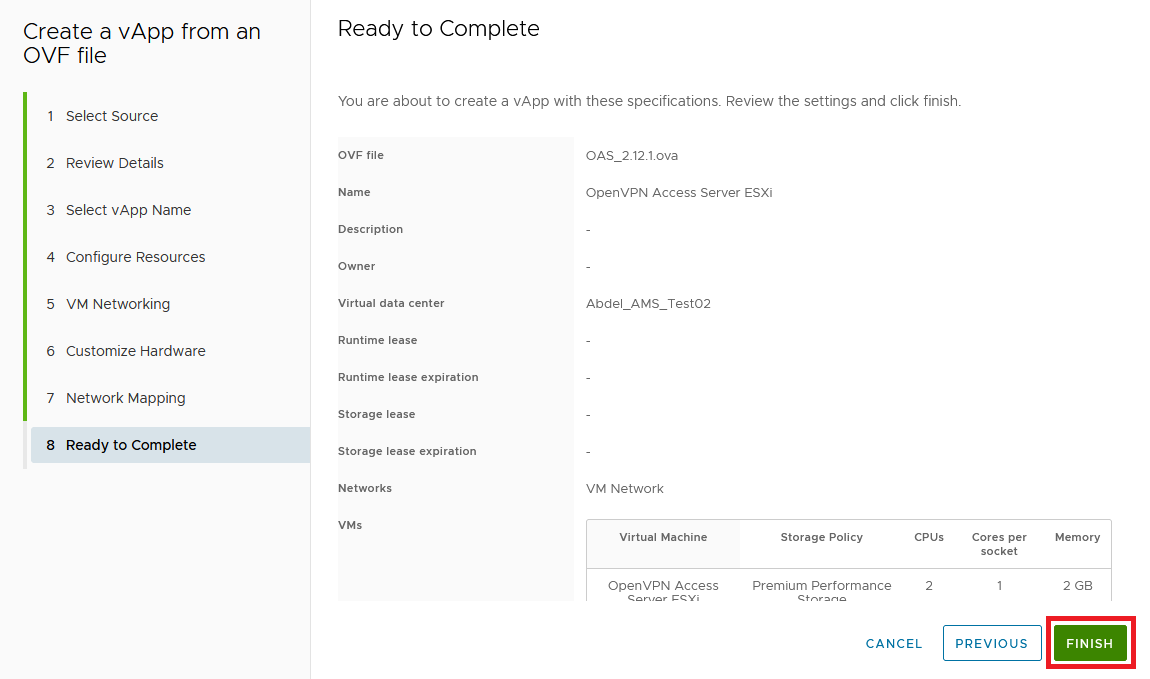
Review the settings and click Finish.
Creating Firewall and NAT Rules
Click Edges, select the Edge gateway rule and click Services.

Go to the Firewall tab and click the + icon.

Create a firewall rule that allows traffic from your local network to the Copaco VMware Cloud environment.

Go to the NAT tab and click +DNAT RULE.

Create a DNAT rule to NAT ports 1194 (UDP/TCP) and 943 (TCP) to our OpenVPNserver machine which will have the IP 192.168.1.100 (We will configure the IP address later).
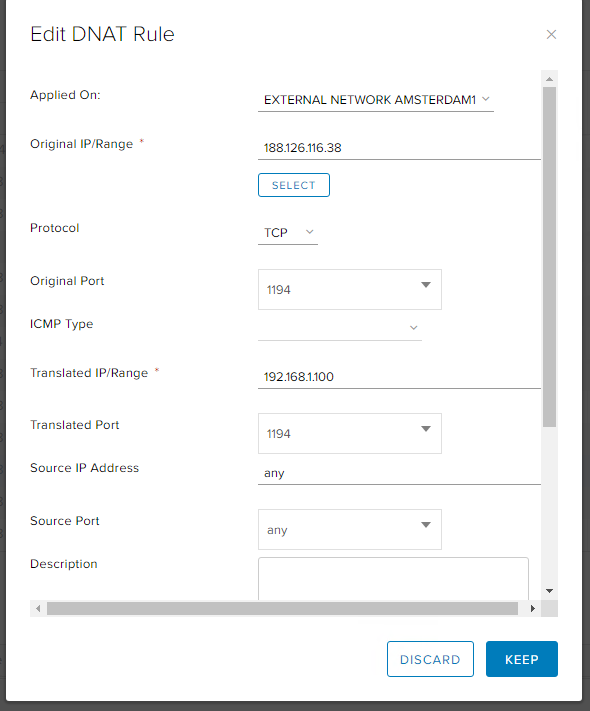
1194 TCP rule

1194 UDP rule
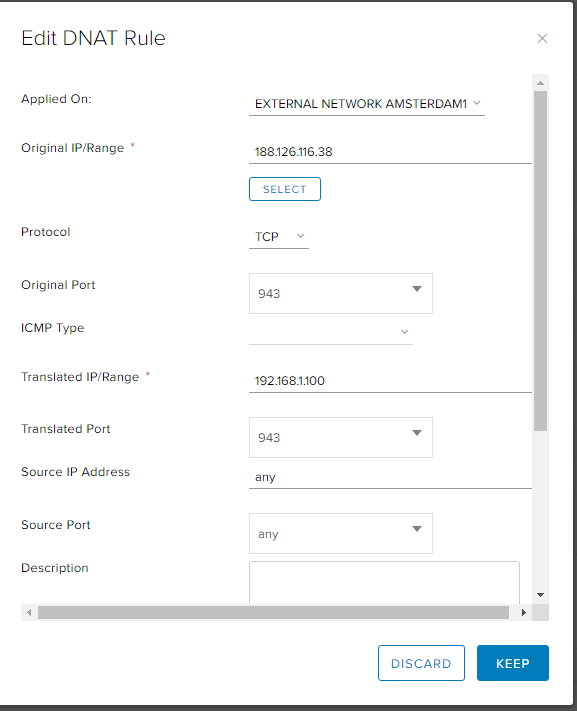
943 TCP rule

All three created rules
Configuring the VM to be able to connect through VPN
Go to vApps and click the name of the vApp created in the first steps.
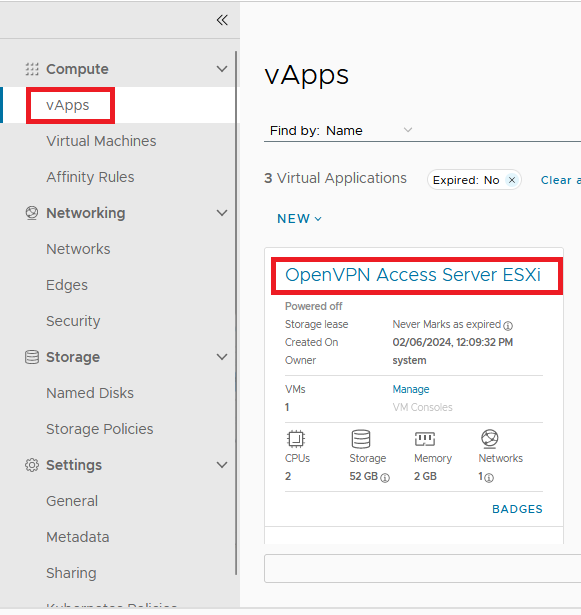
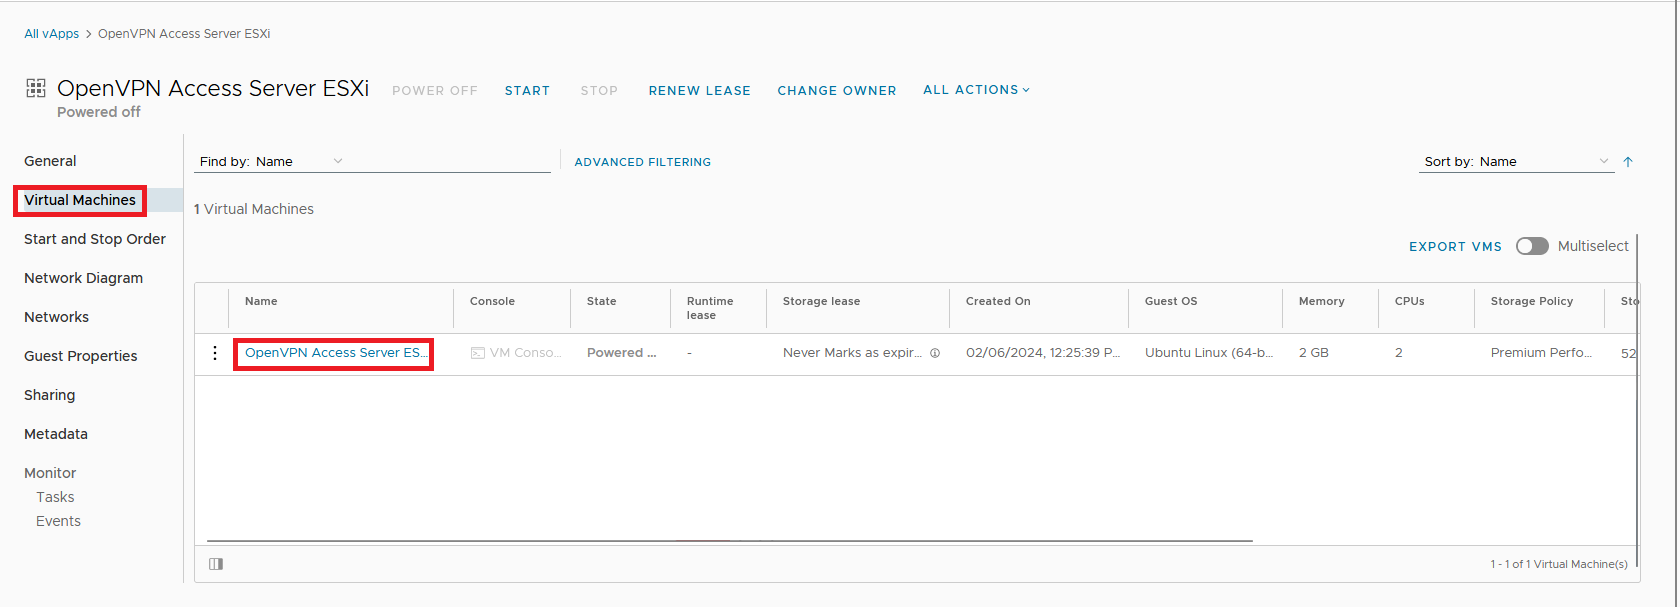
Click Virtual Machines, and click the name of the server.
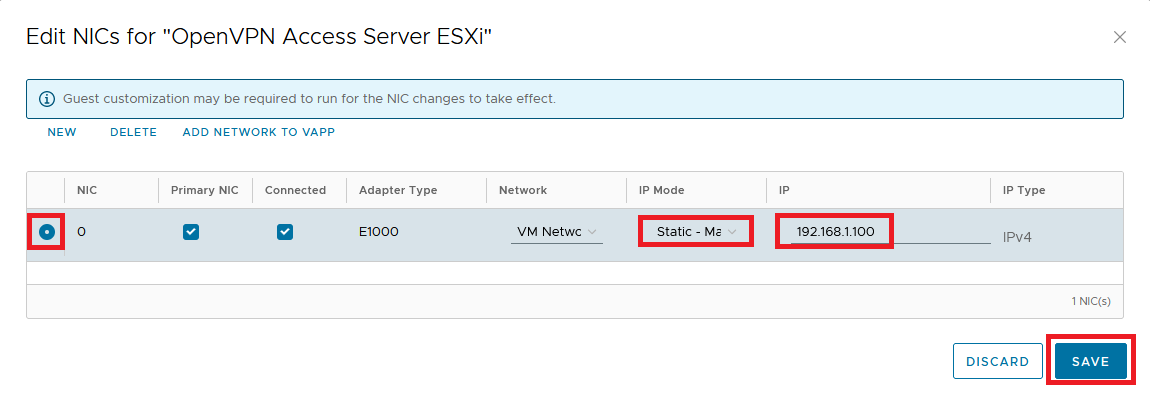
Under Hardware, click NICs and click Edit.
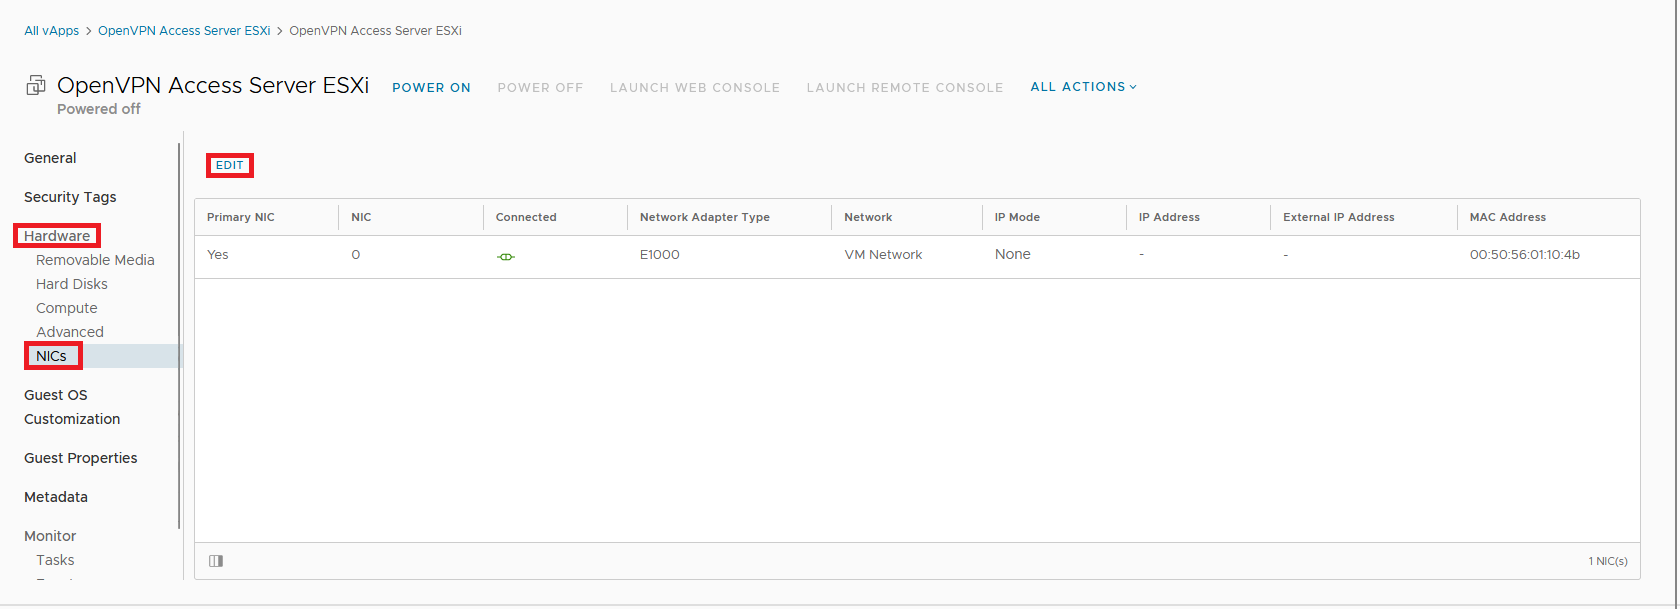
Enable the NIC, Change IP Mode to Static - Manually and enter the IP address and click Save.
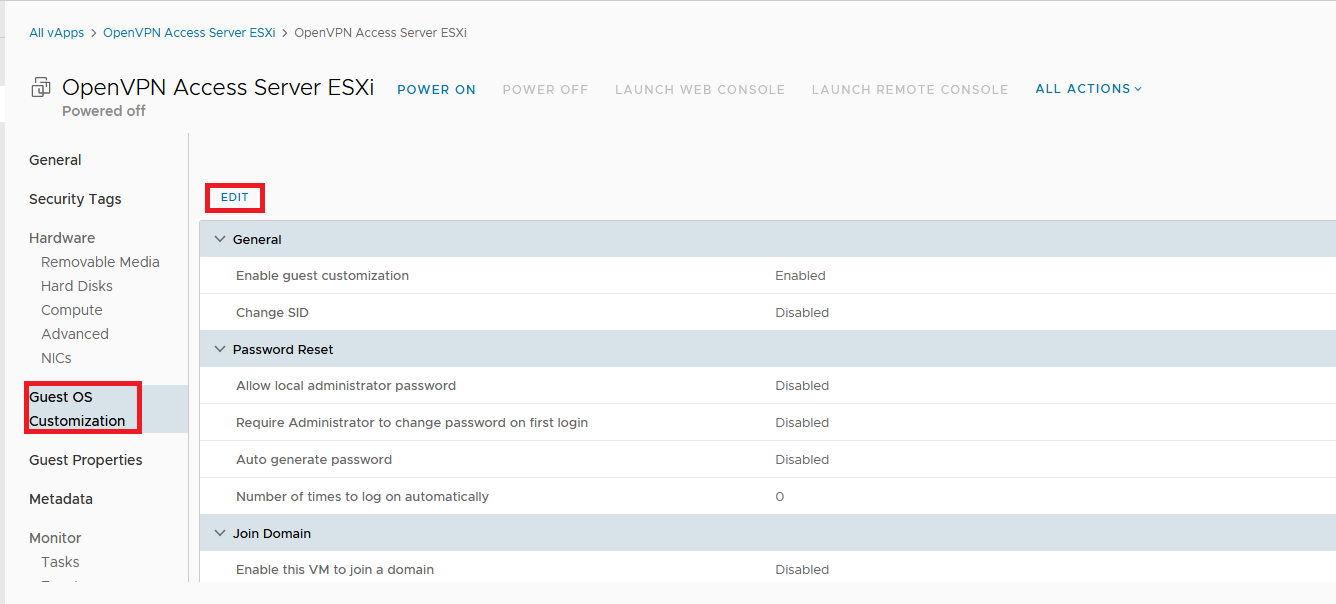
Go to Guest OS Customization and click Edit.
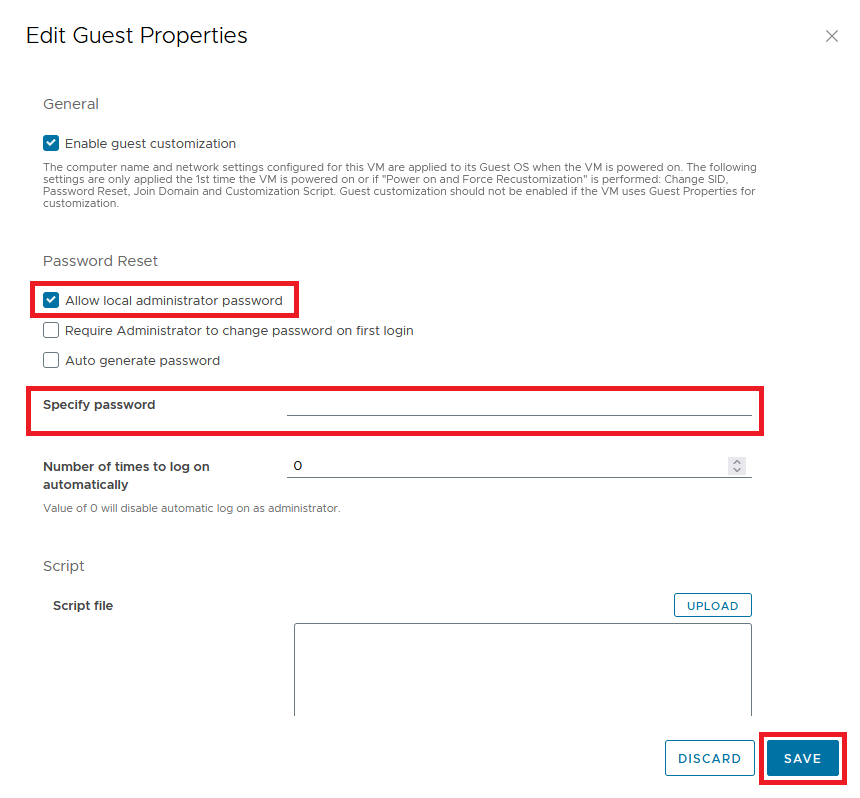
Check the Allow local administrator password checkbox, specify a password and click Save.
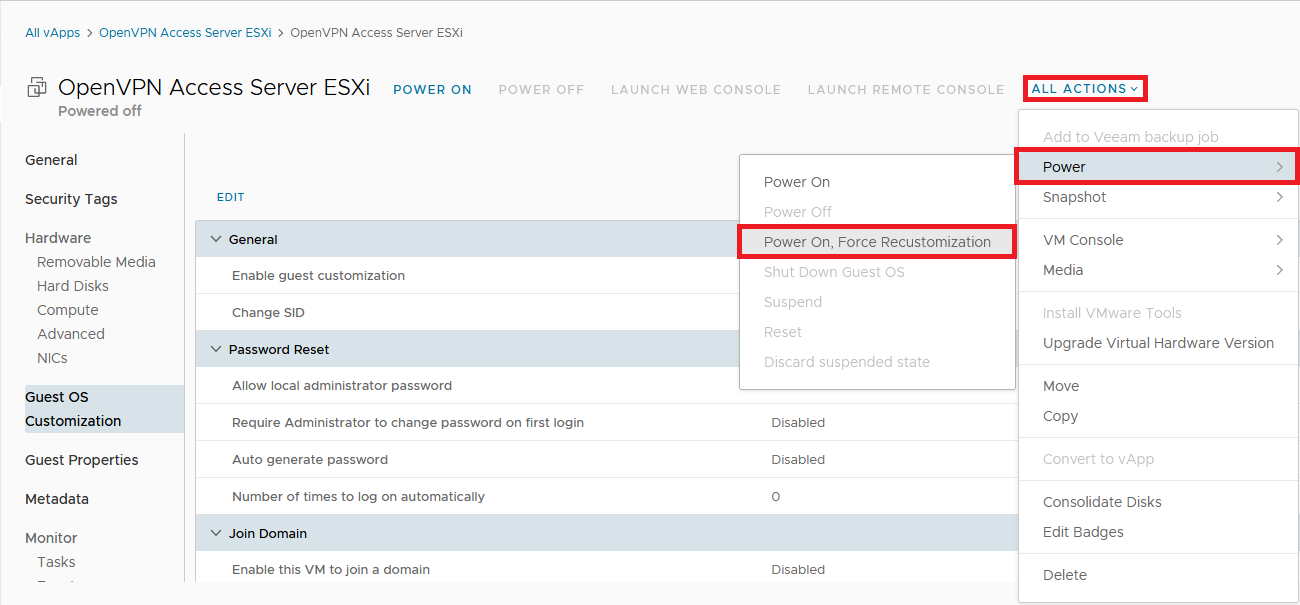
Go to ALL ACTIONS, Click Power and click Power On, Force Recustomization.
When the VM is started, login with the credentials you have specified. The OpenVPN configuration wizard will start.
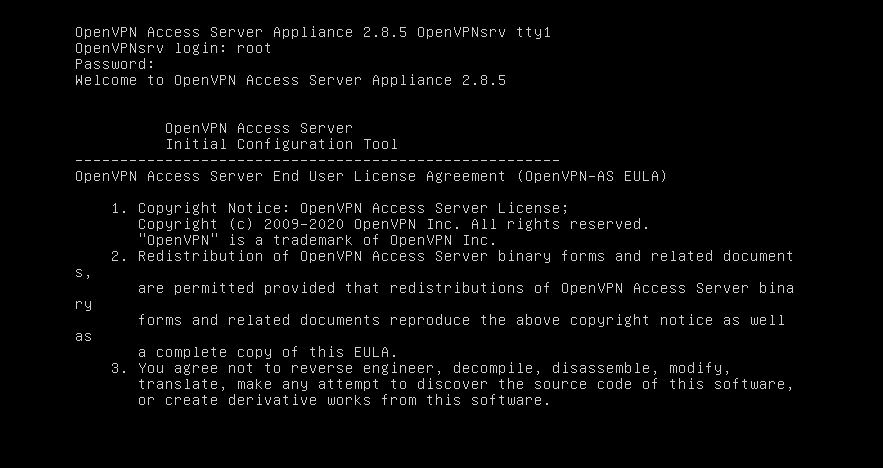
Type Yes if you agree the agreement
Type Yes On primary access node
On specify network interface specify the network interface with the private IP. In this case its 2.

Leave the port for admin web default and press Enter.
Enter port 1149 for OpenVPN Daemon.
Type Yes on the Client traffic routing.
Type Yes for the DNS traffic to be router through VPN.
Type Yes for User authentication via internal DB.
Type Yes for Should private subnets be accessible.
Type Yes to login to the Admin UI with OpenVPN.
Enter your activation key if you have one.
Wait a few minutes for the installation to be complete
Specify a password for the user “openvpn” by typing passwd openvpn.
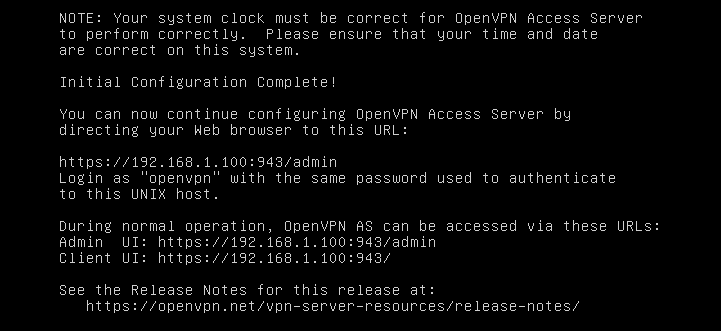
Browse to the OpenVPN admin interface and login with the openvpn user In our case its https://188.126.116.38:943/admin/
Here you can configure several settings such as authentication methods.
Go to the client page to download our client config. In our case its https://188.126.116.38:943/
Here you have several options to choose for using the VPN. We are going to choose to download our config since we already have installed the OpenVPN client.
When you have downloaded the config you have the 192.168.1.100 addresses into 188.126.116.38 (its public address).
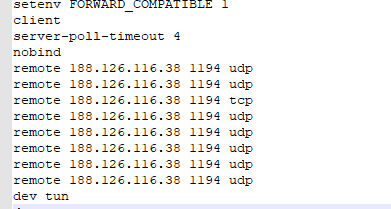
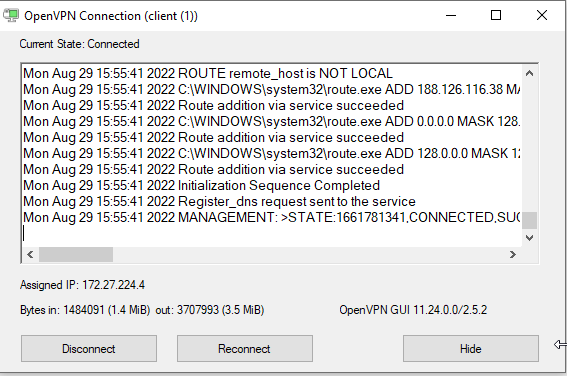
When this is done. you can import the config in to your client and try to make connection.
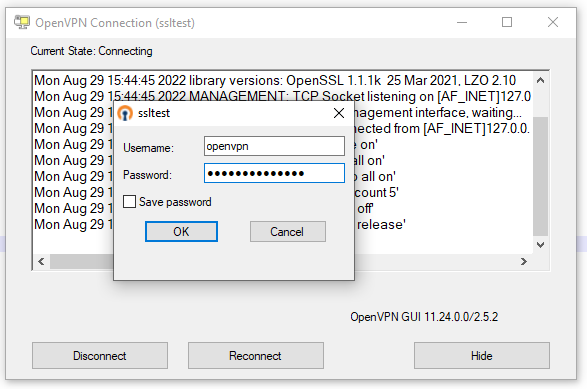
Now you are successfully connected to the OpenVPN VPN connection.