
How to create a site-to-site vpn tunnel
Summary
This article describes how you can create a site-to-site VPN tunnel in Copaco VMware Cloud.
Prerequisites
An active Copaco VMware Cloud subscription;
An account with administrator permissions on the Copaco VMware Cloud environment;
An an Organization Network.
Getting Started
Login to the customer tenant environment from Copaco VMware Cloud.
Click Edges, select the Edge gateway rule and click Services.

Go to the VPN tab and enable IPsec VPN Service Status.

Go to the IPsec VPN Sites tab and press the + button.

Enable the configuration by toggling the Enabled.
Specify the details and Click Keep.
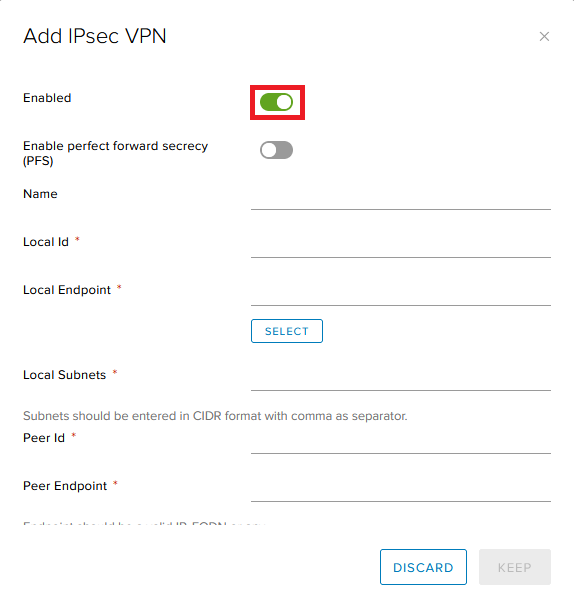

Name: The name for the VPN tunnel
Local ID: The IP Address of your Edge Gateway in Copaco VMware Cloud
Local Endpoint: Same IP address as your Local ID (You can click Select)
Local Subnets: The private subnet that you have defined for your VMware cloud network
Peer Id: This is the IP address of the on-premise firewall
Peer Endpoint: This is the same address as you used for the peer Id
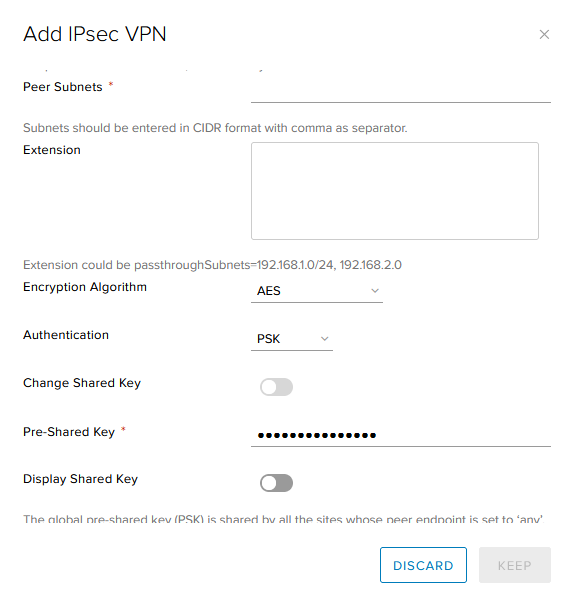
Peer Subnets: This is the subnet that you use in your on-premise environment
Extension: Leave this field empty
Encryption Algorithm: Choose what Algorithm you want to use. We support AES, AES256, AES-GCM, 3DES. (which algorithm you need to use depends on your on-premise firewall model)
Authentication: Here you can choose which authentication method you want to use; PSK or certificate. ( make sure that you use the same method on both sides.)
Pre-Shared key: Here you need to define a pre-shared key (make sure that you use the same PSK on both sides.
Diffie-Hellman Group: Here you can define which DH group you want to use. We support DH5, DH 14, DH 15 and DH16. ( which algorithm you need to use depends on your on-premise firewall model)\
Digest Algorithm: Here you can define which Digest Algorithm you want to use. We support SHA1 and SHA-256
IKE Option: Here you can define which IKE version you want to use. We support IKEv1, IKEv2, IKEFlex
IKE Responder Only: Here you can define if you want to enable or disable IKE Reponder Only
Session Type: Leave this by default to Policy Based Session
Now you need to configure the on-premise side. You need to use the following settings:
Phase 1:
> IKE Version: Ikev1
> Authentication Algorithm: sha1
> SA Lifetime: 28800 seconds
Phase 2:
> Authentication Algorithm: sha1
> SA Lifetime: 3600 seconds