How to manage DNS records
When you want to create a CNAME or MX record, make sure you add a “.” at the end of the “Value”. If you don’t do this, it will add the domain name after the original value which is not correct.
Summary
After purchasing an InterNetX AutoDNS subscription, you can create, modify and delete DNS records for your domain. This article describes how you can do this.
Prerequisites
An active InterNetX AutoDNS subscription.
Getting Started
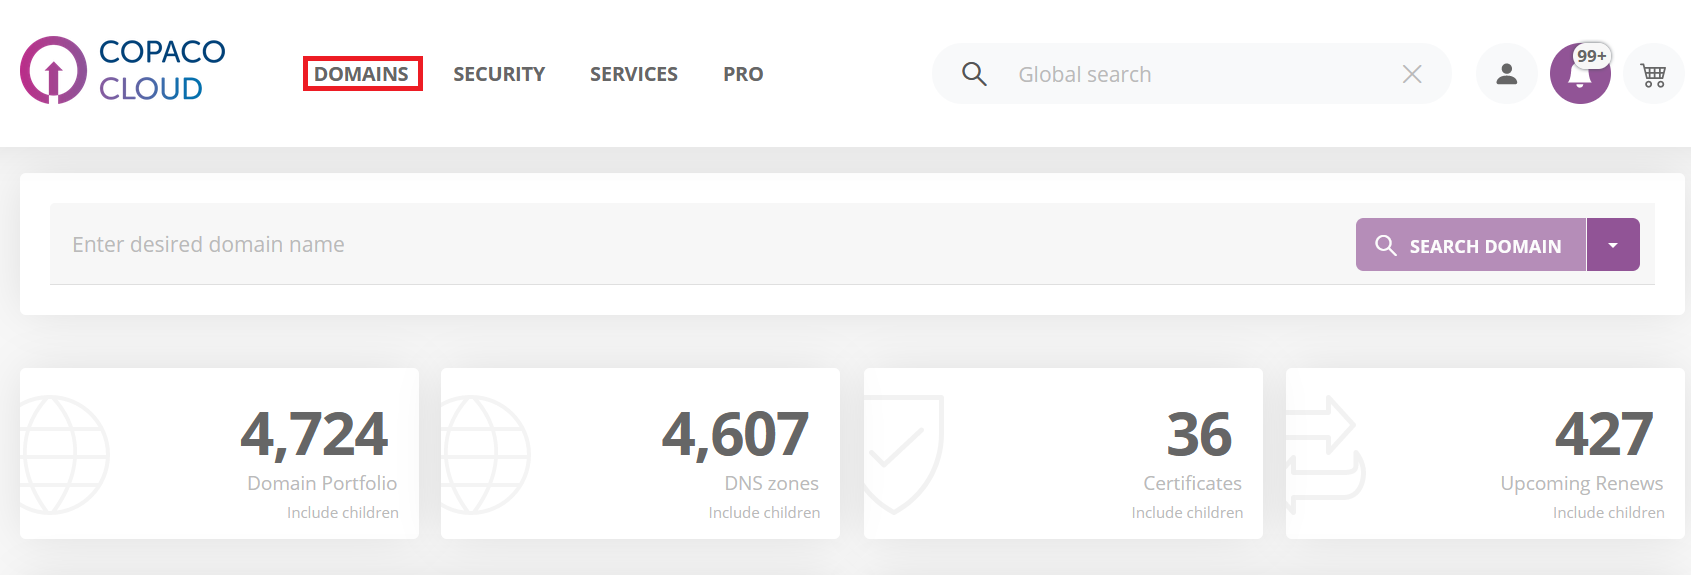
Login to https://webservices.copaco.cloud.
Click Domains.
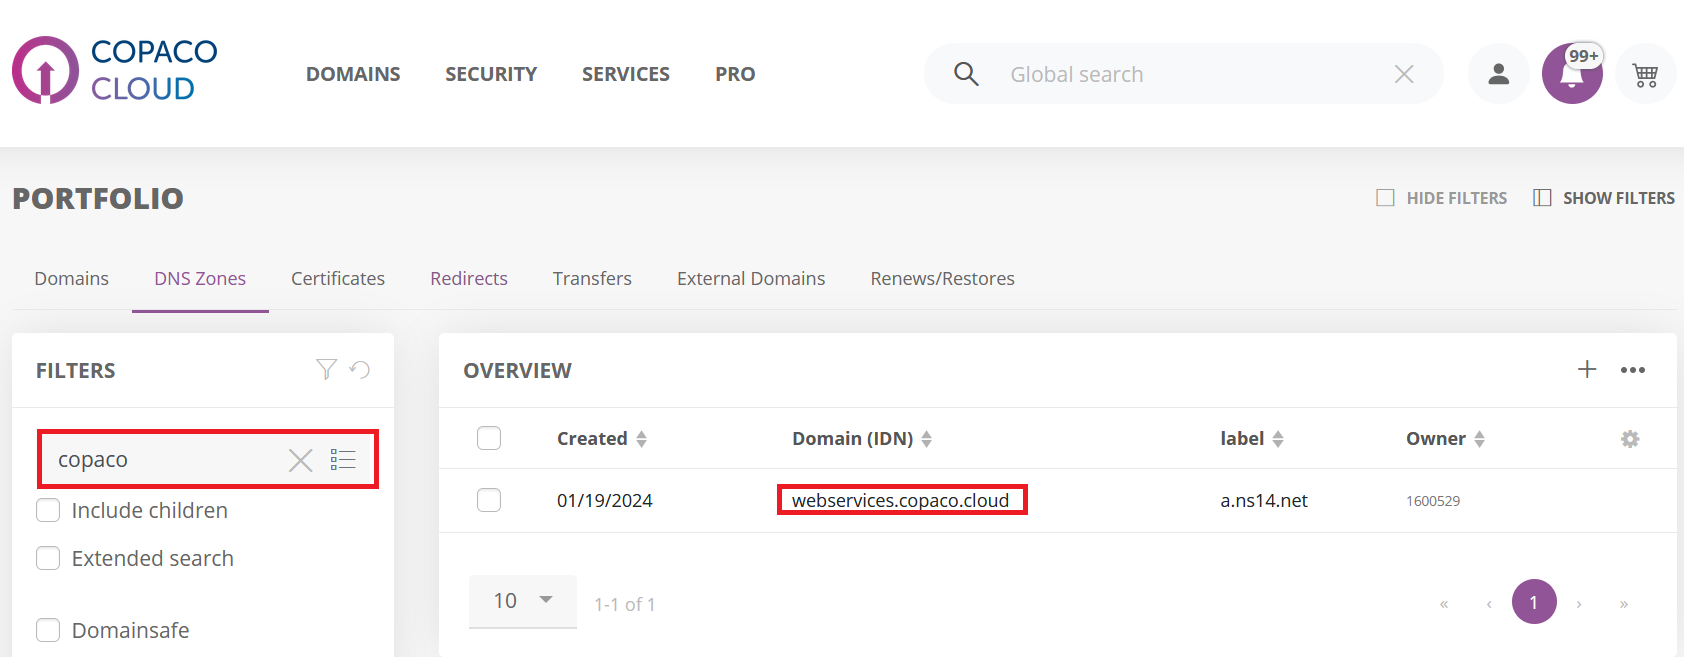
Click DNS Zones.

Use the filter to search for the domain name and click the domain name you wish to edit.
Click Resource Records.

Adding DNS records
On the Resource Records page, click the + icon.
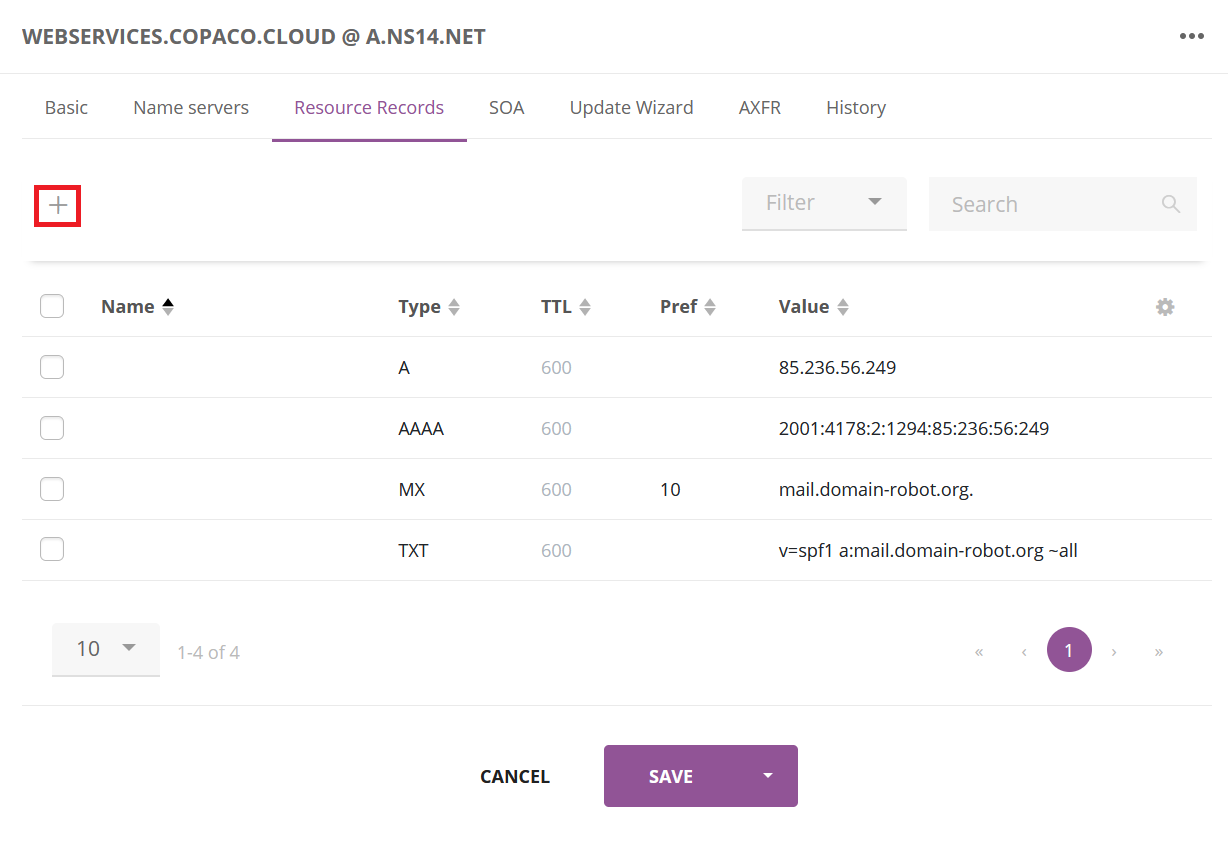
Fill in the fields and click Add.
Please note that the fields may be different for each record type.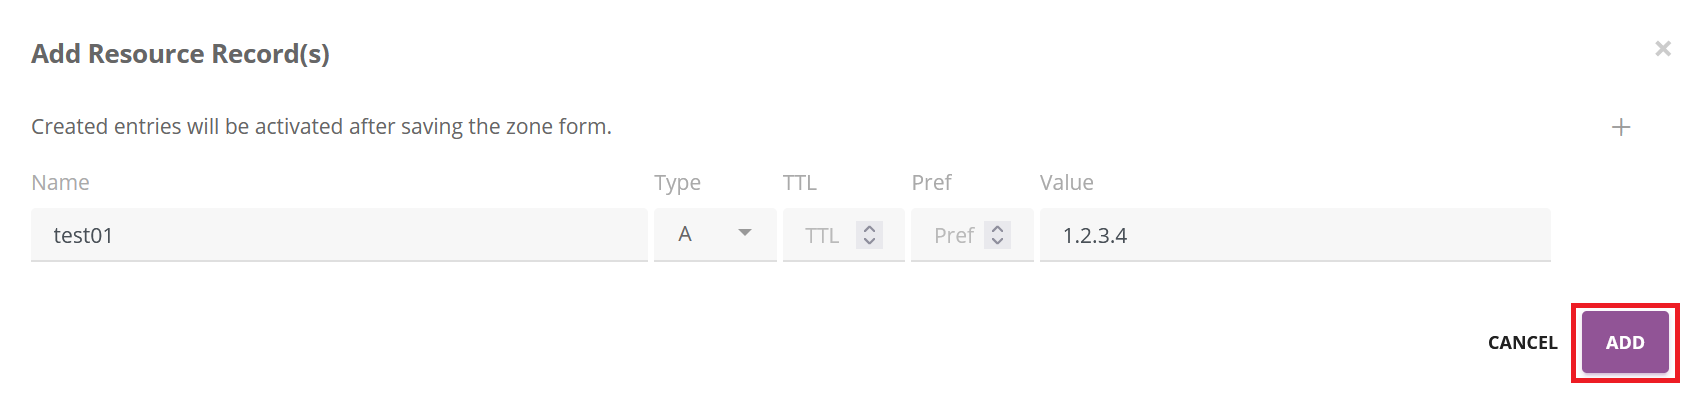
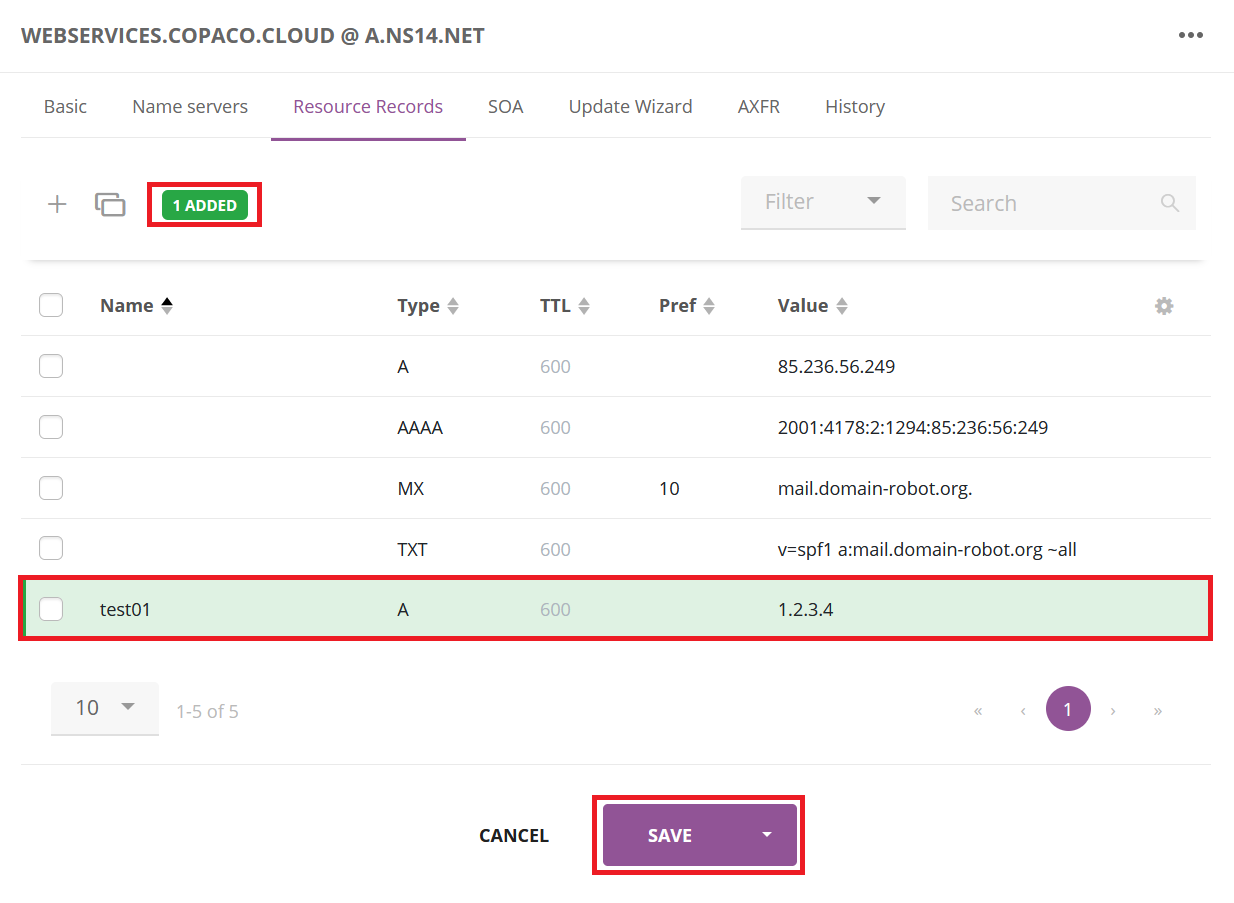
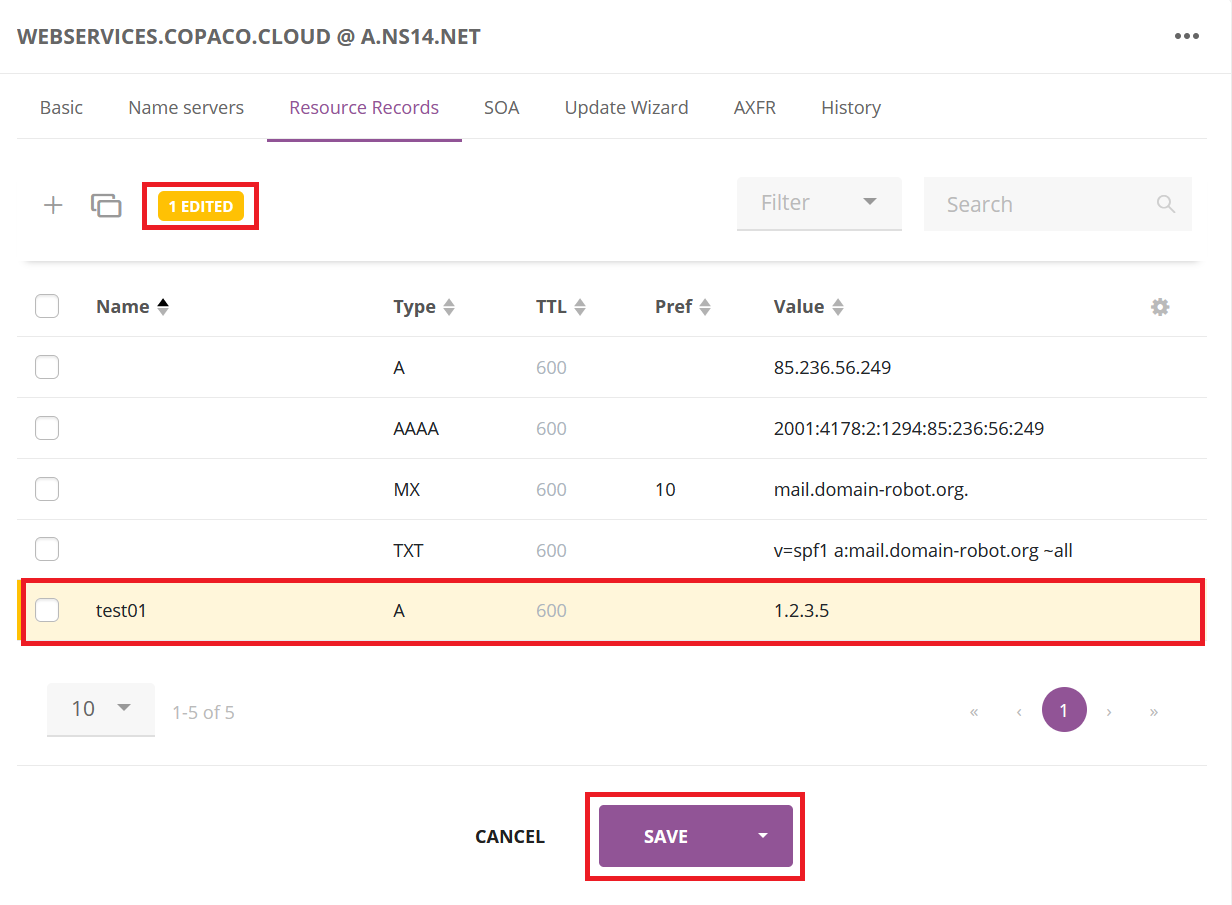
Review the added DNS record(s) and click Save.
Modifying DNS records
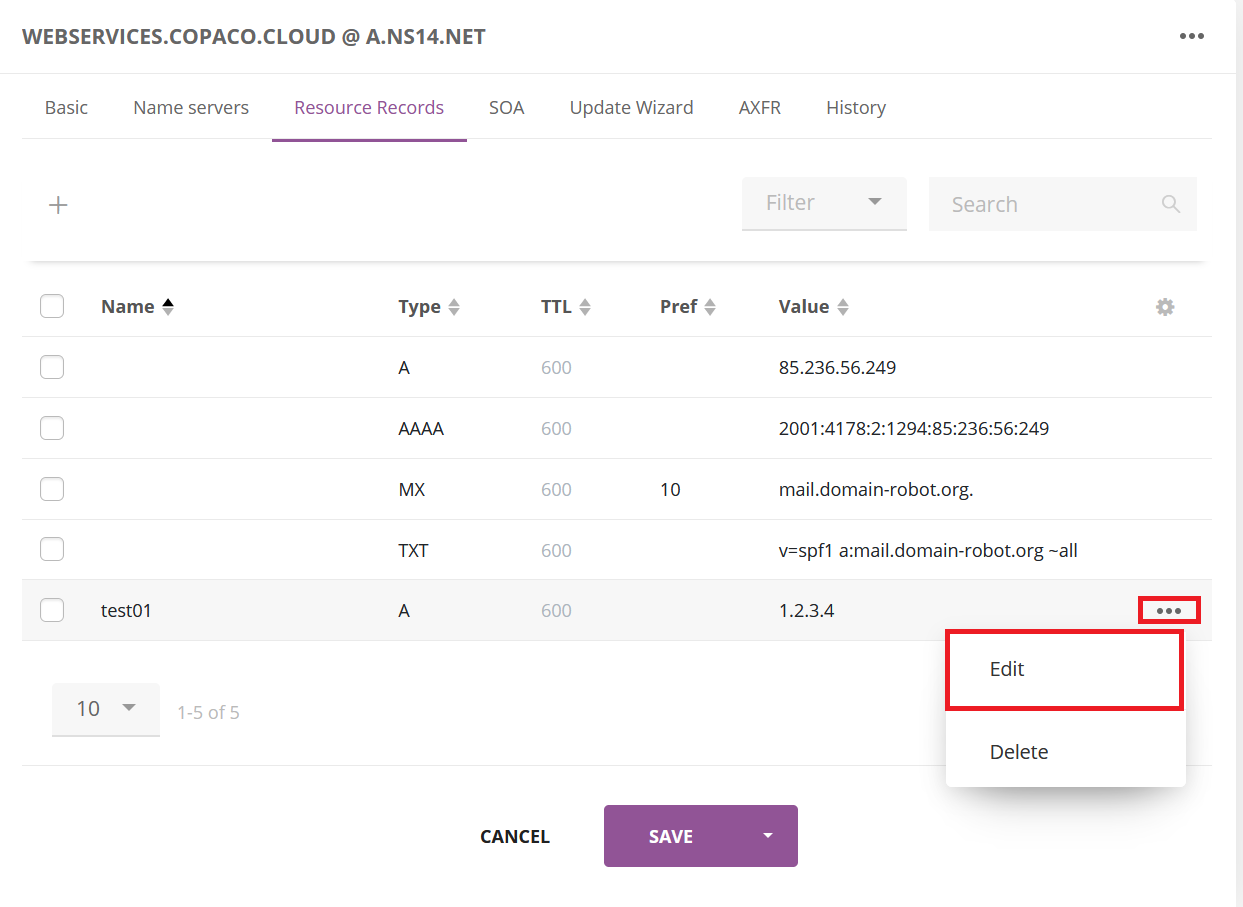
On the Resource Records page, click the 3 dots next to the domain and click Edit.
Adjust the record and click Save.
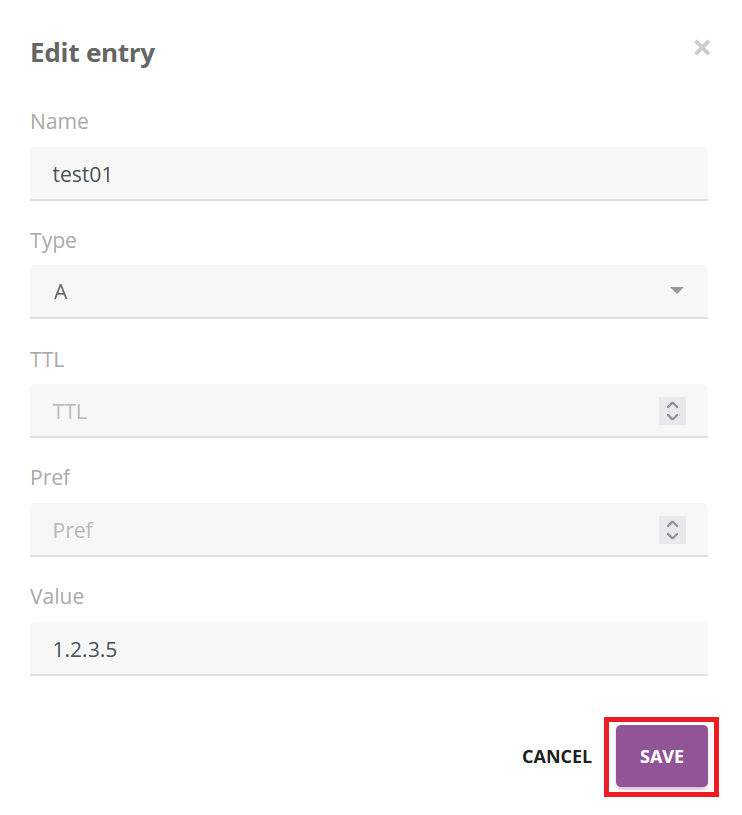
Review the edited DNS record(s) and click Save.
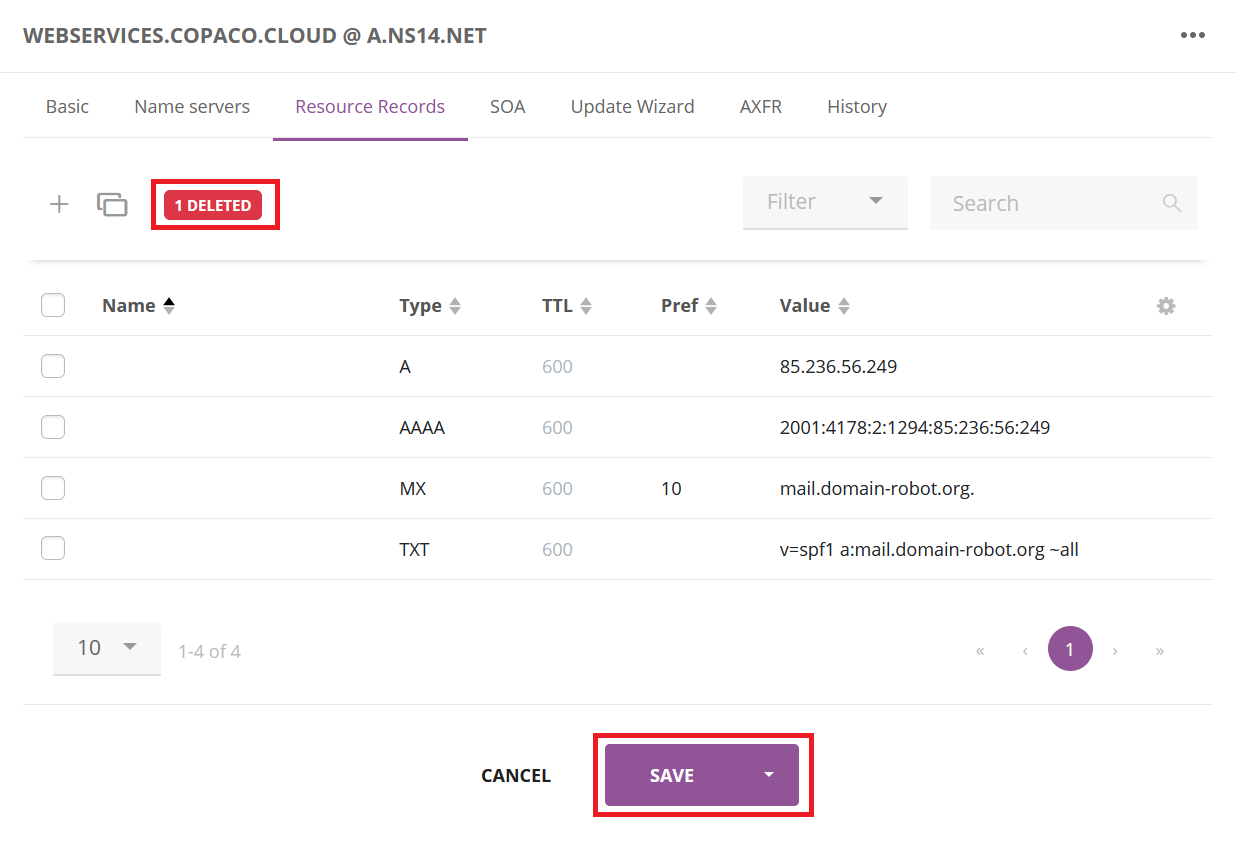
Deleting DNS records
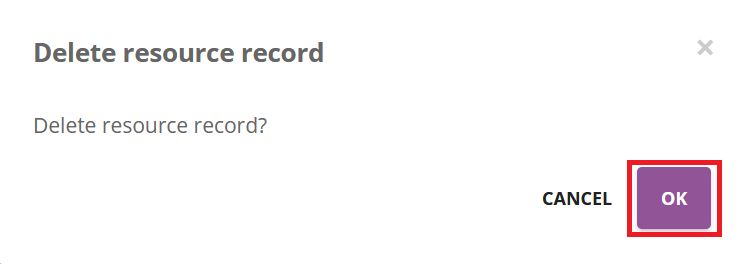
On the Resource Records page, click the 3 dots next to the domain and click Delete.

Confirm the deletion by clicking OK.
Click Save.