How to disable the auto renewal for a Microsoft 365 subscription
Summary
In case you want to cancel a Microsoft 365 subscription on renewal date, you can turn off the auto renewal. This article describes how you can do this.
Prerequisites
An account on your Copaco Cloud Portal;
An active Microsoft 365 subscription.
Getting Started
Login to your Copaco Cloud Portal.
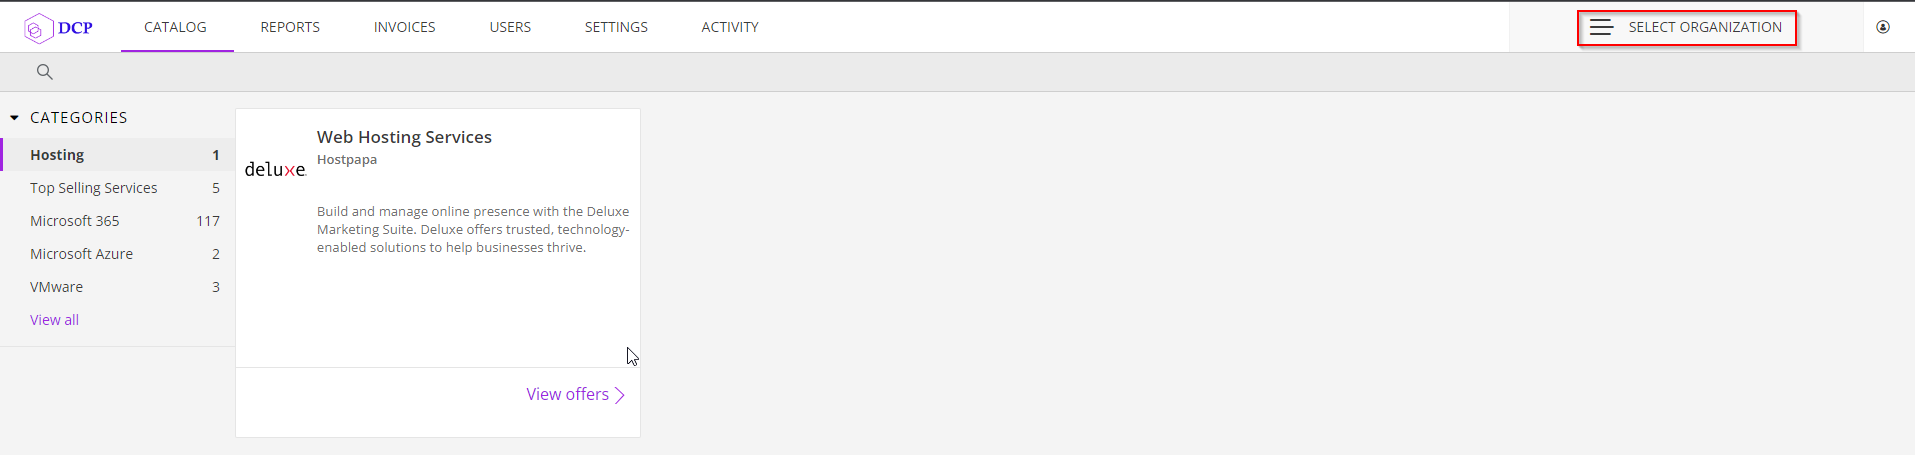
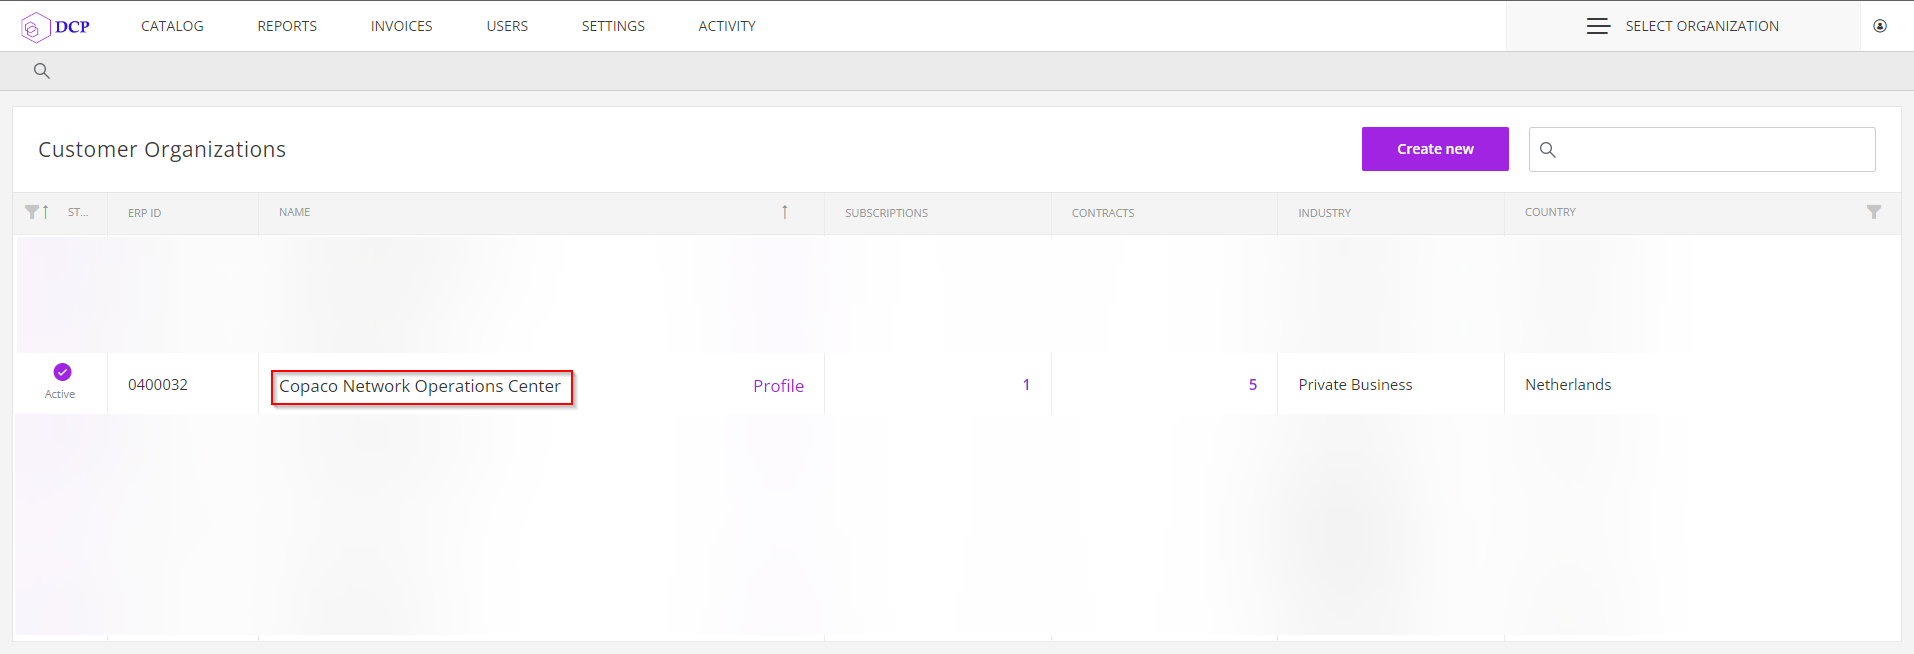
Click SELECT ORGANIZATION in the top right of your screen and click the name of the customer.

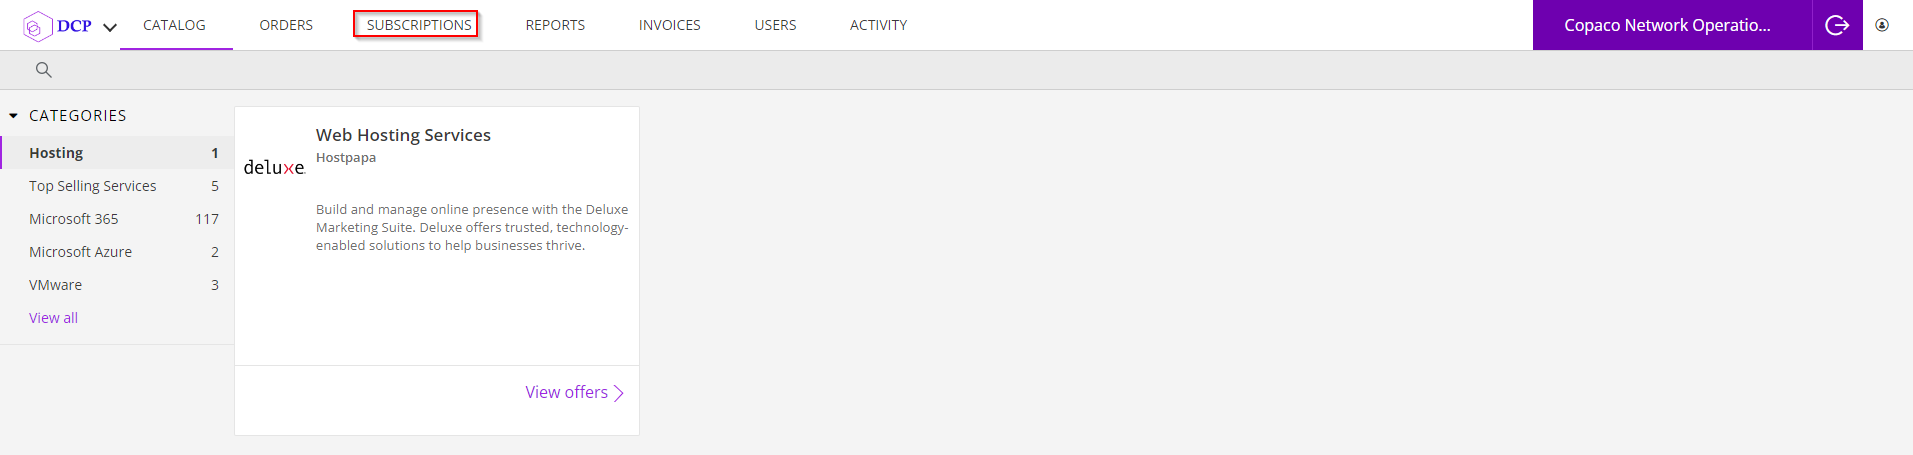
Under SUBSCRIPTIONS, click the subscription you wish to disable the auto renewal for.
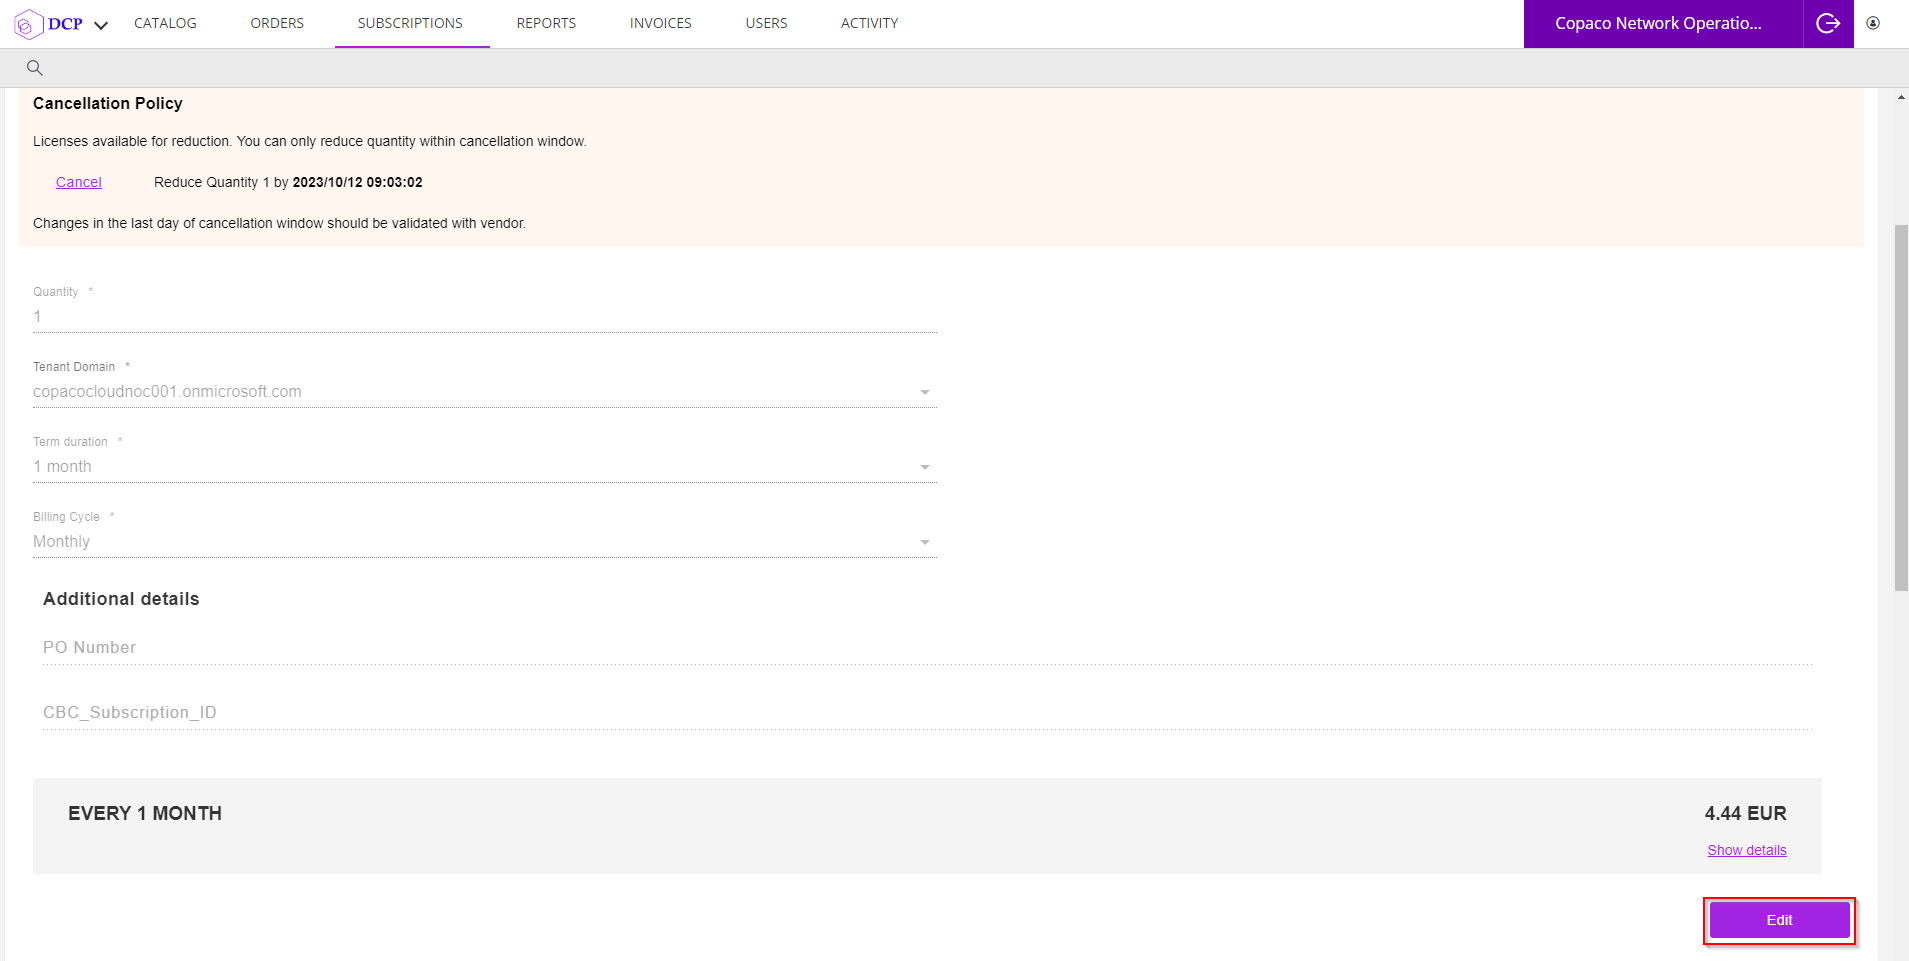
Scroll down to the bottom of the page and click Edit.

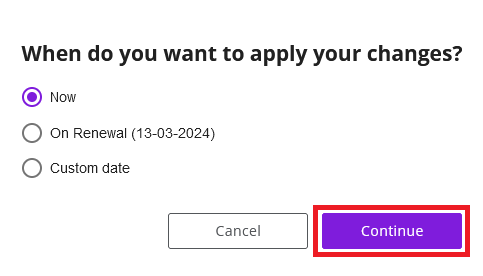
Click Continue to make apply the changes now.
Uncheck the Renews On checkbox.

(Optional) Enter additional details.

Click Save.

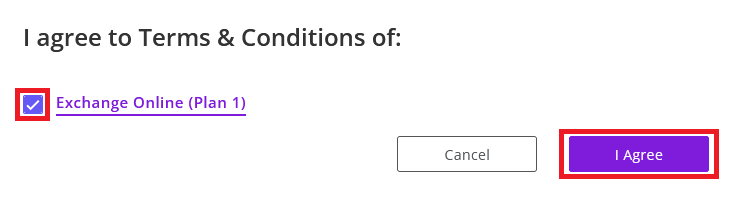
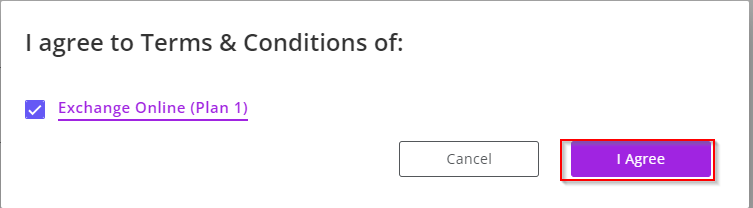
Agree to the Terms & Conditions by checking the checkbox and clicking I Agree.
Your order has been placed.

When logged in to our Copaco Cloud Portal click on “Select Organisation” in right top corner
Click on the customer name for which you want to place the upsize order
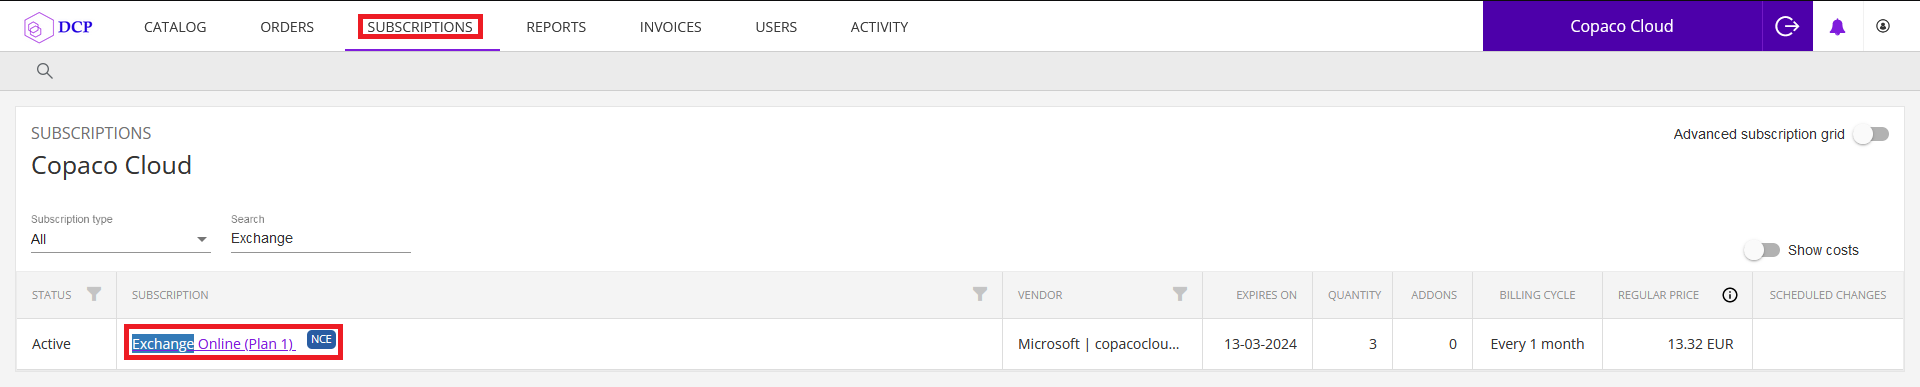
In the top menu select “subscriptions”
Click on the subscription for which you want to place an upsize order. In this example we are going to upsize the “Exchange Online (plan 1)” subscription by adding 1 additional license. Click on the subscription name.

Click on “Edit”
Now you can choose when you want to make the change. In this example we are going to choose for “now” Select “Now” and click “Continue”.
Note: you can also schedule the order by chosing “custom date” since “on renewal” is not allowed by Microsoft.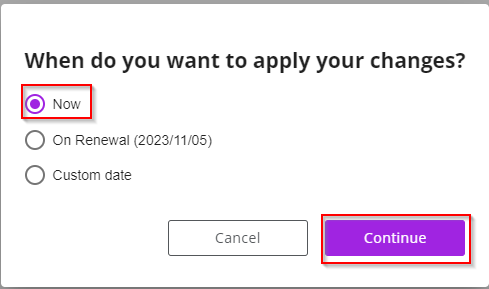
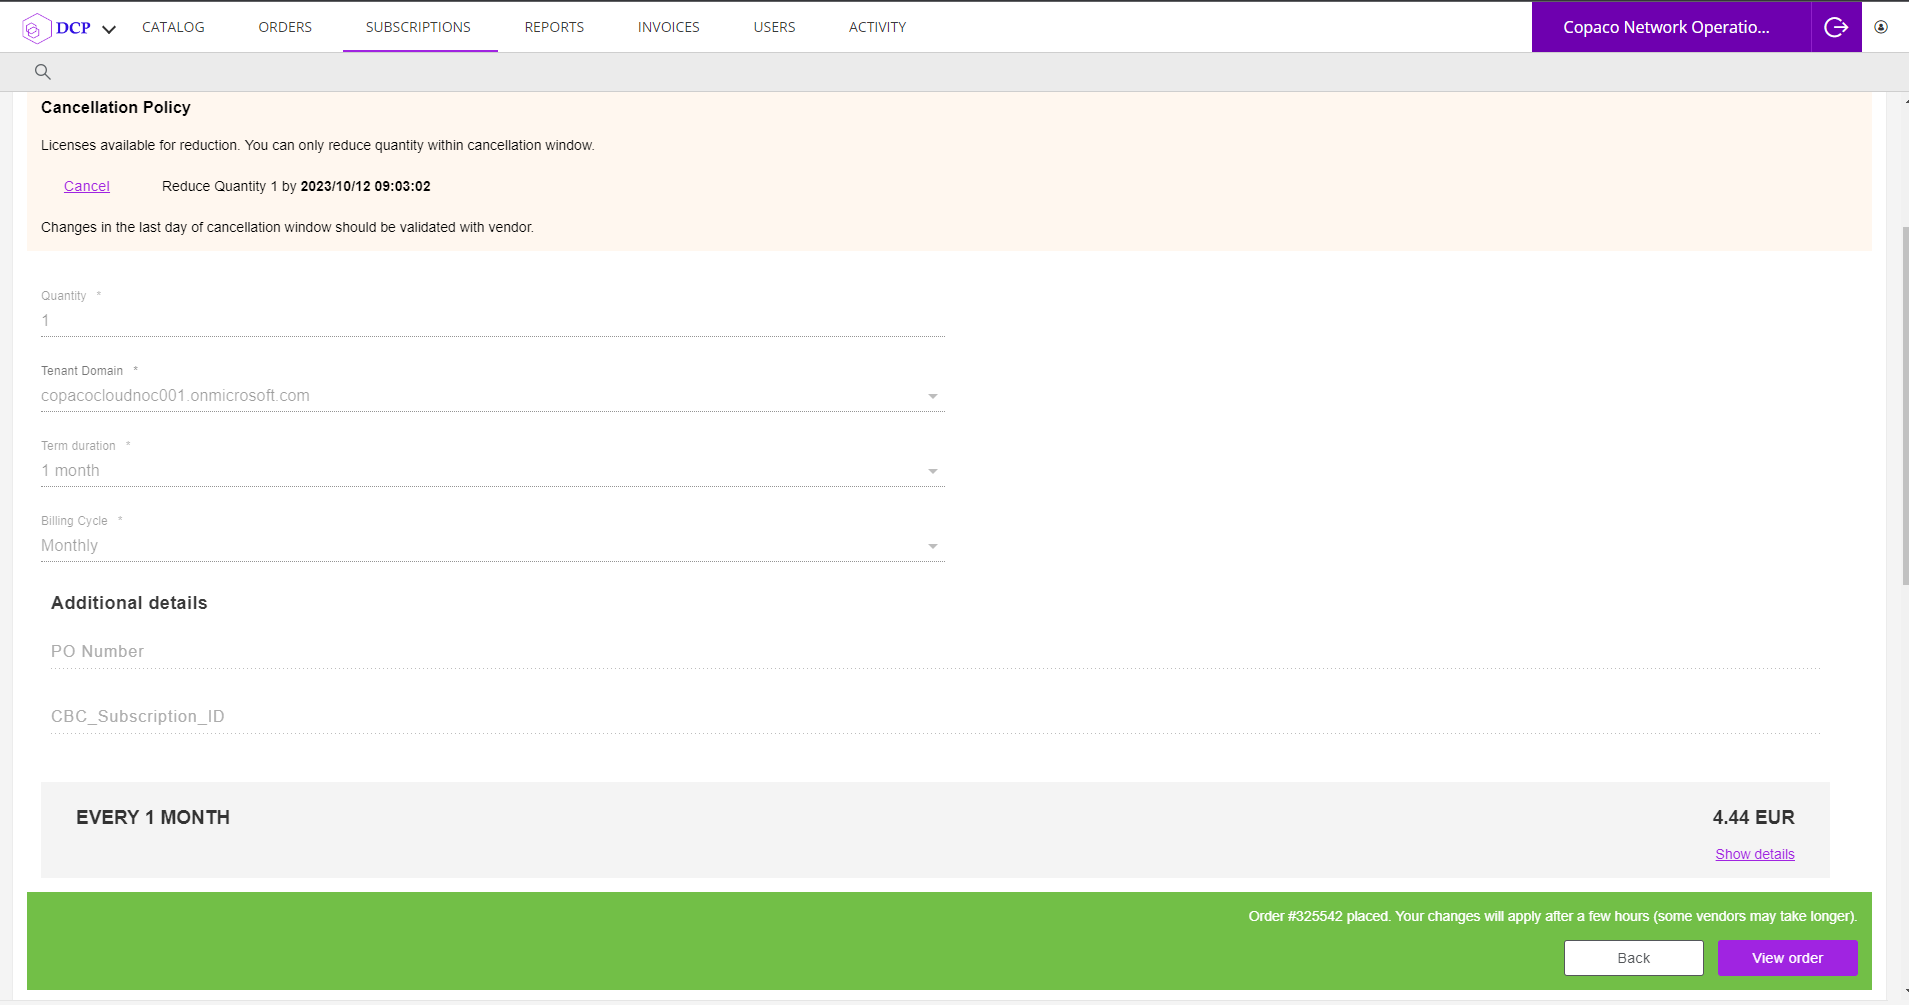
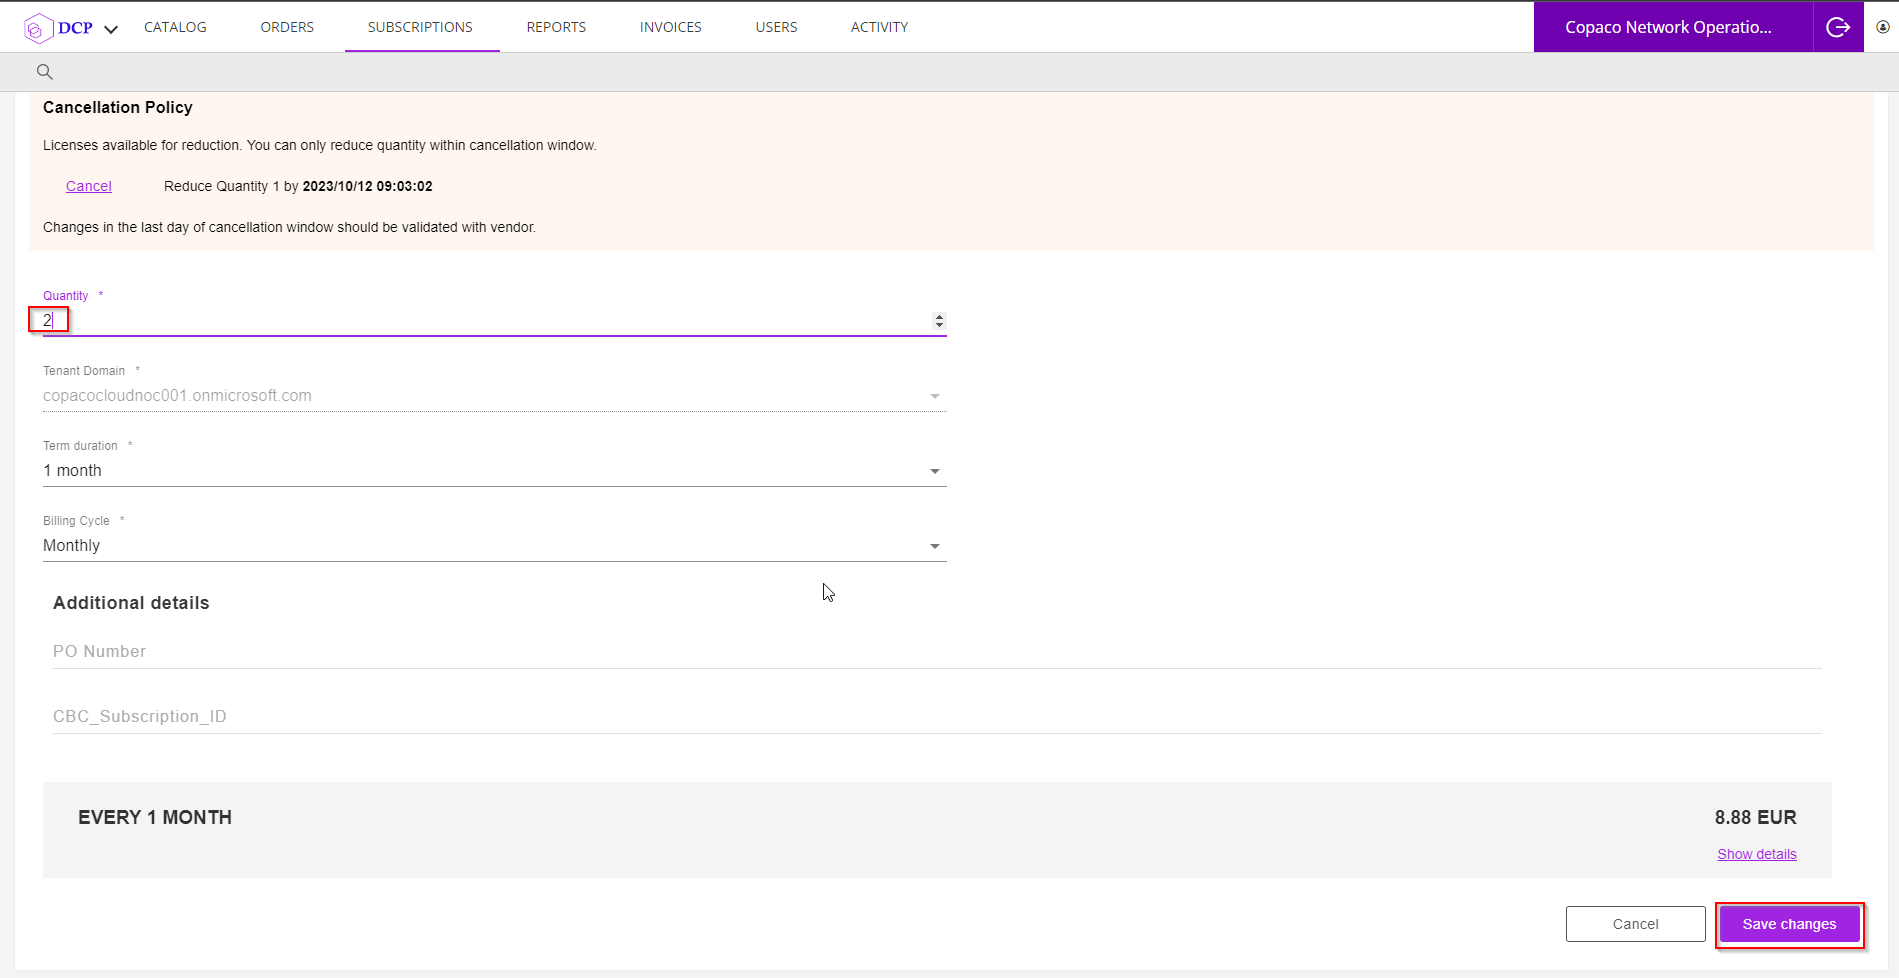
Now we are going to change the “Quantity” from 1 to 2 and click “Save Changes”
On the “confirmation” page click “Confirm”

Accept the “Terms & Conditions” and click “I Agree”
Your upgrade order has now been placed. You can view your order or continue shopping.