
How to order InterNetX AutoDNS
Summary
One of the products you can purchase is InterNetX. InterNetX allows you to create, transfer and manage domain names. This article will describe how you can order InterNetX AutoDNS.
Prerequisites
An account on your Copaco Cloud Portal.
Getting Started
Login to your Copaco Cloud Portal.
Click SELECT ORGANIZATION in the top right of your screen and click the name of the customer.
Please note the customer needs the ‘Active’ status. Otherwise you won’t be able to purchase subscriptions.
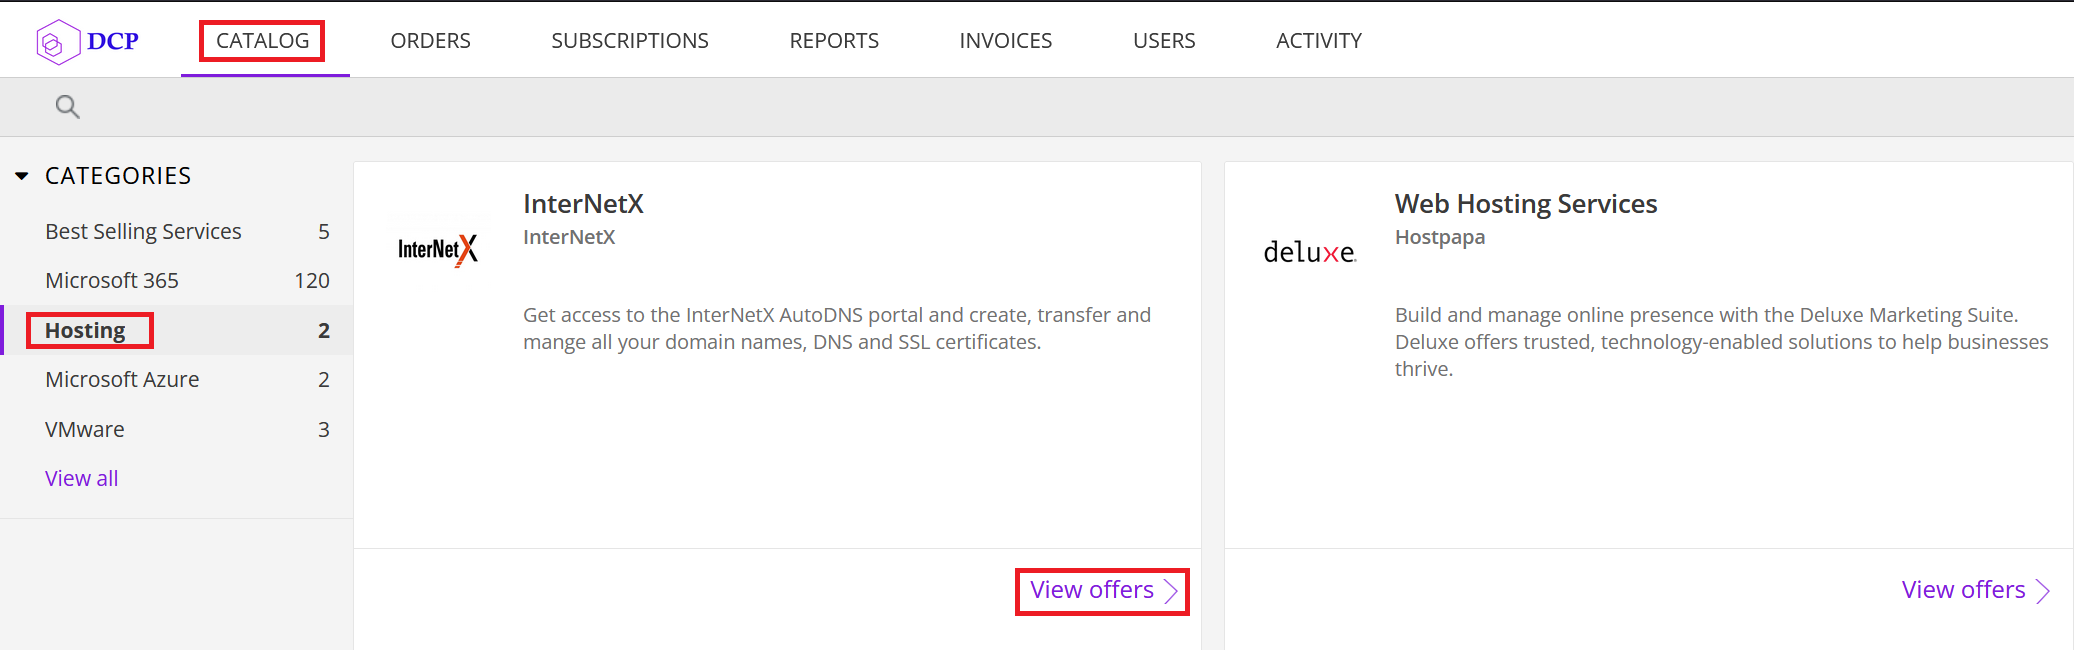
Under CATALOG, click Hosting and click View offers under InterNetX.
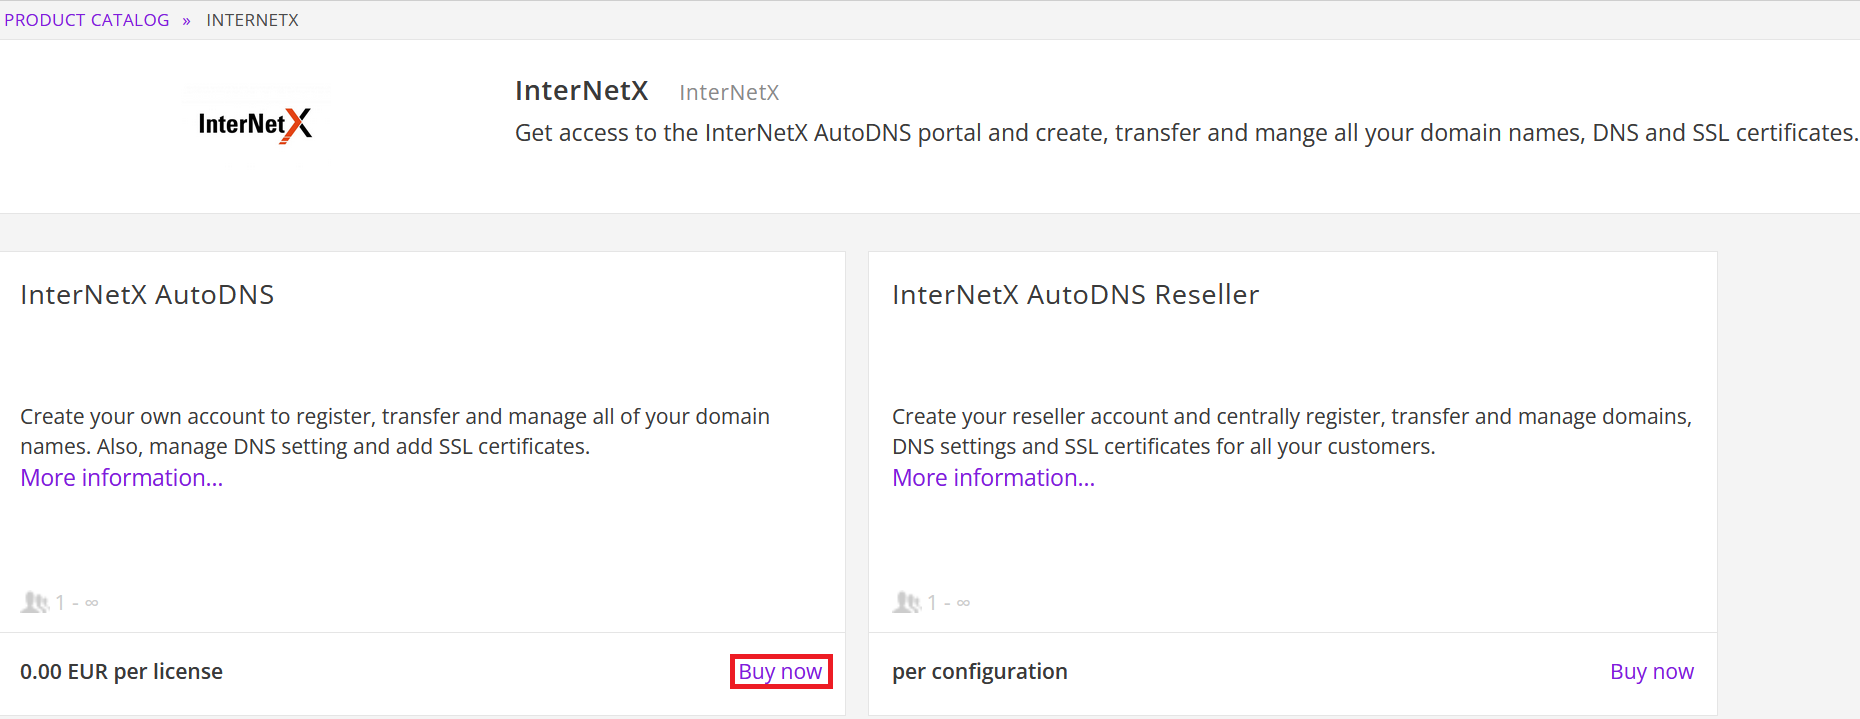
Click Buy now on the InterNetX AutoDNS option.
Fill in the fields.
(Optional) Check the Create Alias Username checkbox and choose your preferred username.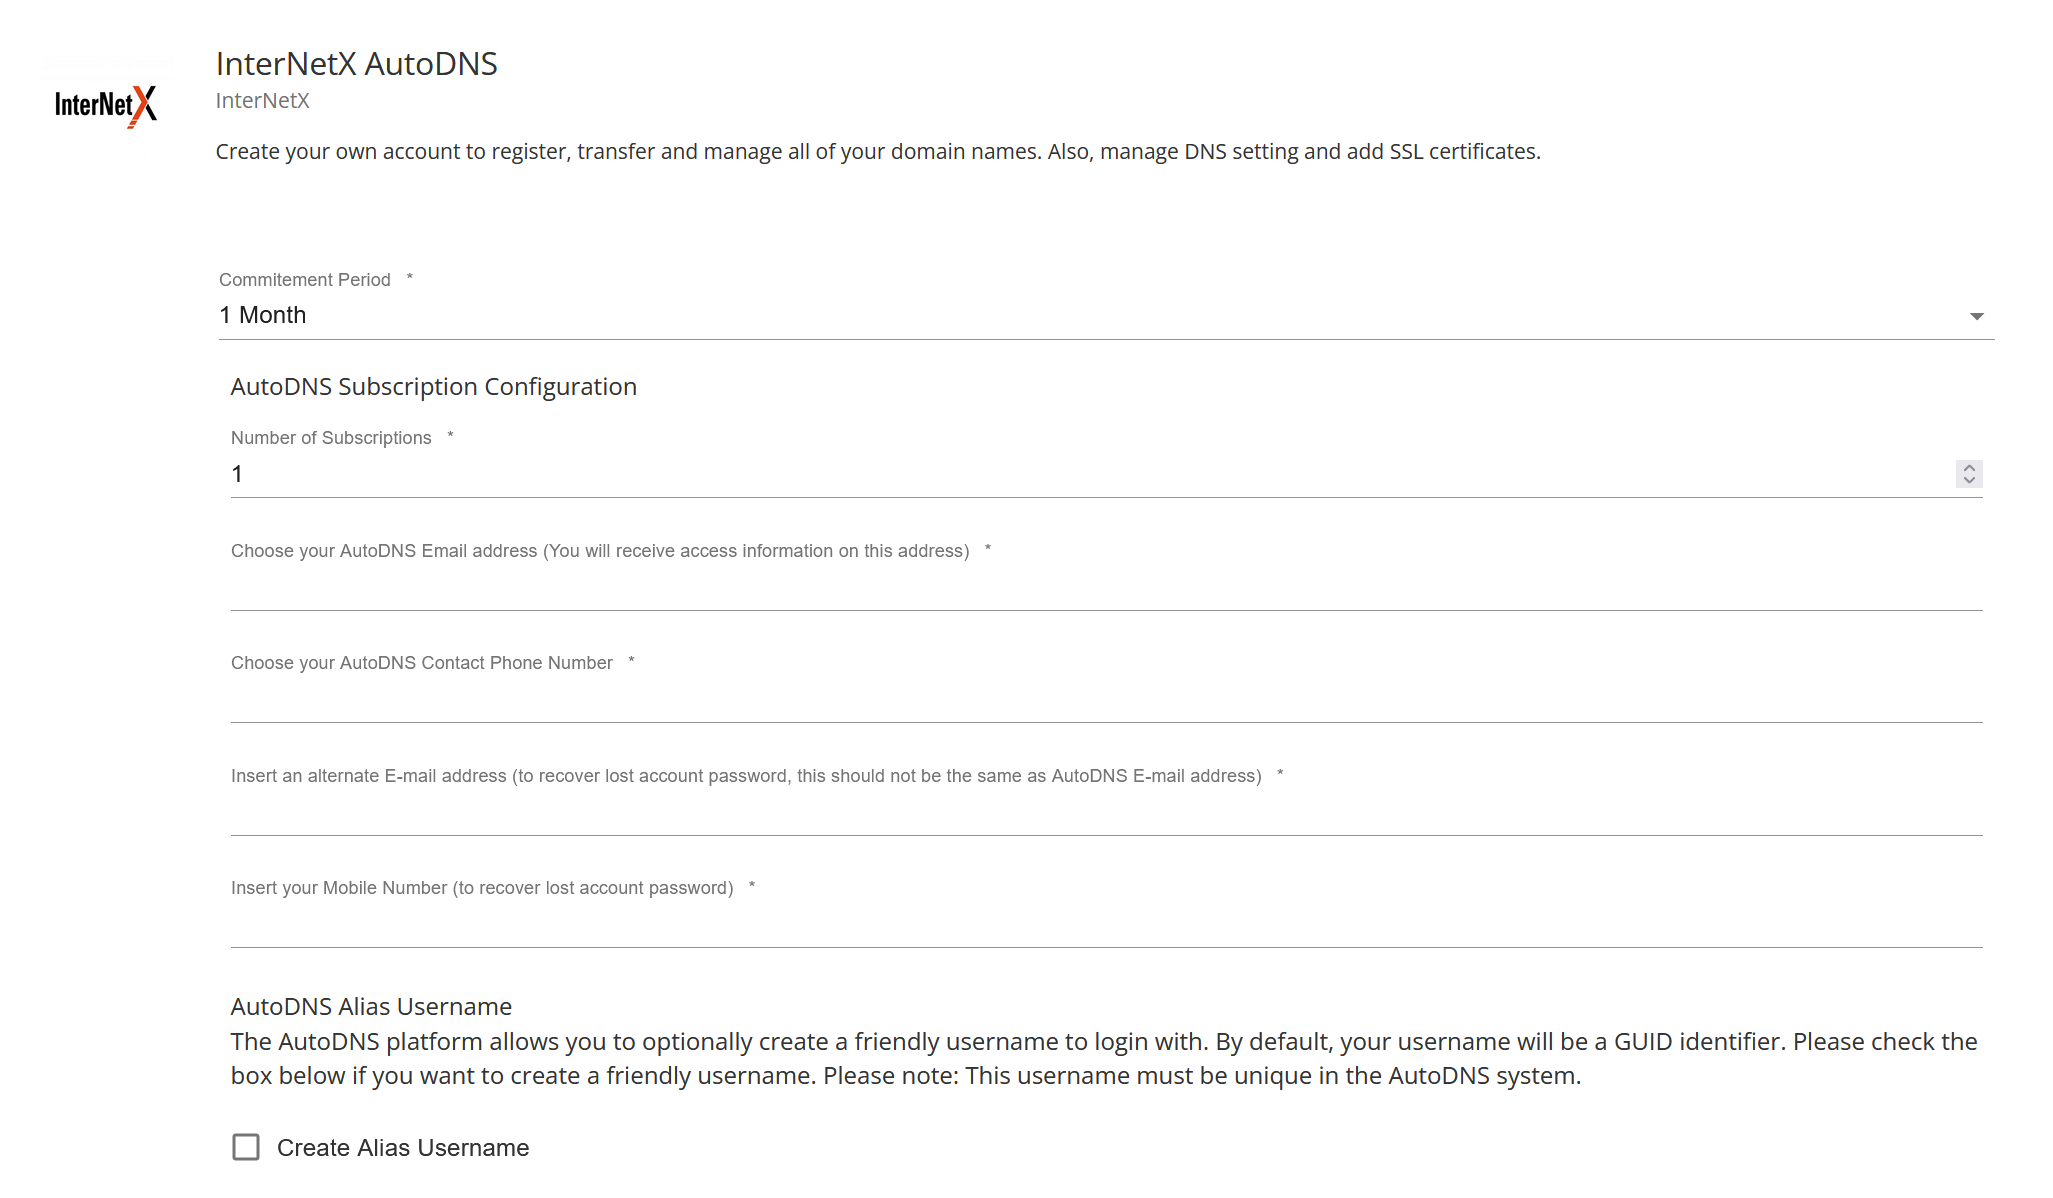
(Optional) Enter additional details.

Review the information and click Add to cart.

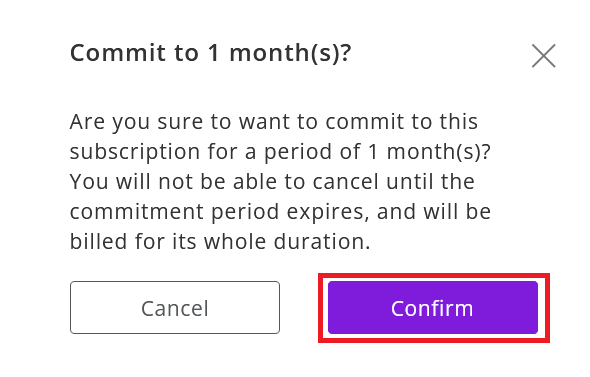
Click Confirm to confirm to the commitment period.
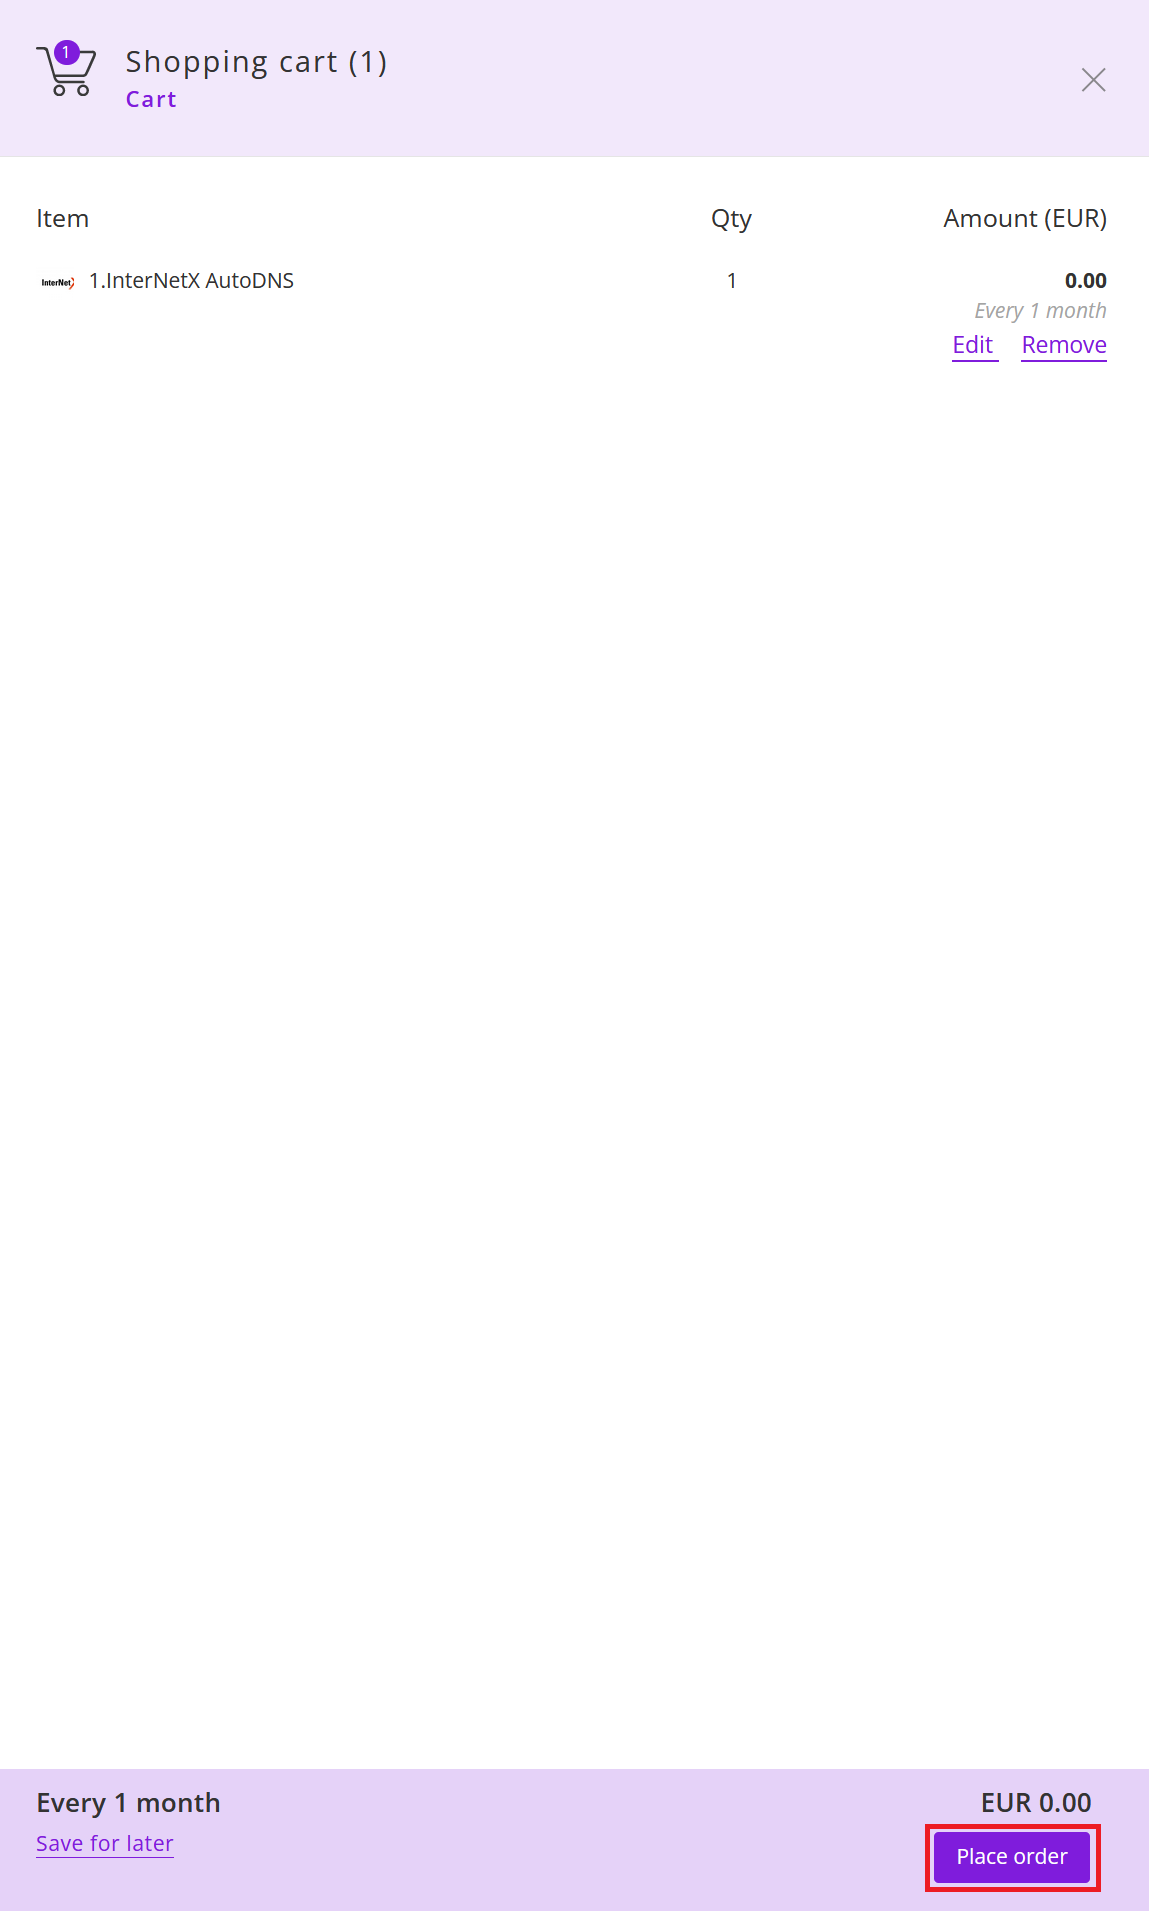
Finalize the order by clicking Place order in the shopping cart.
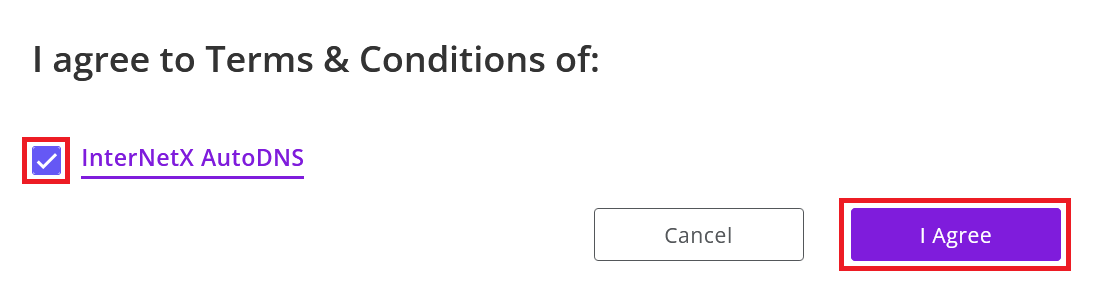
Agree to the Terms & Conditions of InterNetX AutoDNS by checking the checkbox and clicking I Agree.
Your order has been placed.
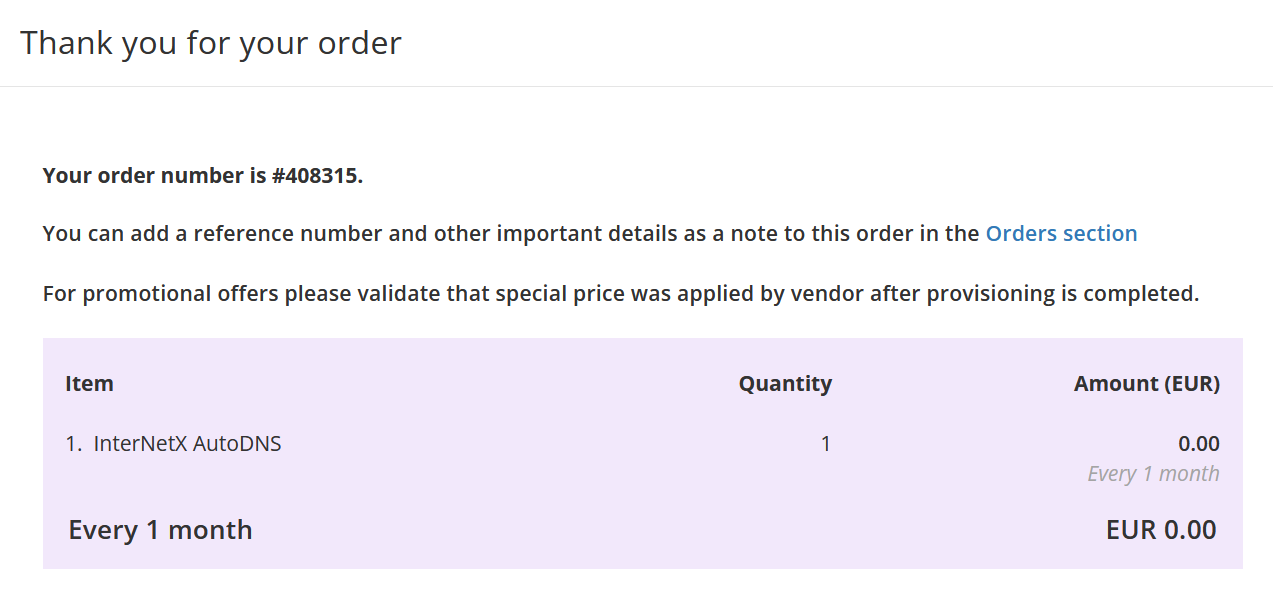
You will receive an e-mail with the login information.