How to restore a backup using Veeam on Copaco VMware Cloud
Summary
After Veeam on Copaco VMware Cloud is purchased, Veeam backup jobs can be created within the Copaco VMware Cloud portal. This article will describe how you can restore a backup.
Prerequisites
An active Veeam on Copaco VMware Cloud subscription;
An account on Copaco VMware Cloud.
Getting Started
Login to the customer tenant environment from Copaco VMware Cloud.
Go to More and click Data Protection with Veeam.

In the VMs tab, click the line of the VM you wish to restore.
Note: Clicking the VM will only show you the backup history.
Choose one of the restore options.
Instant Recovery
Entire VM Restore
Restore vApp
Virtual Disks
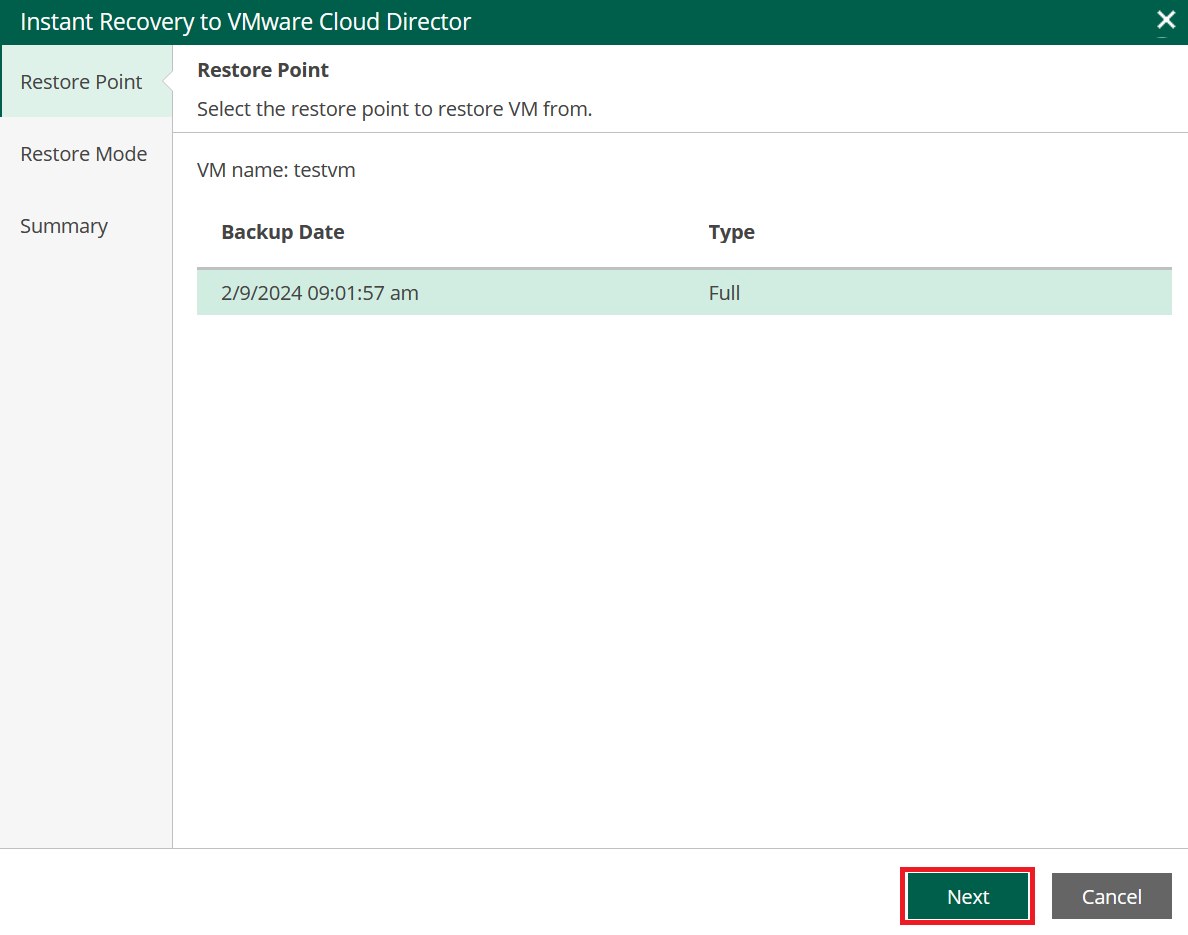
Instant Recovery
Click Instant Recovery.

Select the restore point you wish to restore the VM from and click Next.
Choose whether you want to restore the VM to the original location, or to a new location with different settings and click Next.
If you choose the Restore to a new location, or different settings option you will get a wizard to configure these settings.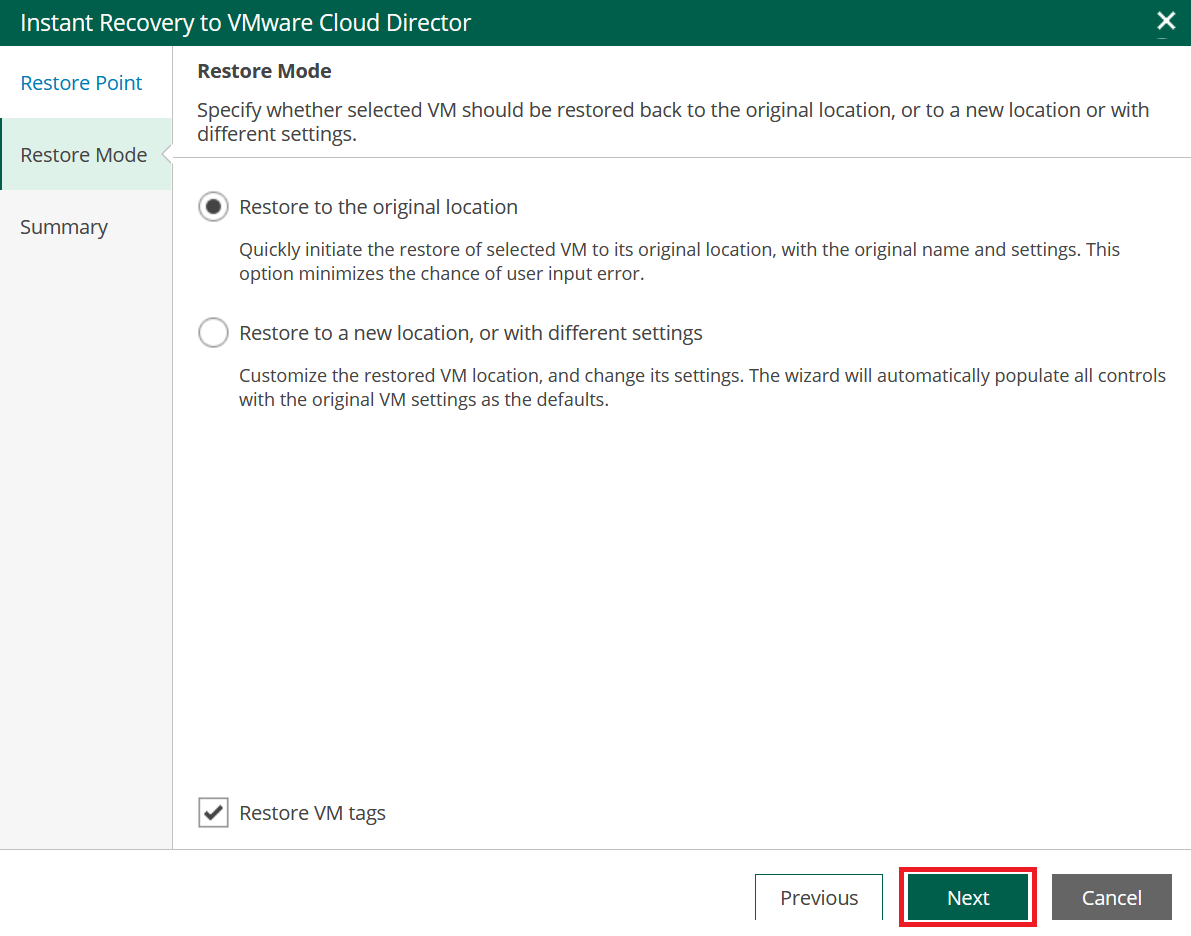
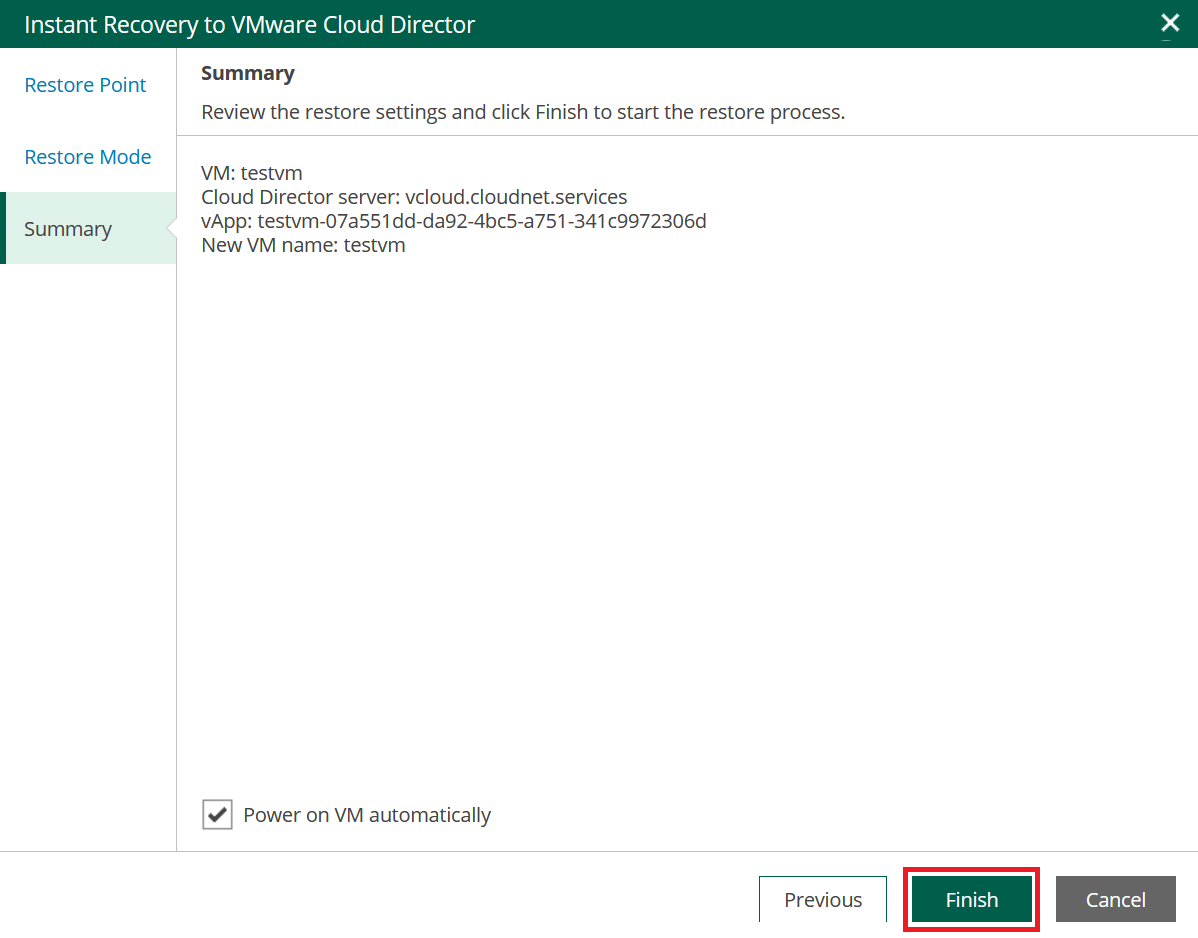
Review the restore settings and click Finish.
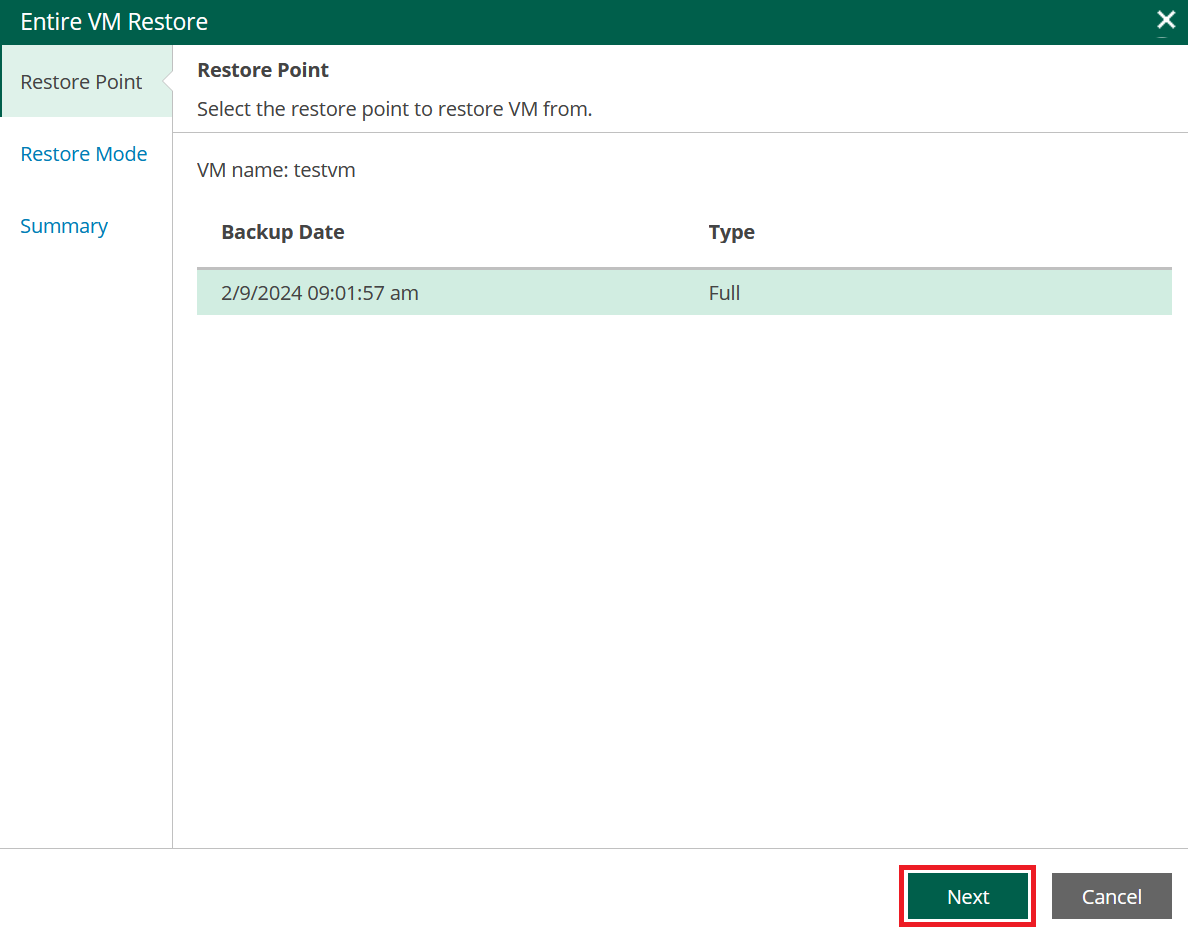
Entire VM Restore
Click Entire VM Restore.

Select the restore point you wish to restore the VM from and click Next.
Choose whether you want to restore the VM to the original location, or to a new location with different settings and click Next.
(Optional) Select the Quick rollback option to restore changed blocks only.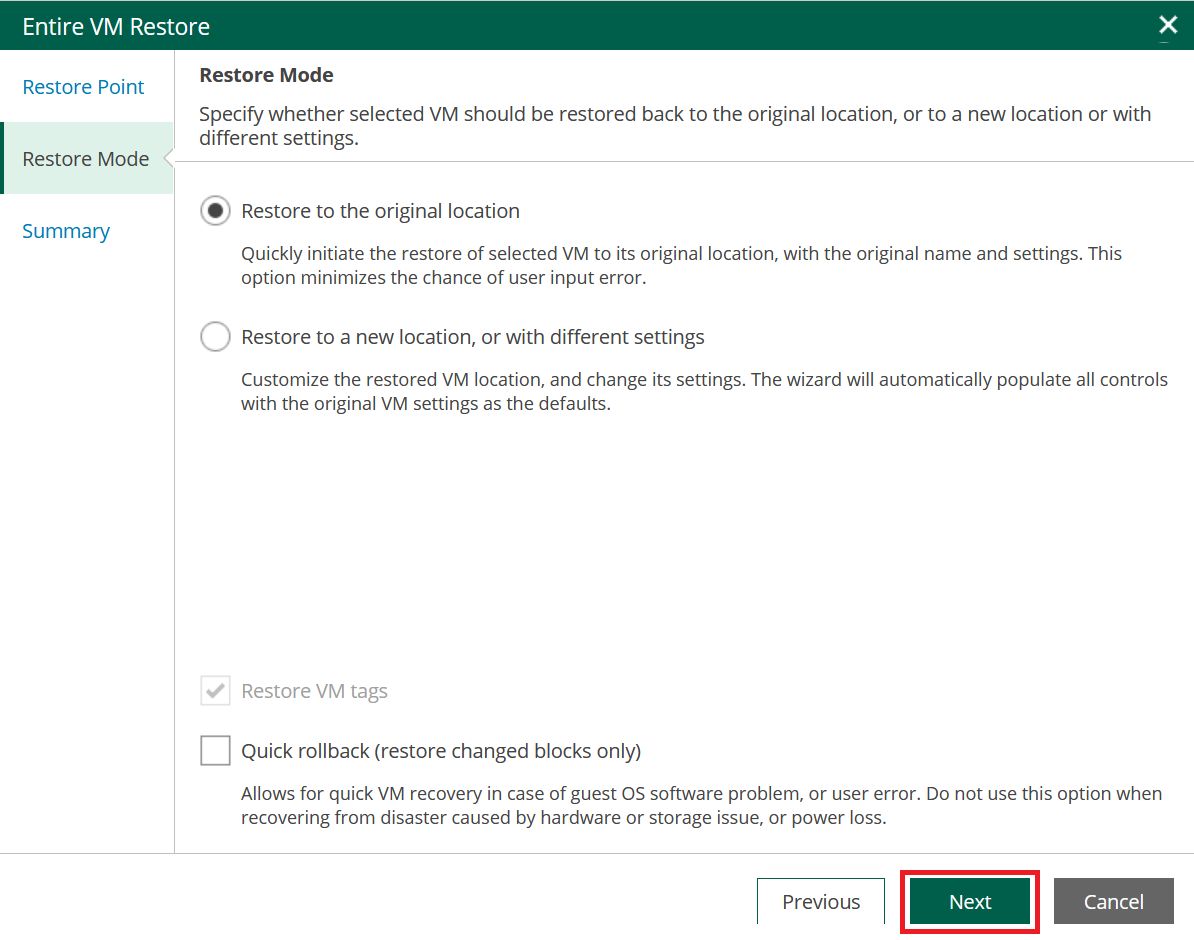
Review the restore settings and click Finish.

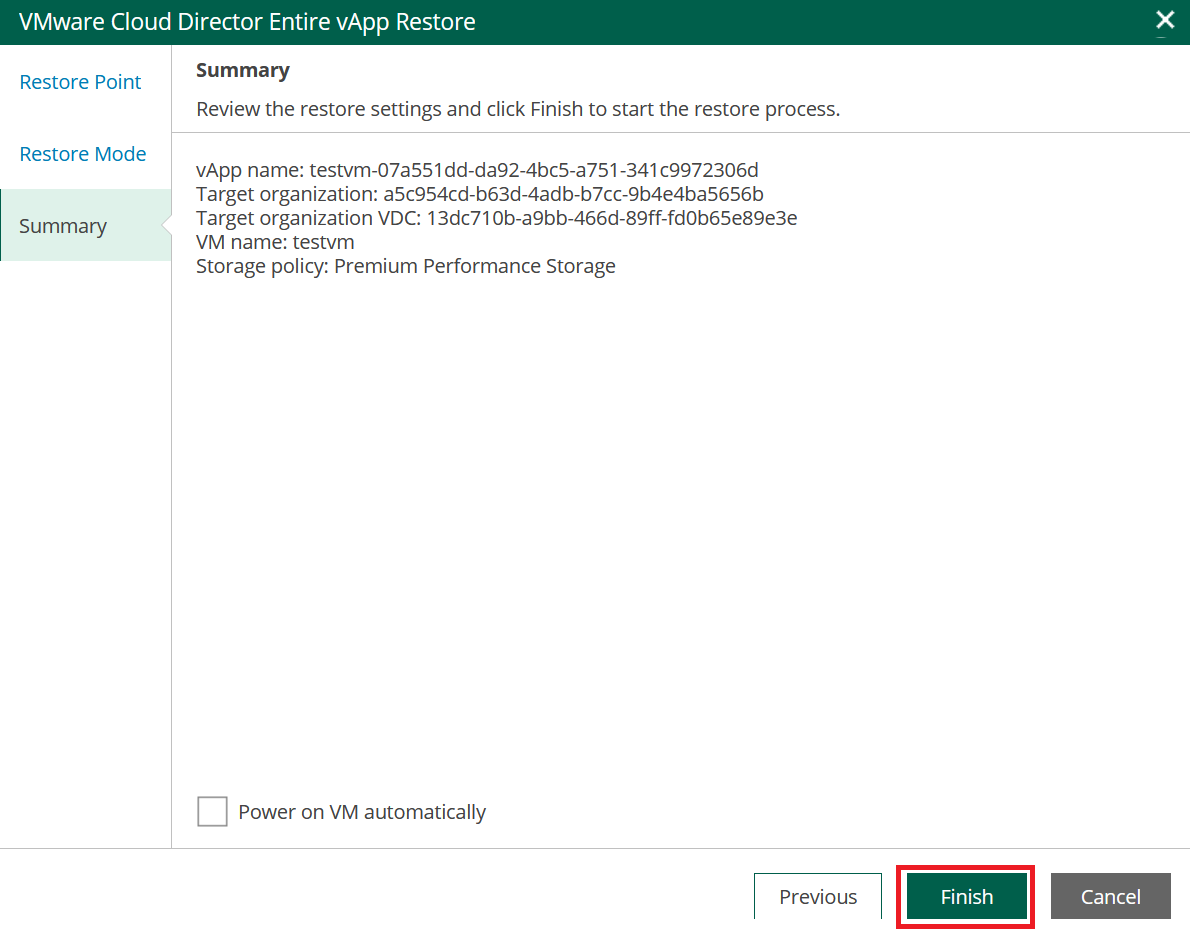
Restore vApp
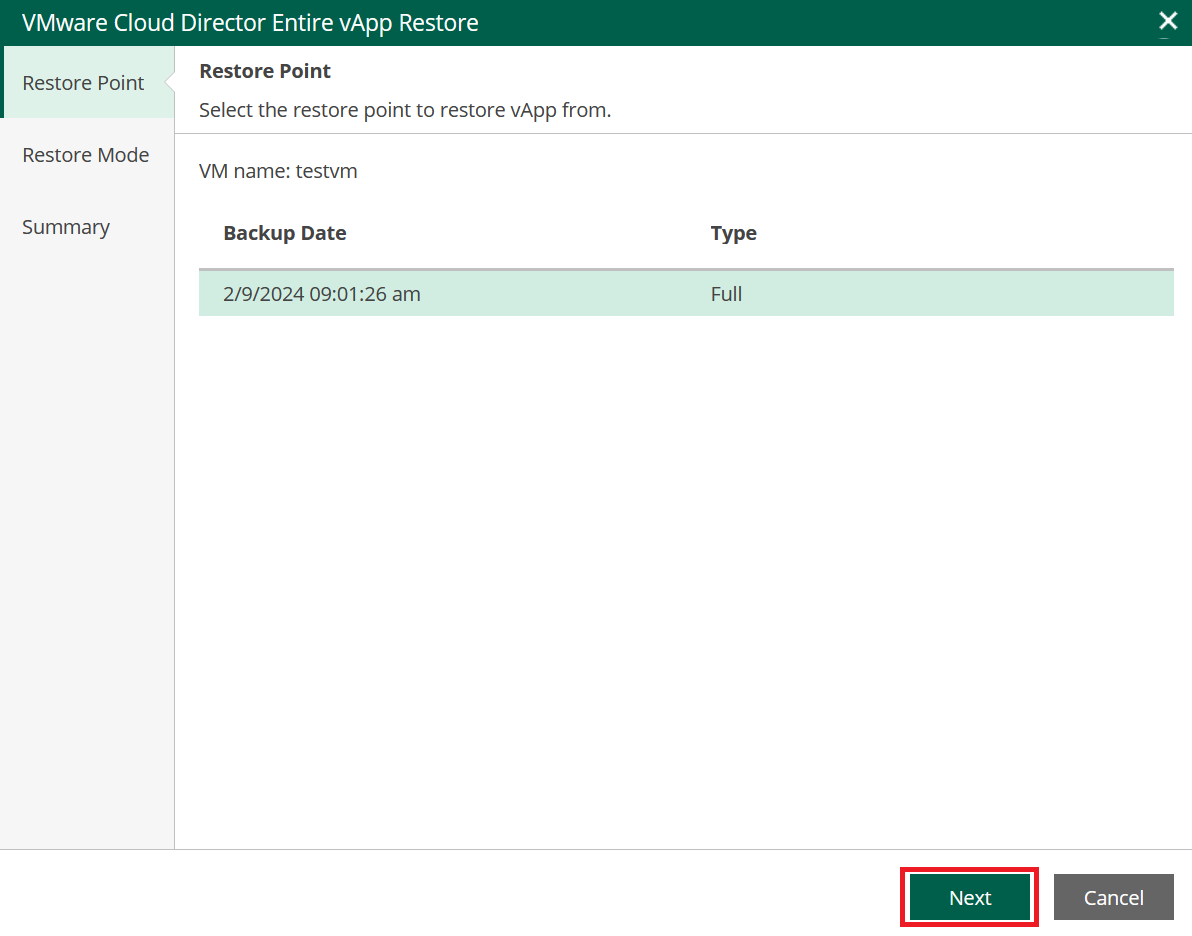
Click Restore vApp.

Select the restore point you wish to restore the vApp from and click Next.
Choose whether you want to restore the vApp to the original location, or to a new location with different settings and click Next.
(Optional) Select the Quick rollback option to restore changed blocks only.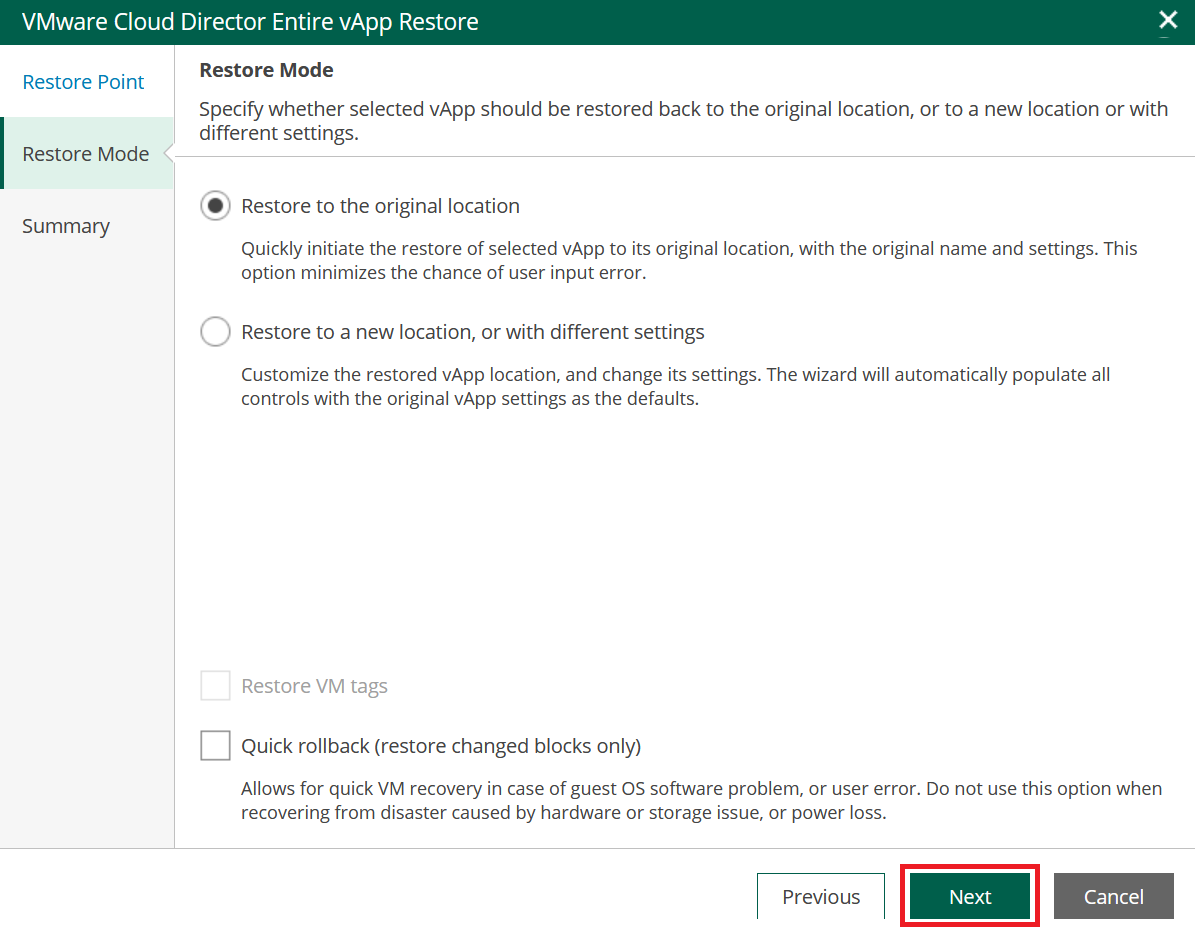
Review the restore settings and click Finish.
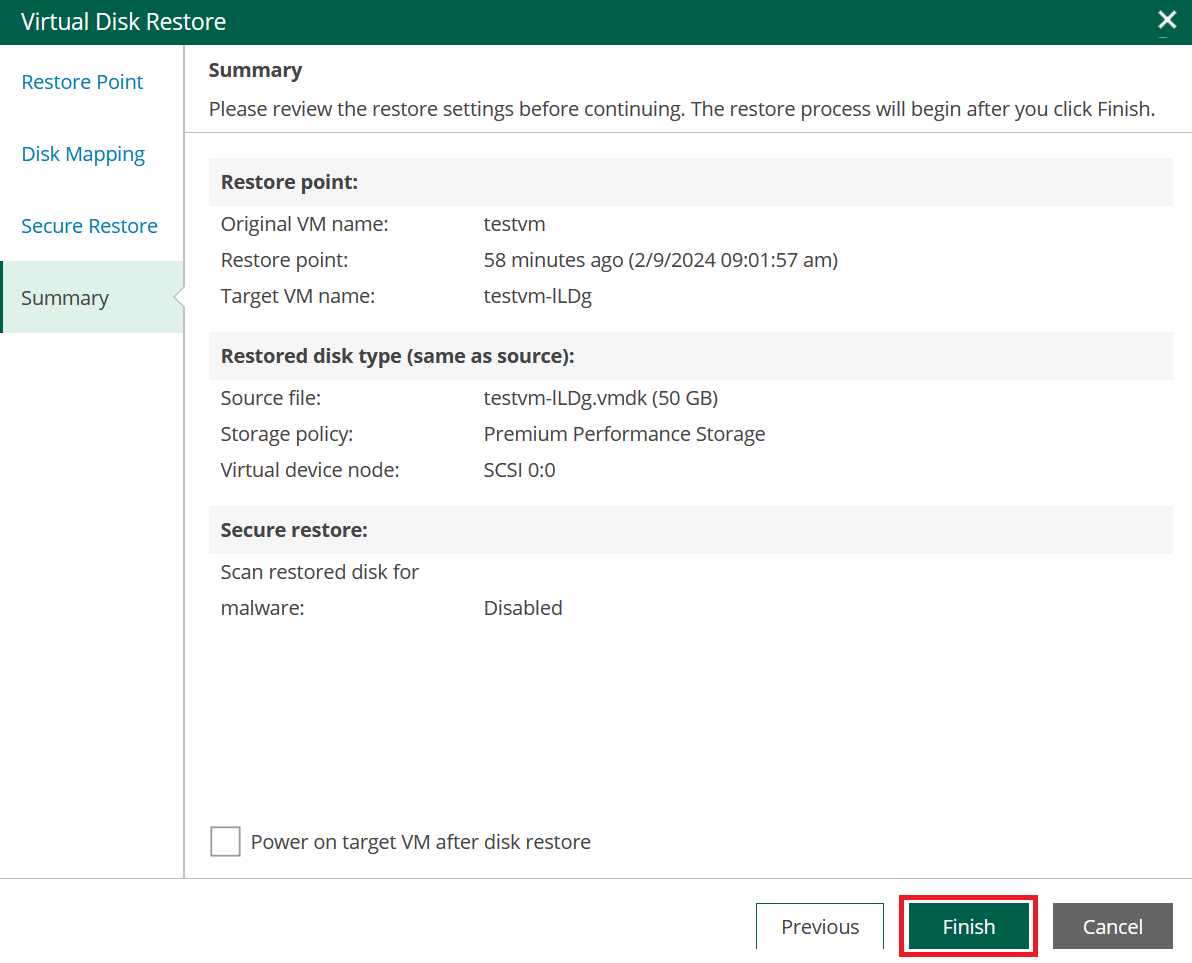
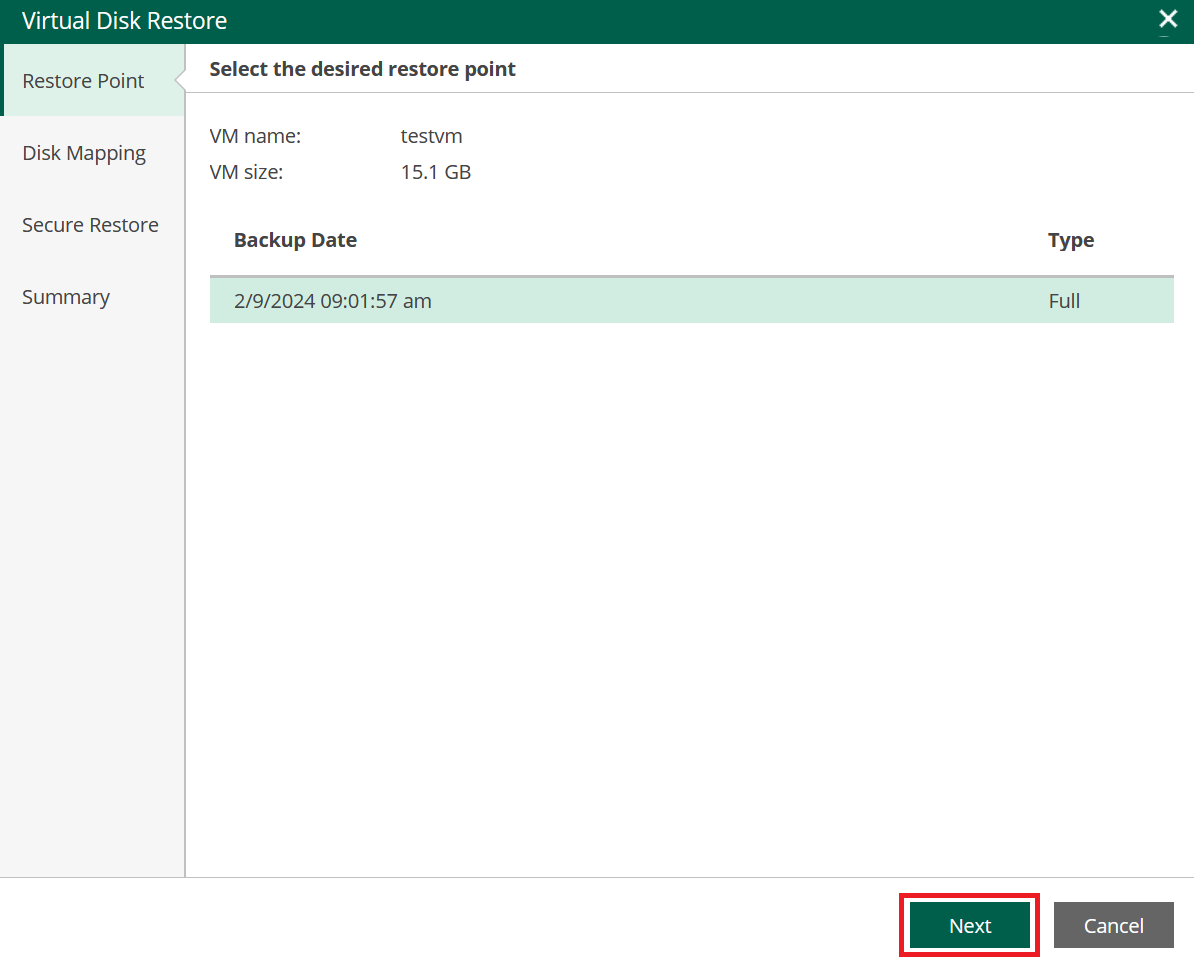
Virtual Disks
Click Virtual Disks.

Select the restore point and click Next.
Choose what disk you want to restore and click Next.
(Optional) Change the Restored disk type and if you would like to perform a Quick rollback.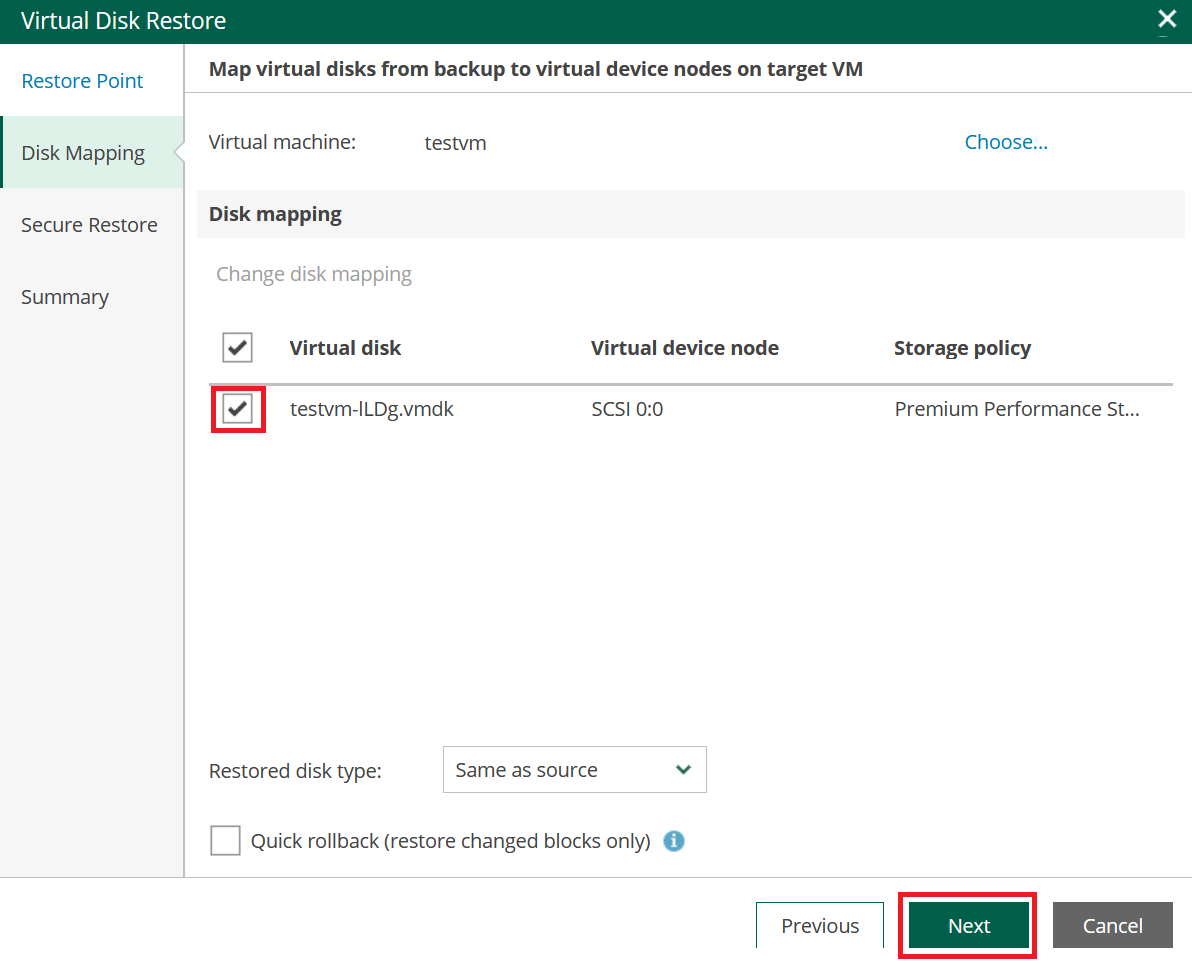
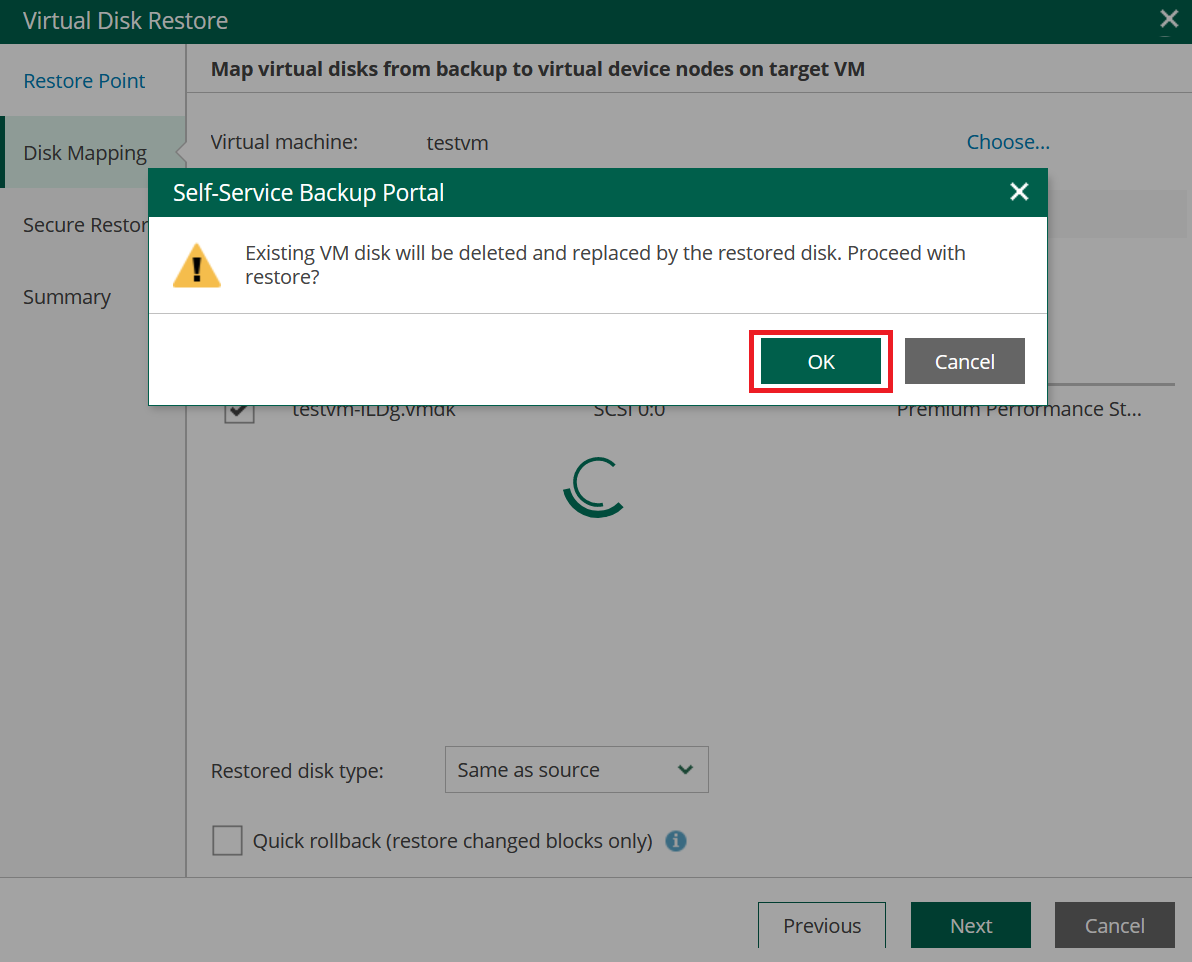
Confirm the message and click OK.
Choose whether you want to scan the selected backup for malware prior to restore and click Next.
Note: This option requires a compatible antivirus installed on the mount server.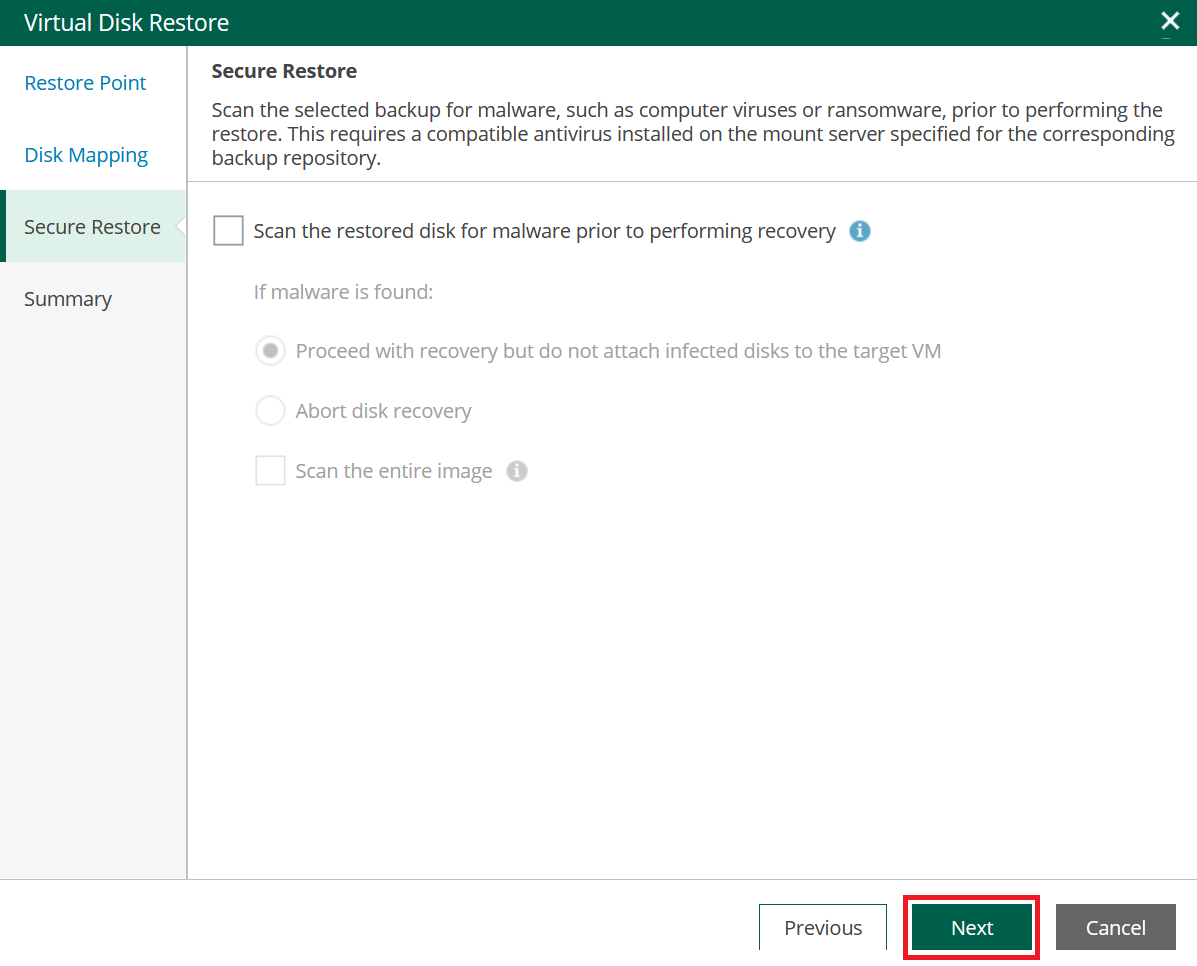
Review the restore settings and click Finish.