How to use your own SMTP relay server using Veeam backup for Microsoft 365
Summary
By default, our Veeam VBM portal uses the Copaco Cloud SMTP relay. This relay uses backup@cloudnet.services as from address and is inherited by ever reseller and underlying customers. This means that all email notifications (backup job changes, backup job results etc..) are sent via this email address.
In case you don’t want this, you can stop the inheritance and use your own mail relay. This will then be used for all mail notifications for all your customers. This article will describe how you can do this.
Prerequisites
A Microsoft 365 tenant;
A valid domain on this Microsoft tenant.
Getting Started
This article is divided in three parts. You can use the “on this page” section to quickly skip to another section.
Creating the Exchange connector
Login to your own Microsoft tenant via: https://portal.office.com using your reseller credentials.
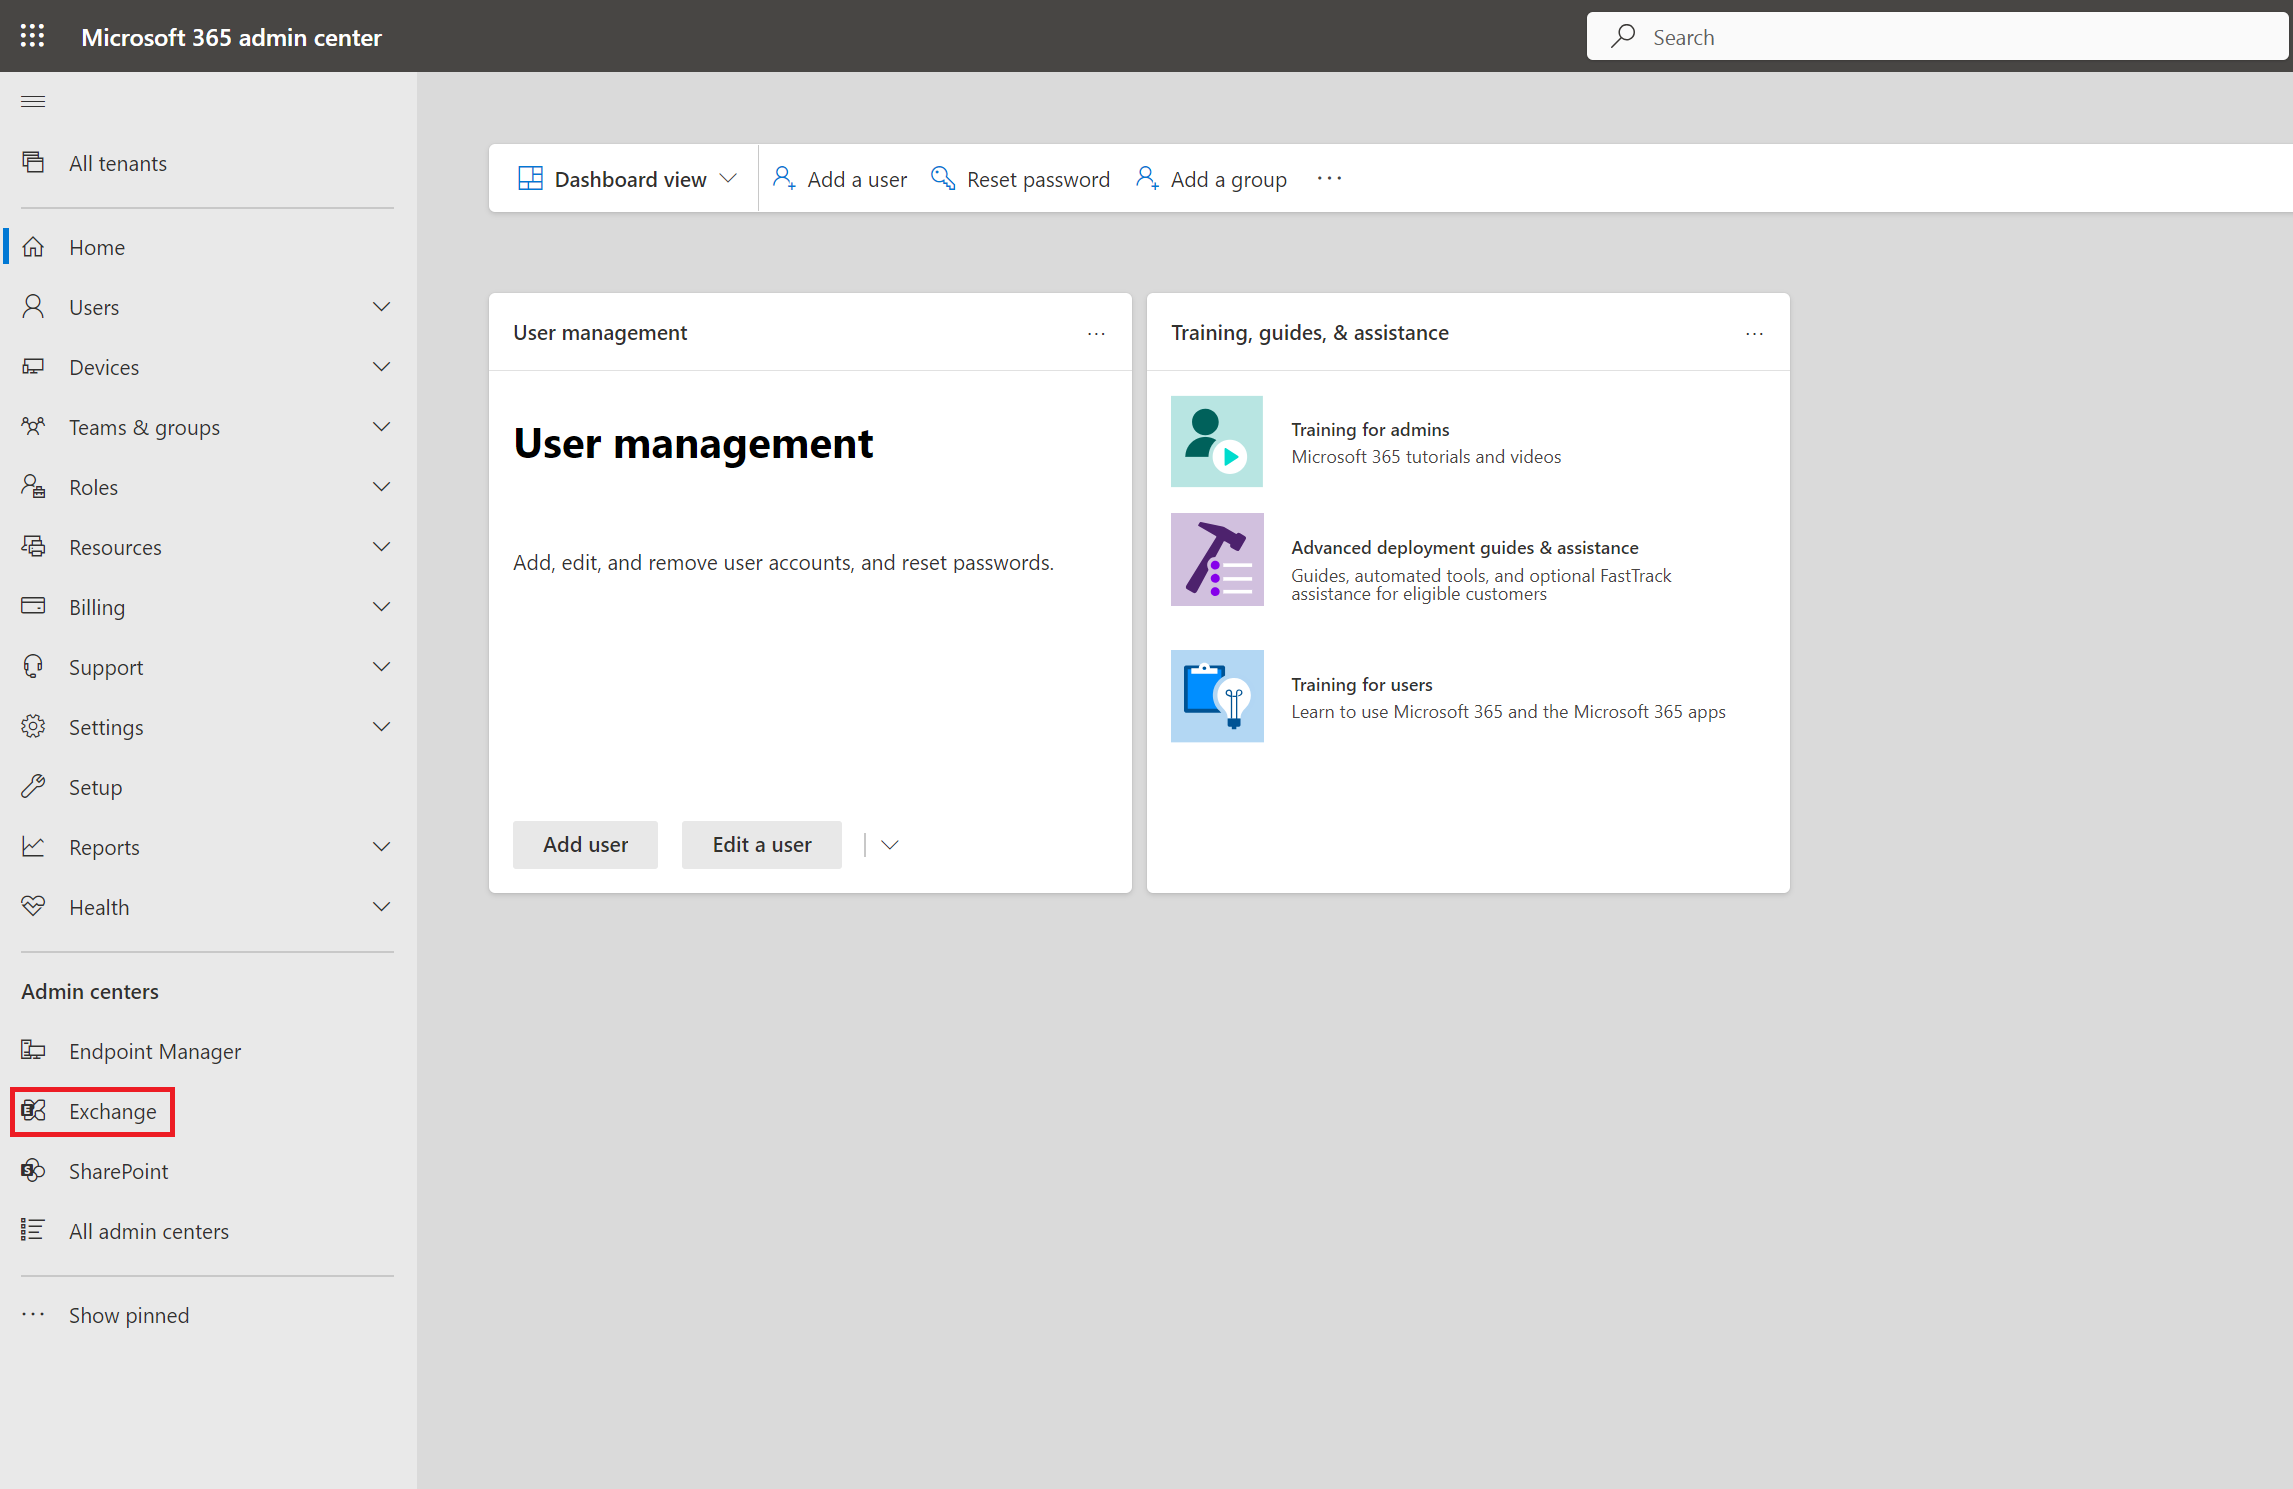
Click Show all and click Exchange.
Expand Mail flow and click Connectors.
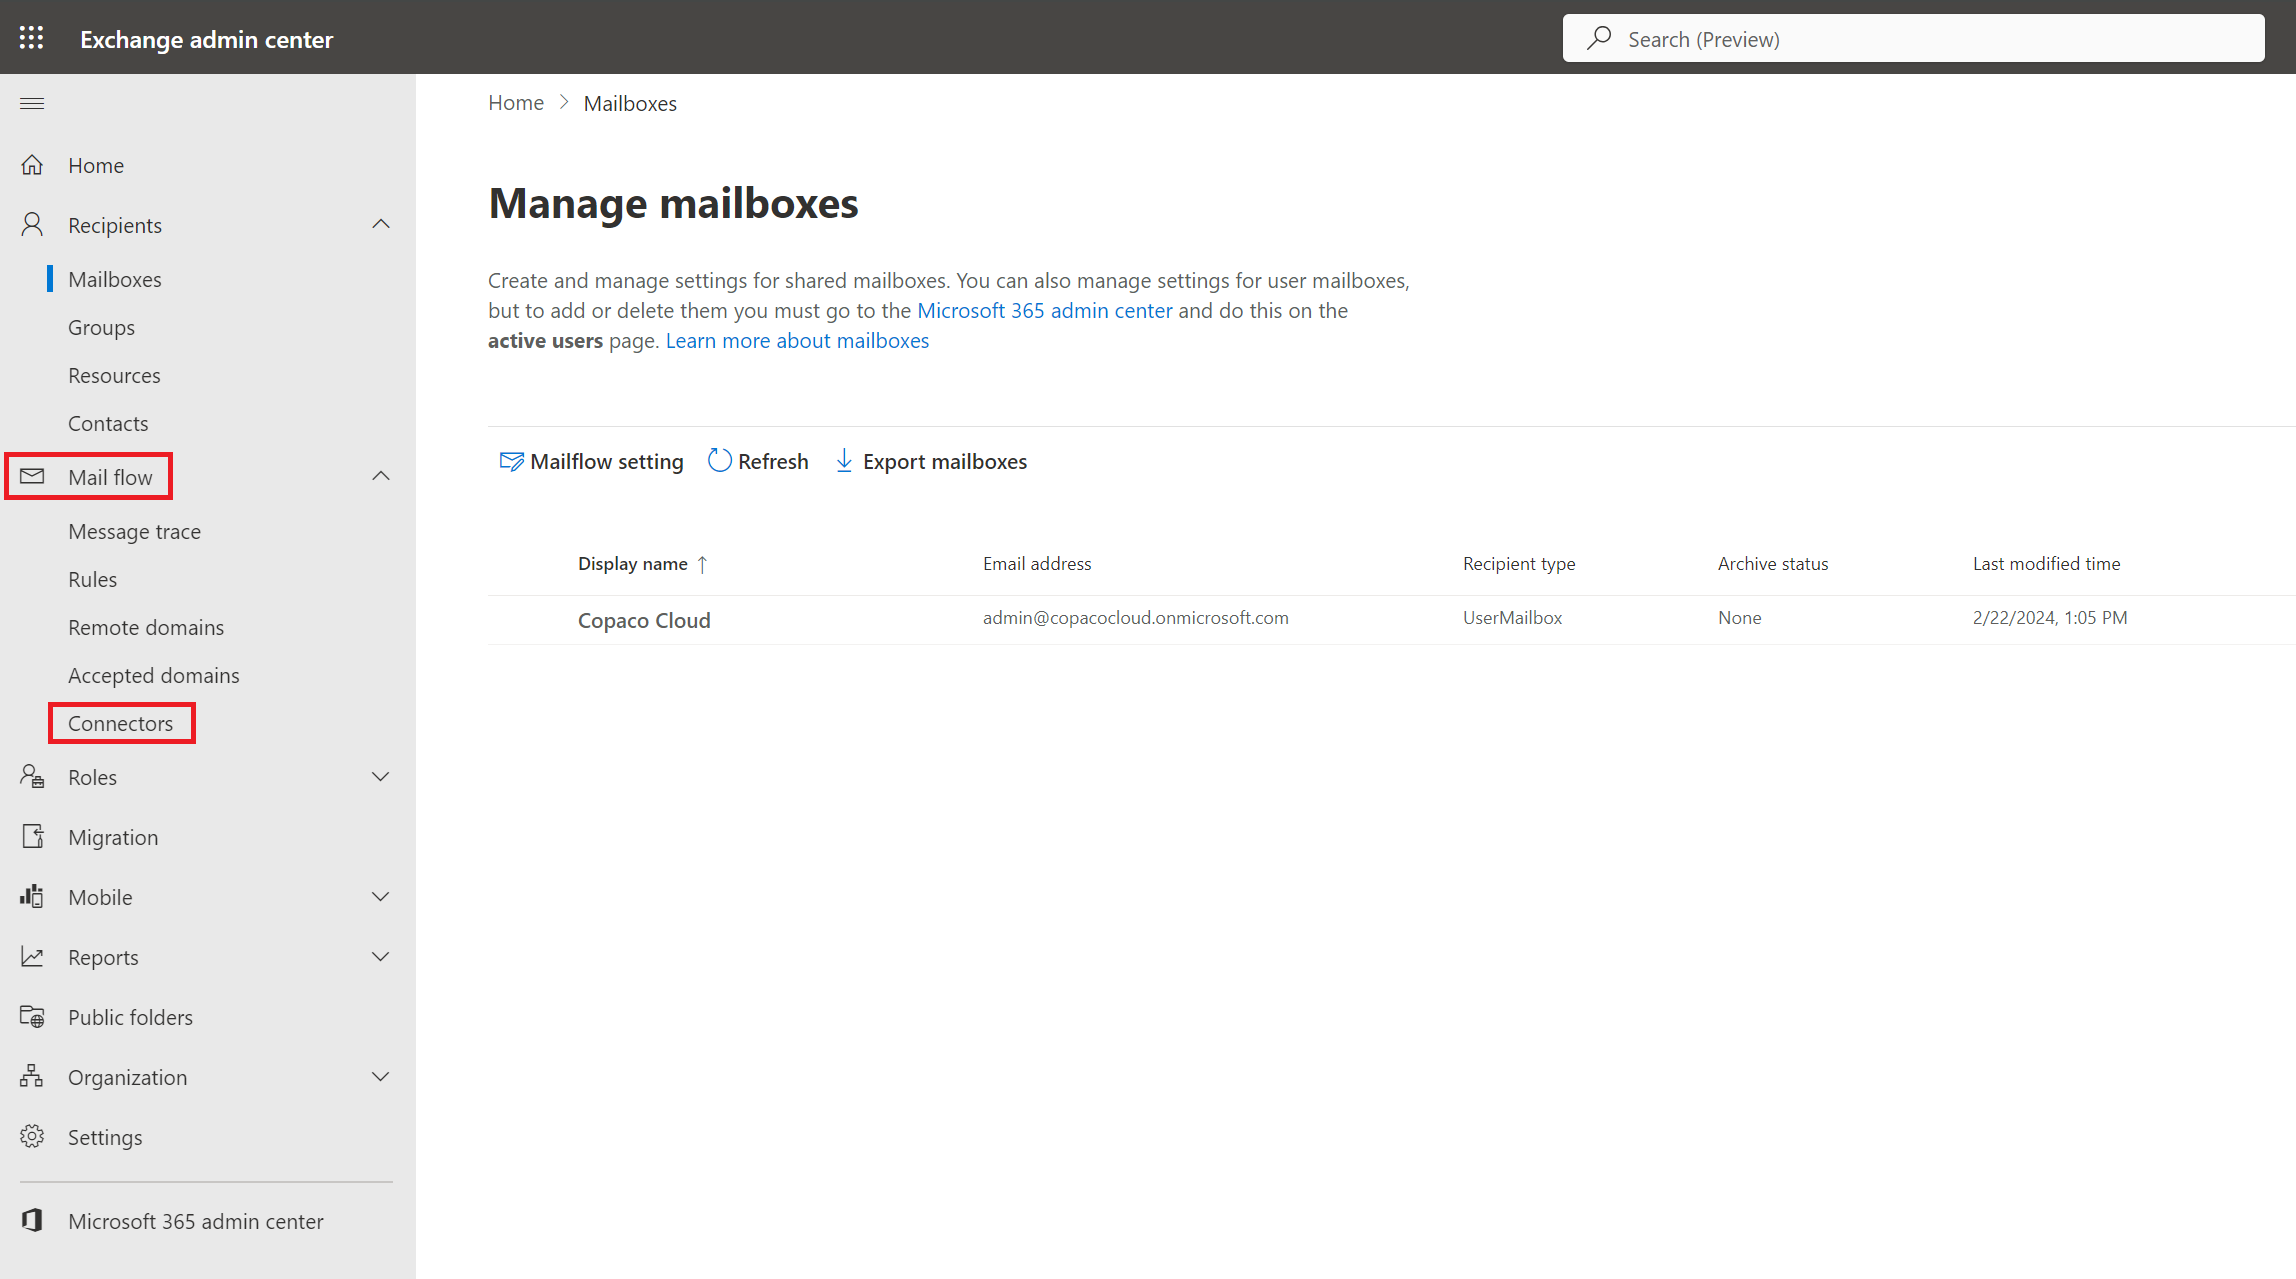
Click + Add a connector.

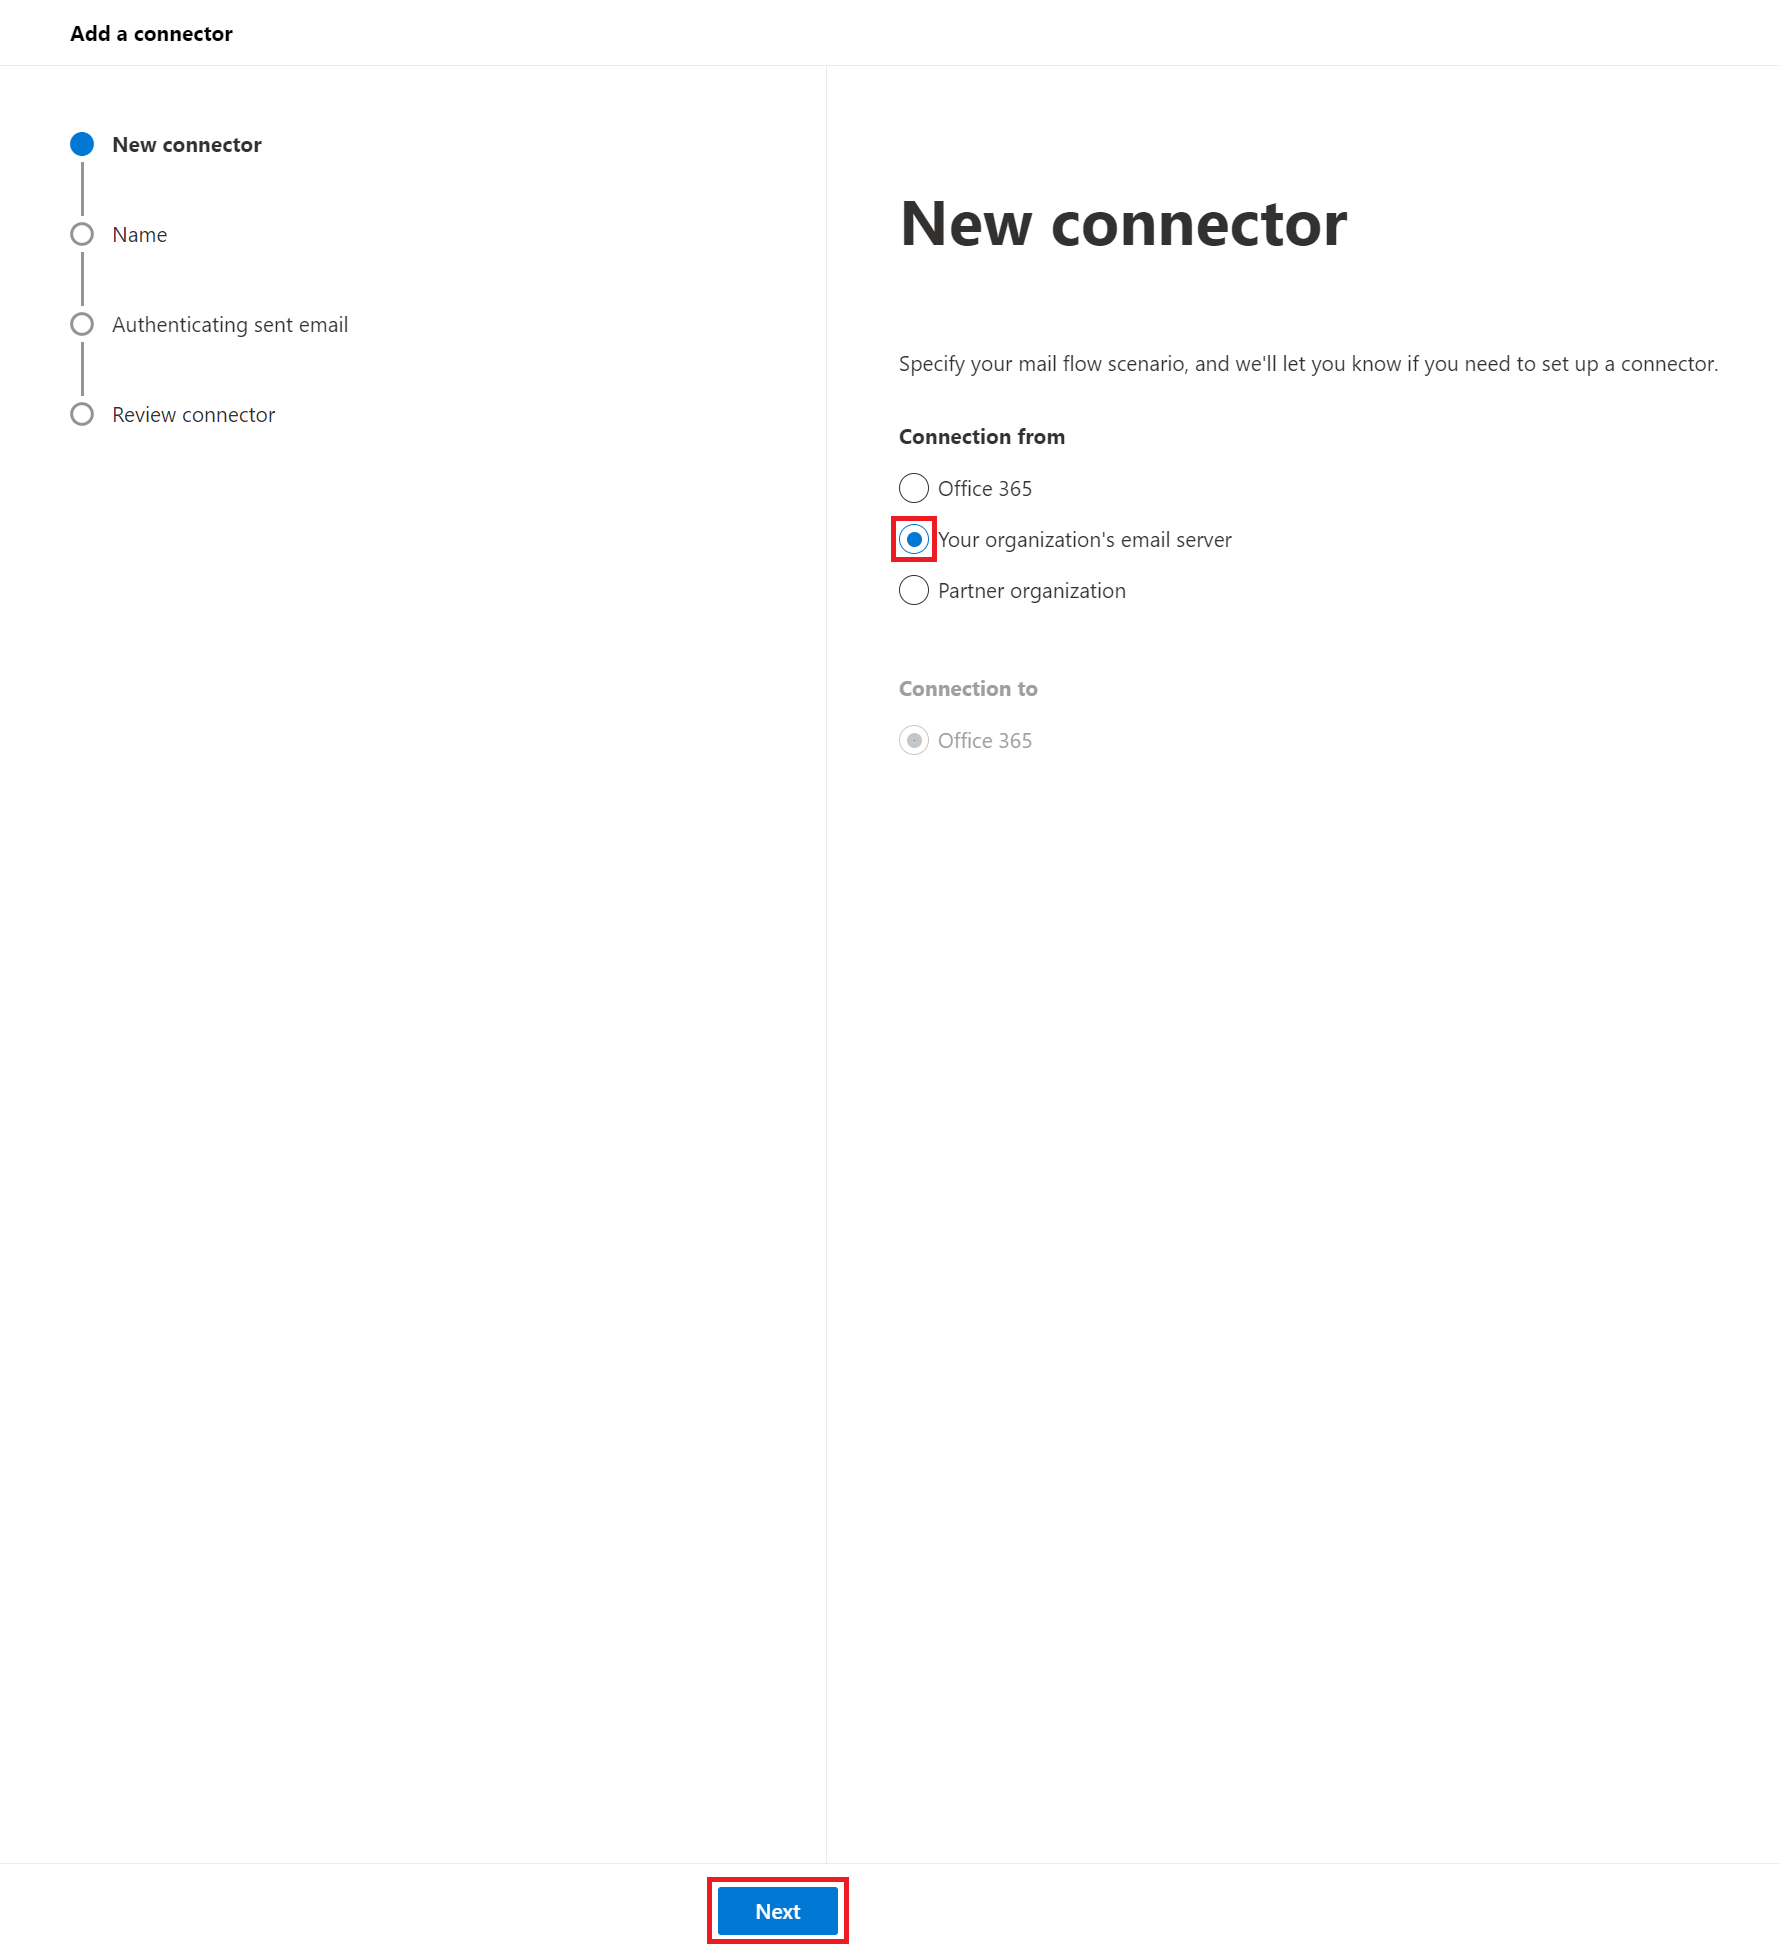
Choose Your organization’s email server and click Next.
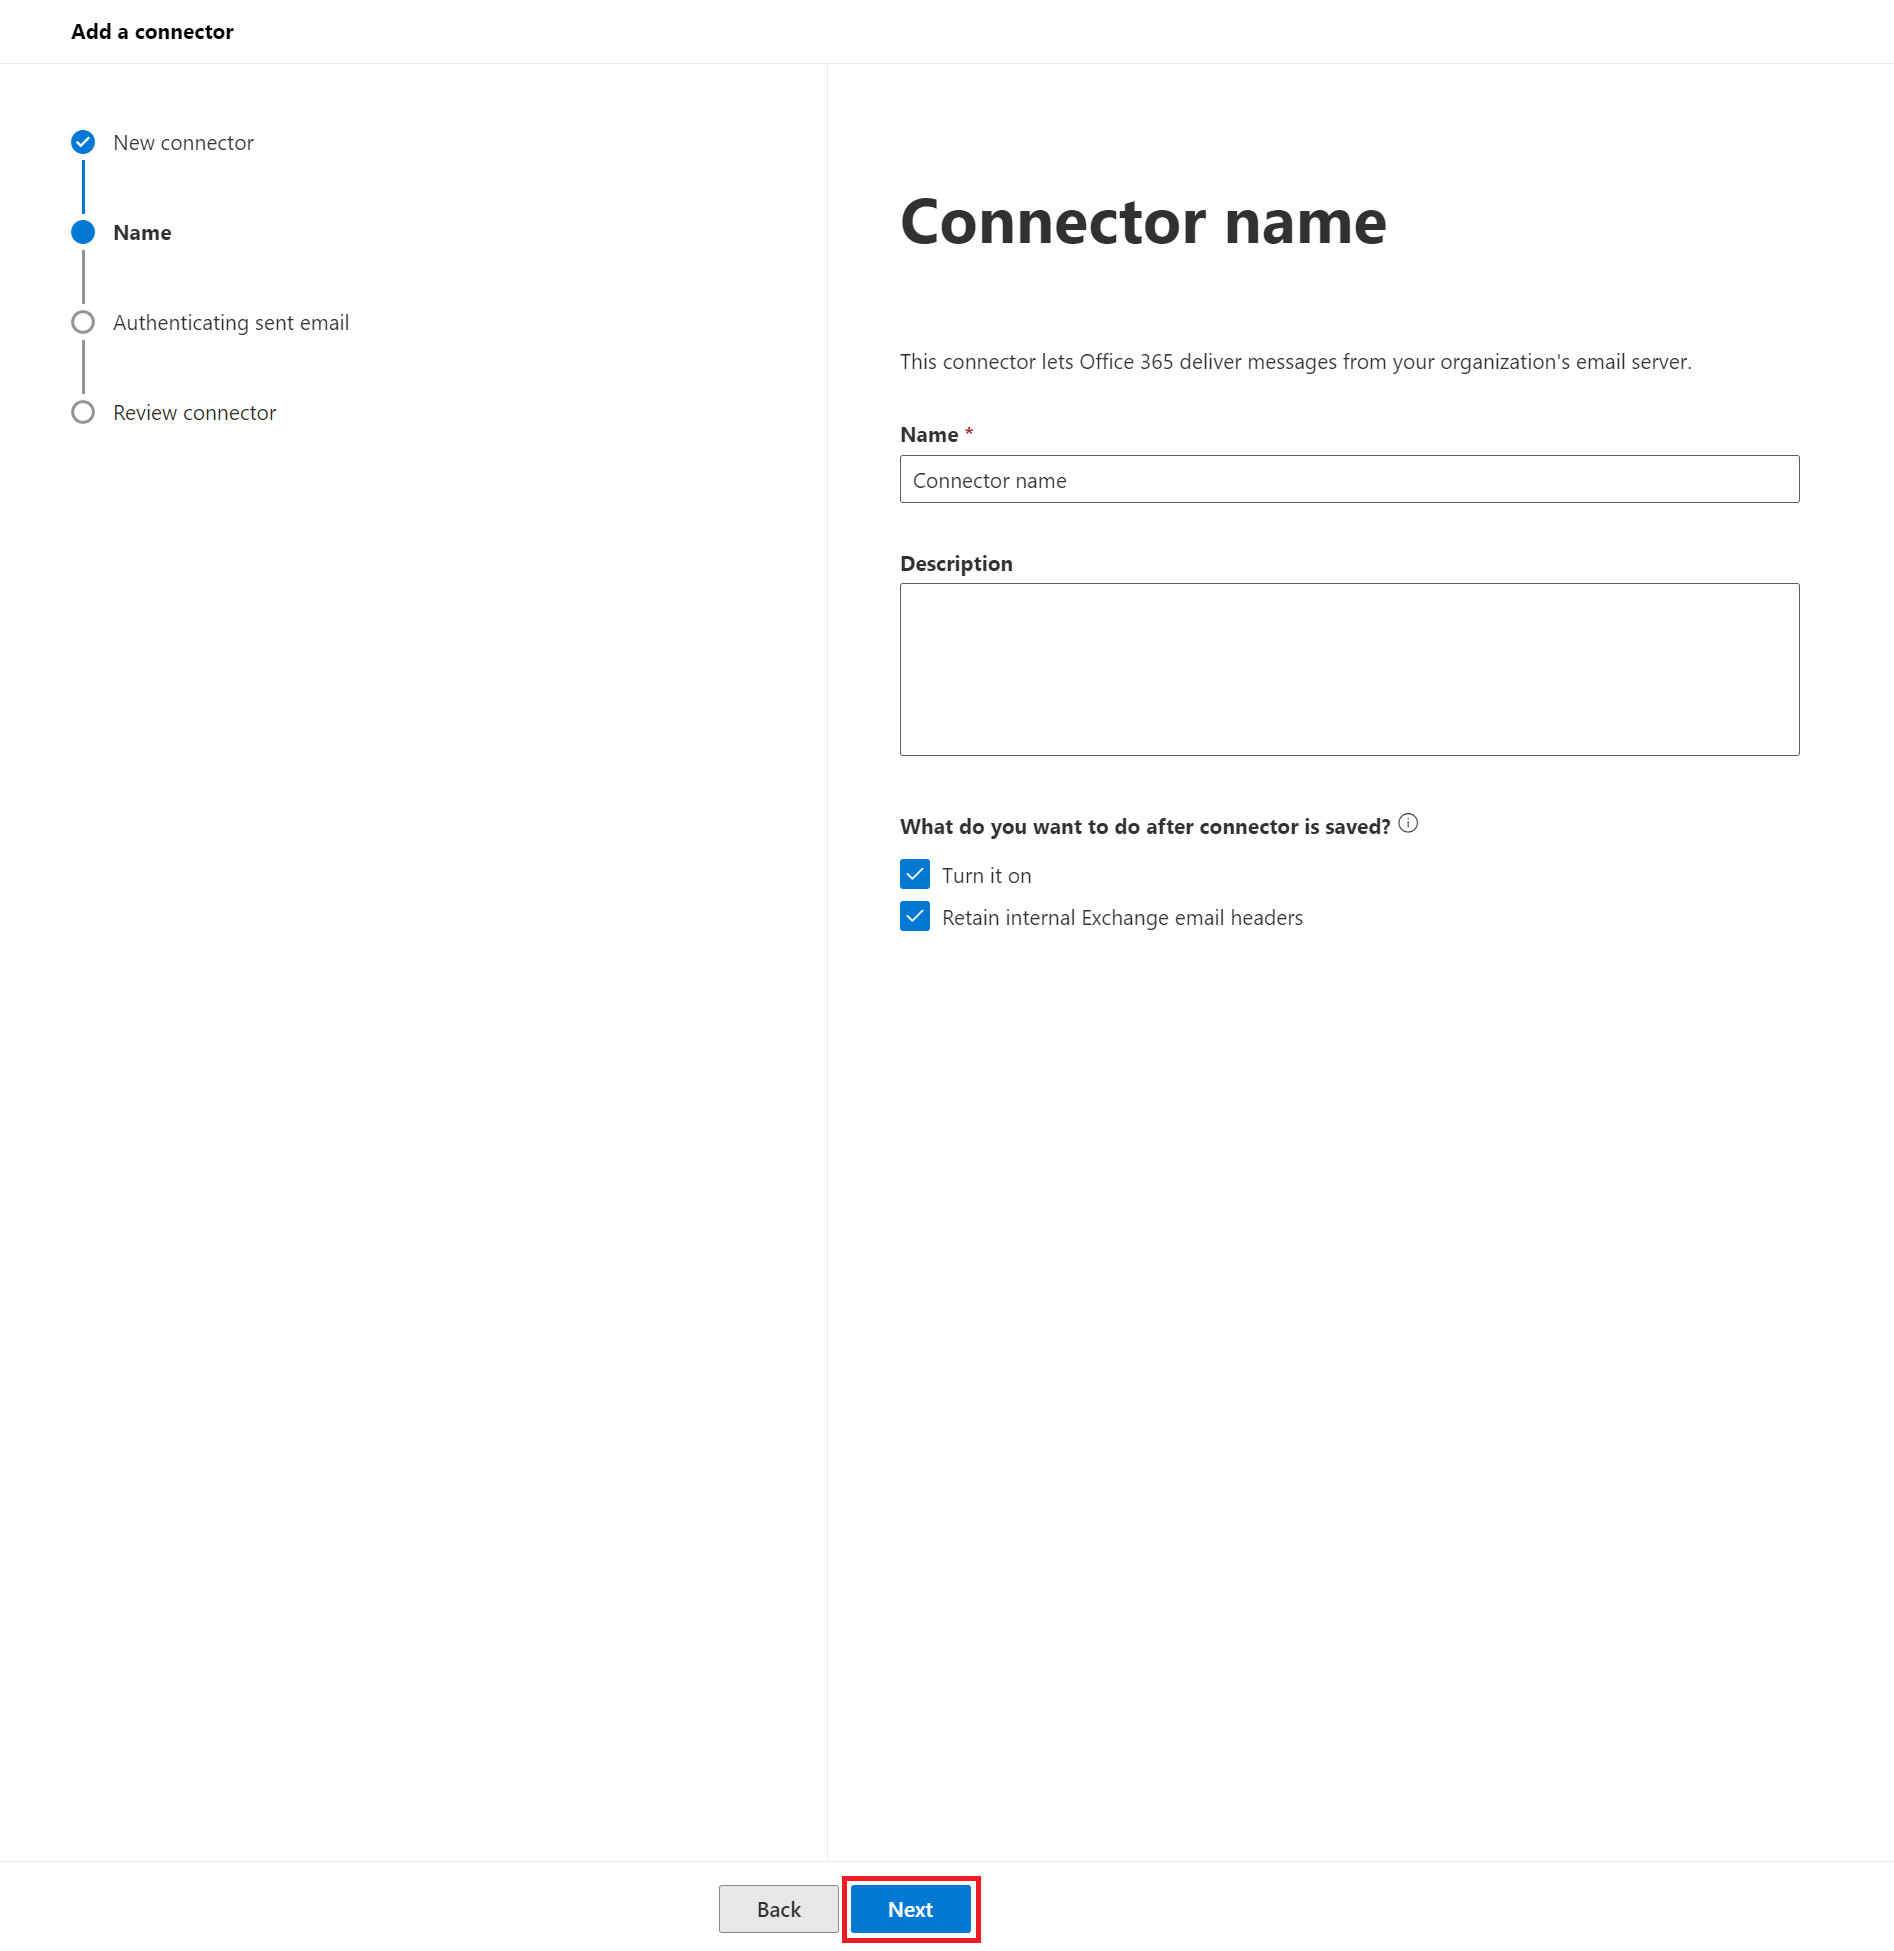
Provide a name for the connector, check the Turn it on and Retain internal Exchange email headers checkboxes and click Next.
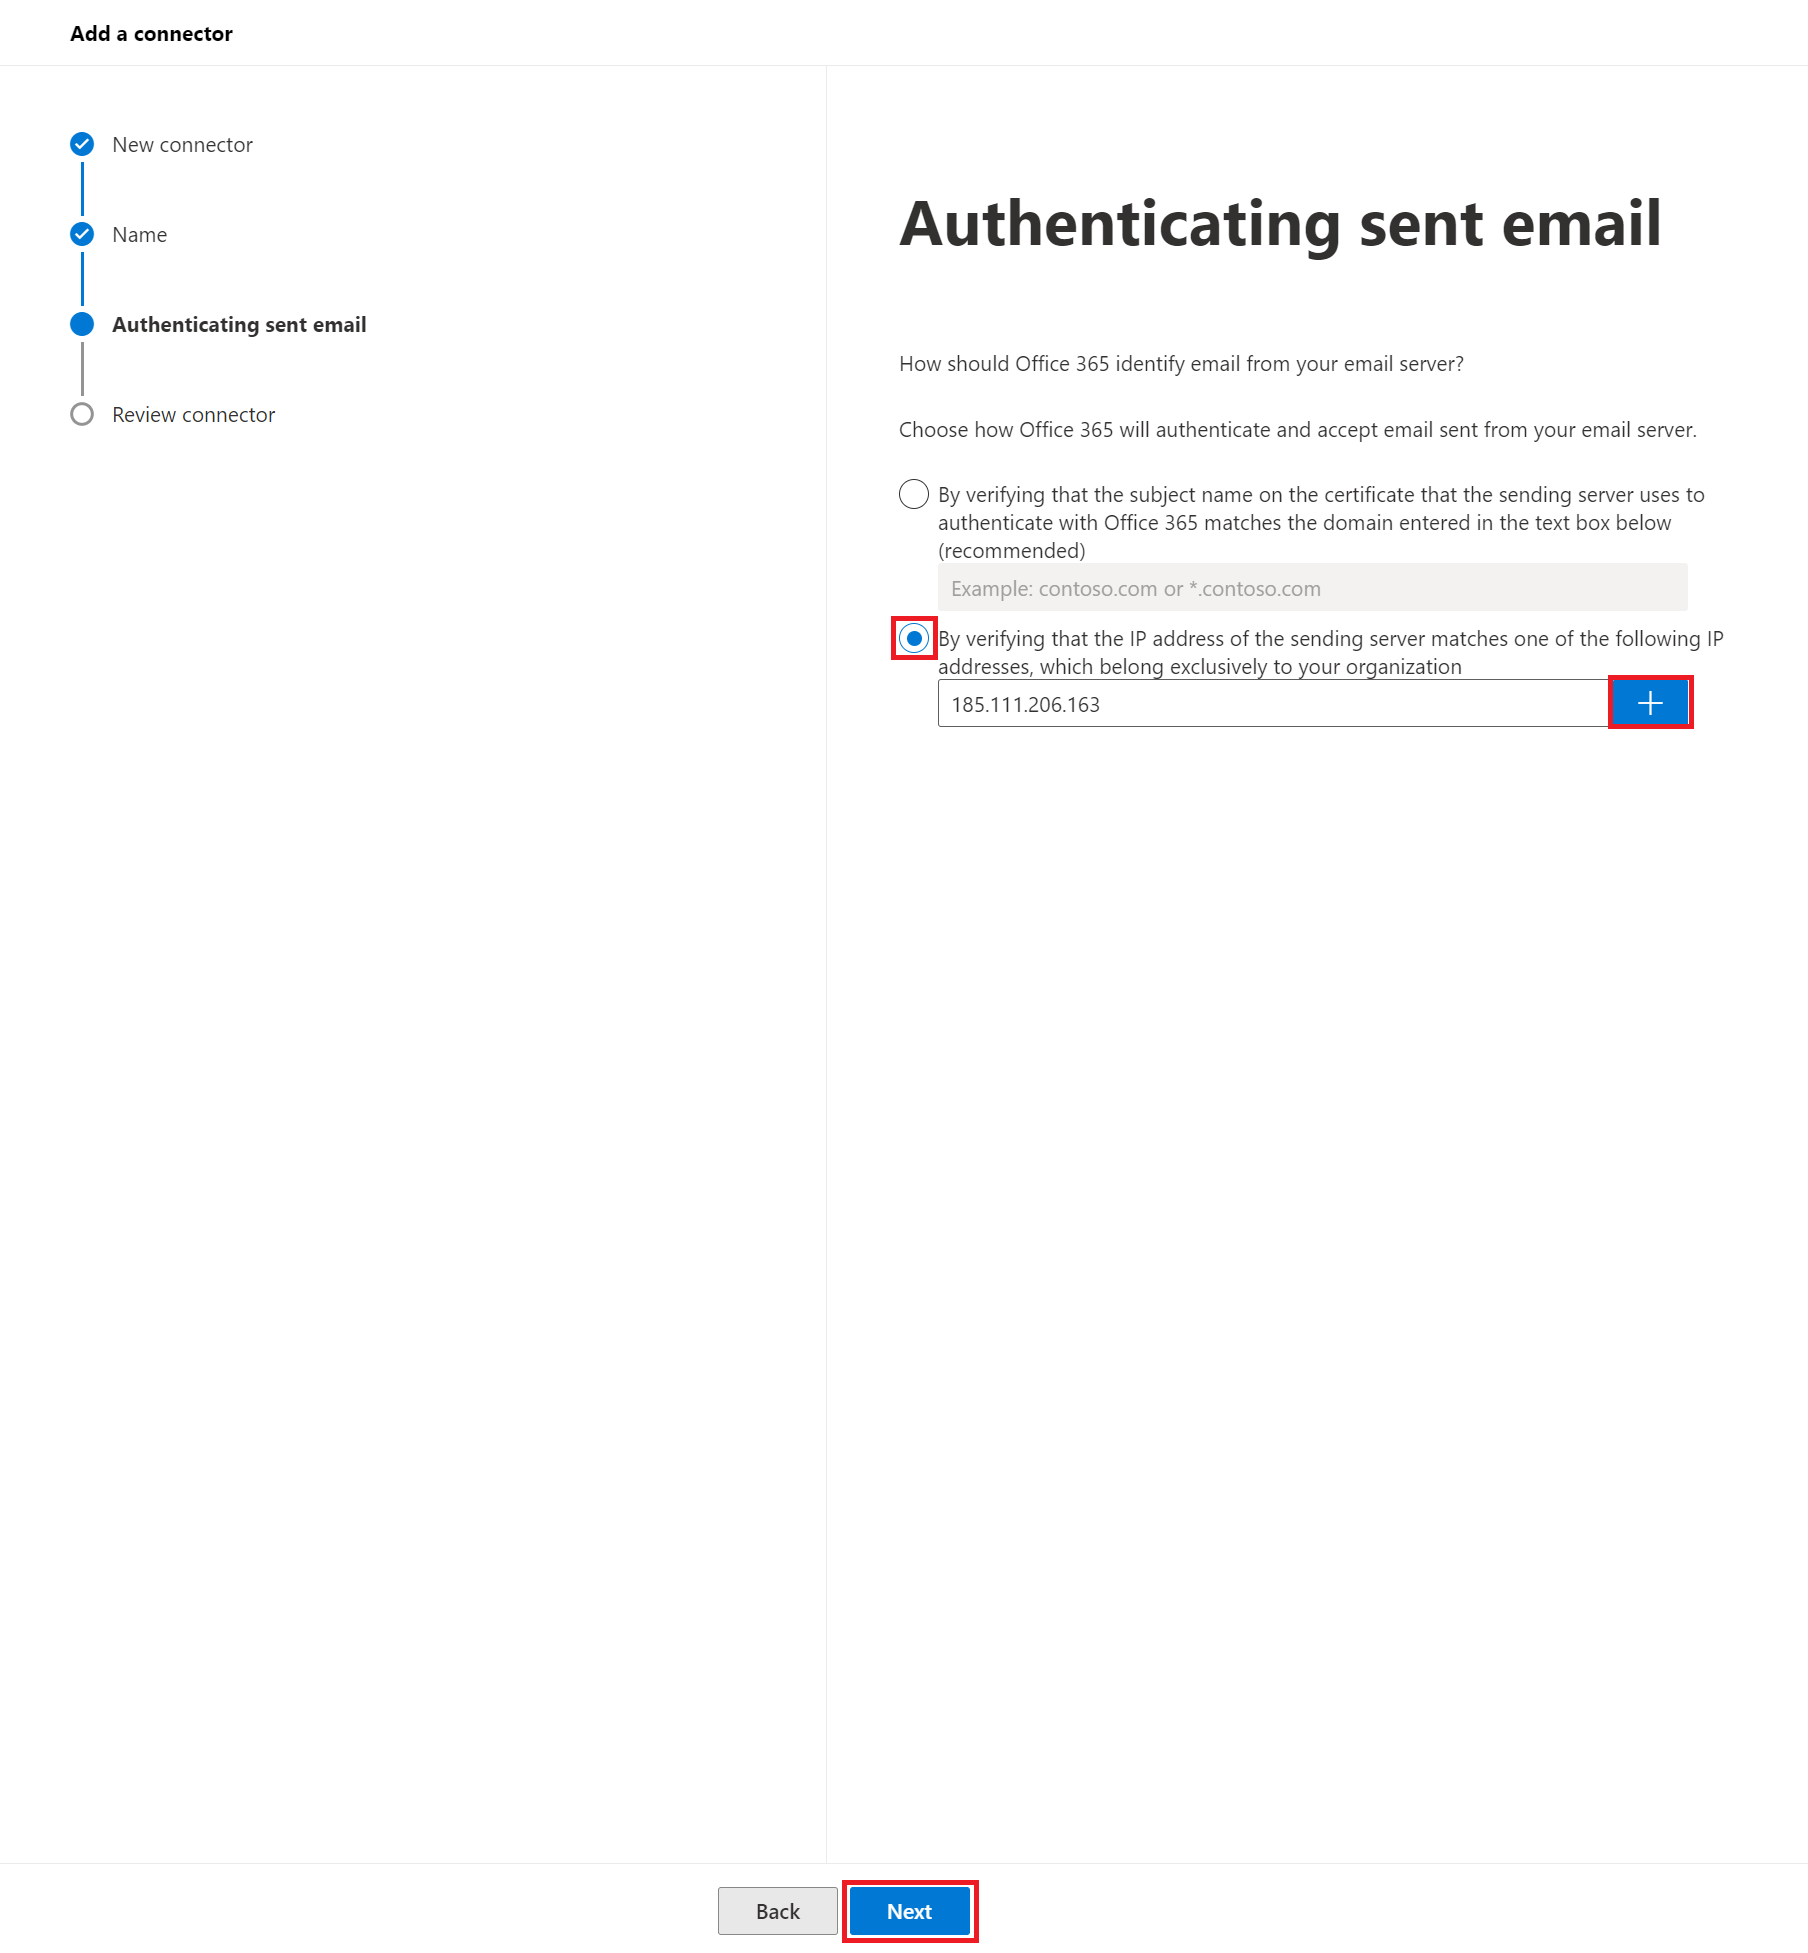
Open a cmd prompt and execute the following.
This will give you the IP address you have to enter in the next step (CODEnslookup portal.veeamvbm.cloudnet.services Example output: C:\User\user>nslookup portal.veeamvbm.cloudnet.services Server: xxx Address: xxx Non-authoritative answer: Name: portal.veeamvbm.cloudnet.services Address: 185.111.206.163Check the IP address checkbox, enter the IP from step 7, click the + icon and click Next.
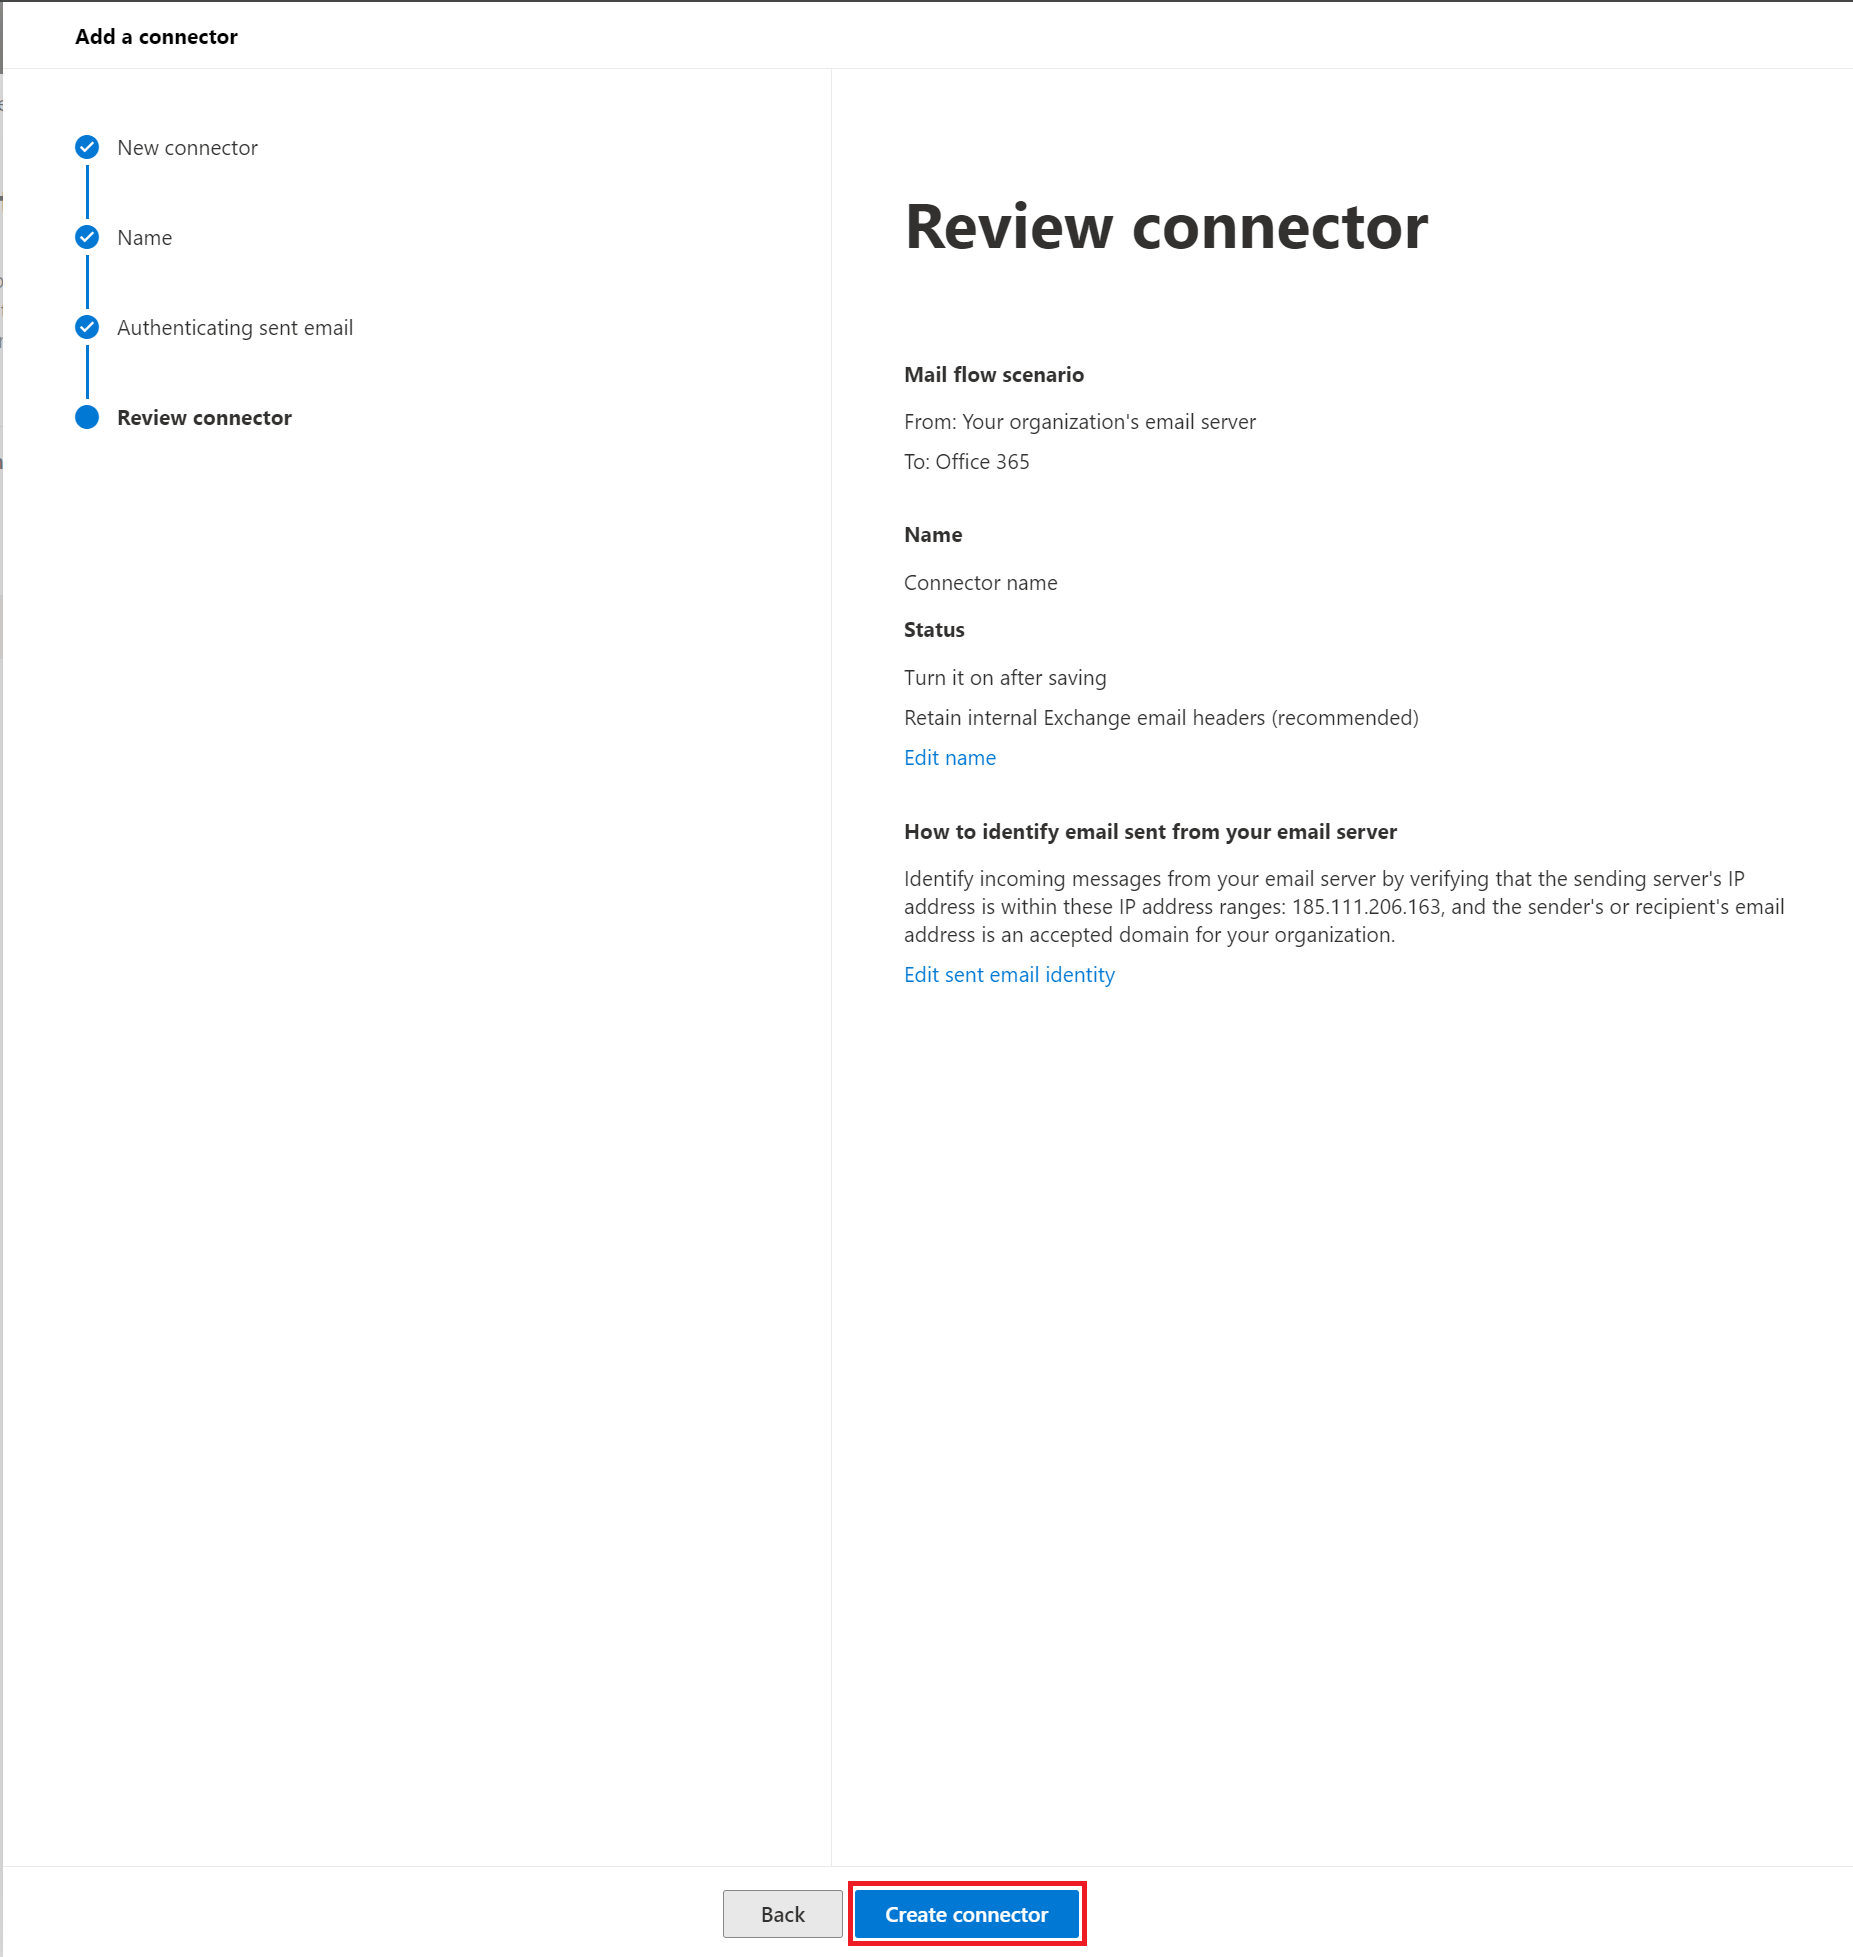
Review the connector and click Create connector.
Finding the relay DNS record of the Microsoft 365 tenant
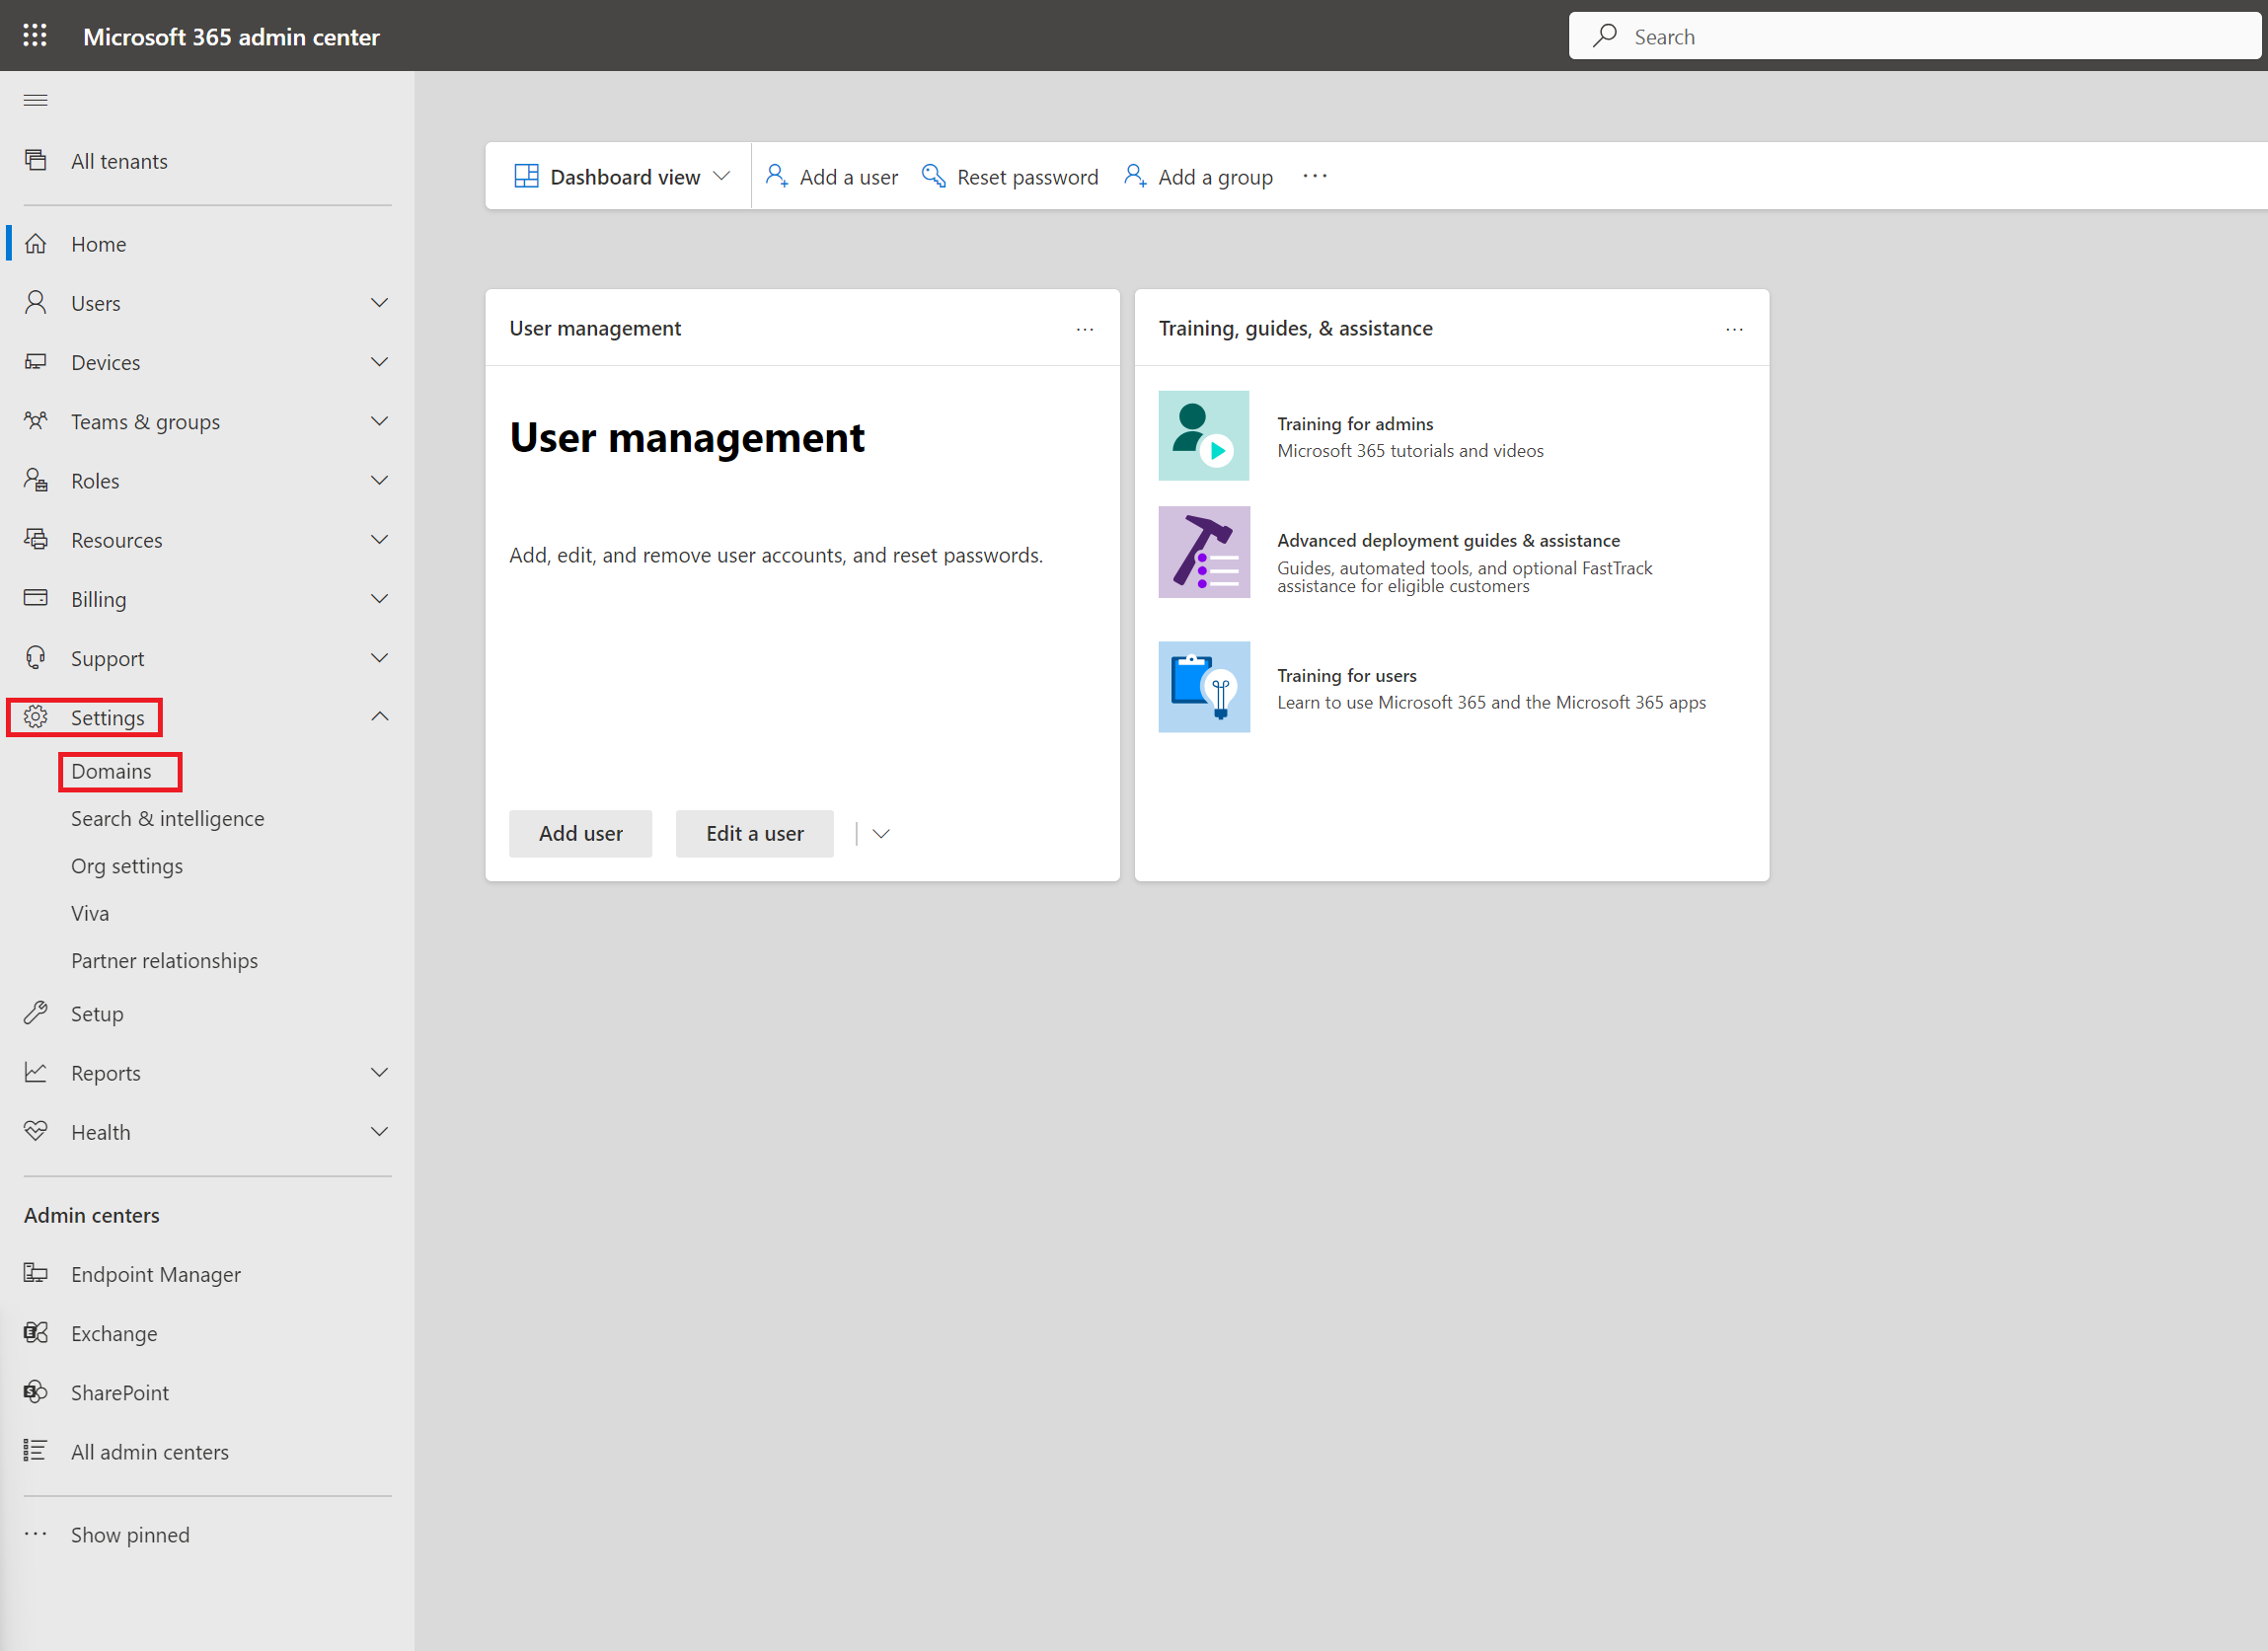
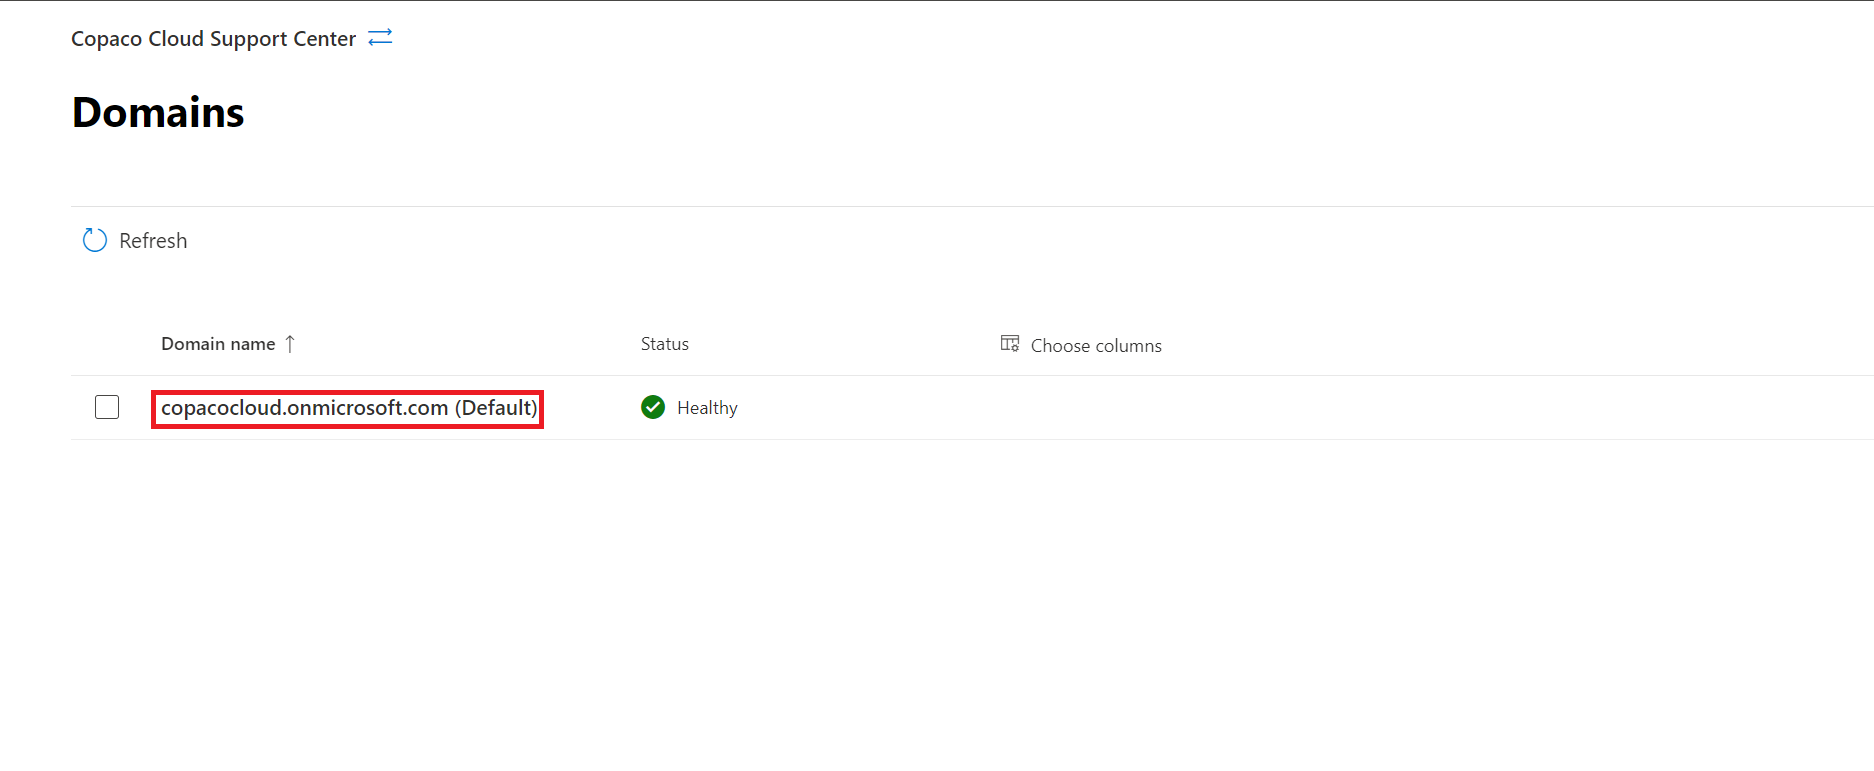
Go back to the Microsoft 365 admin center, expand Settings and click Domains.
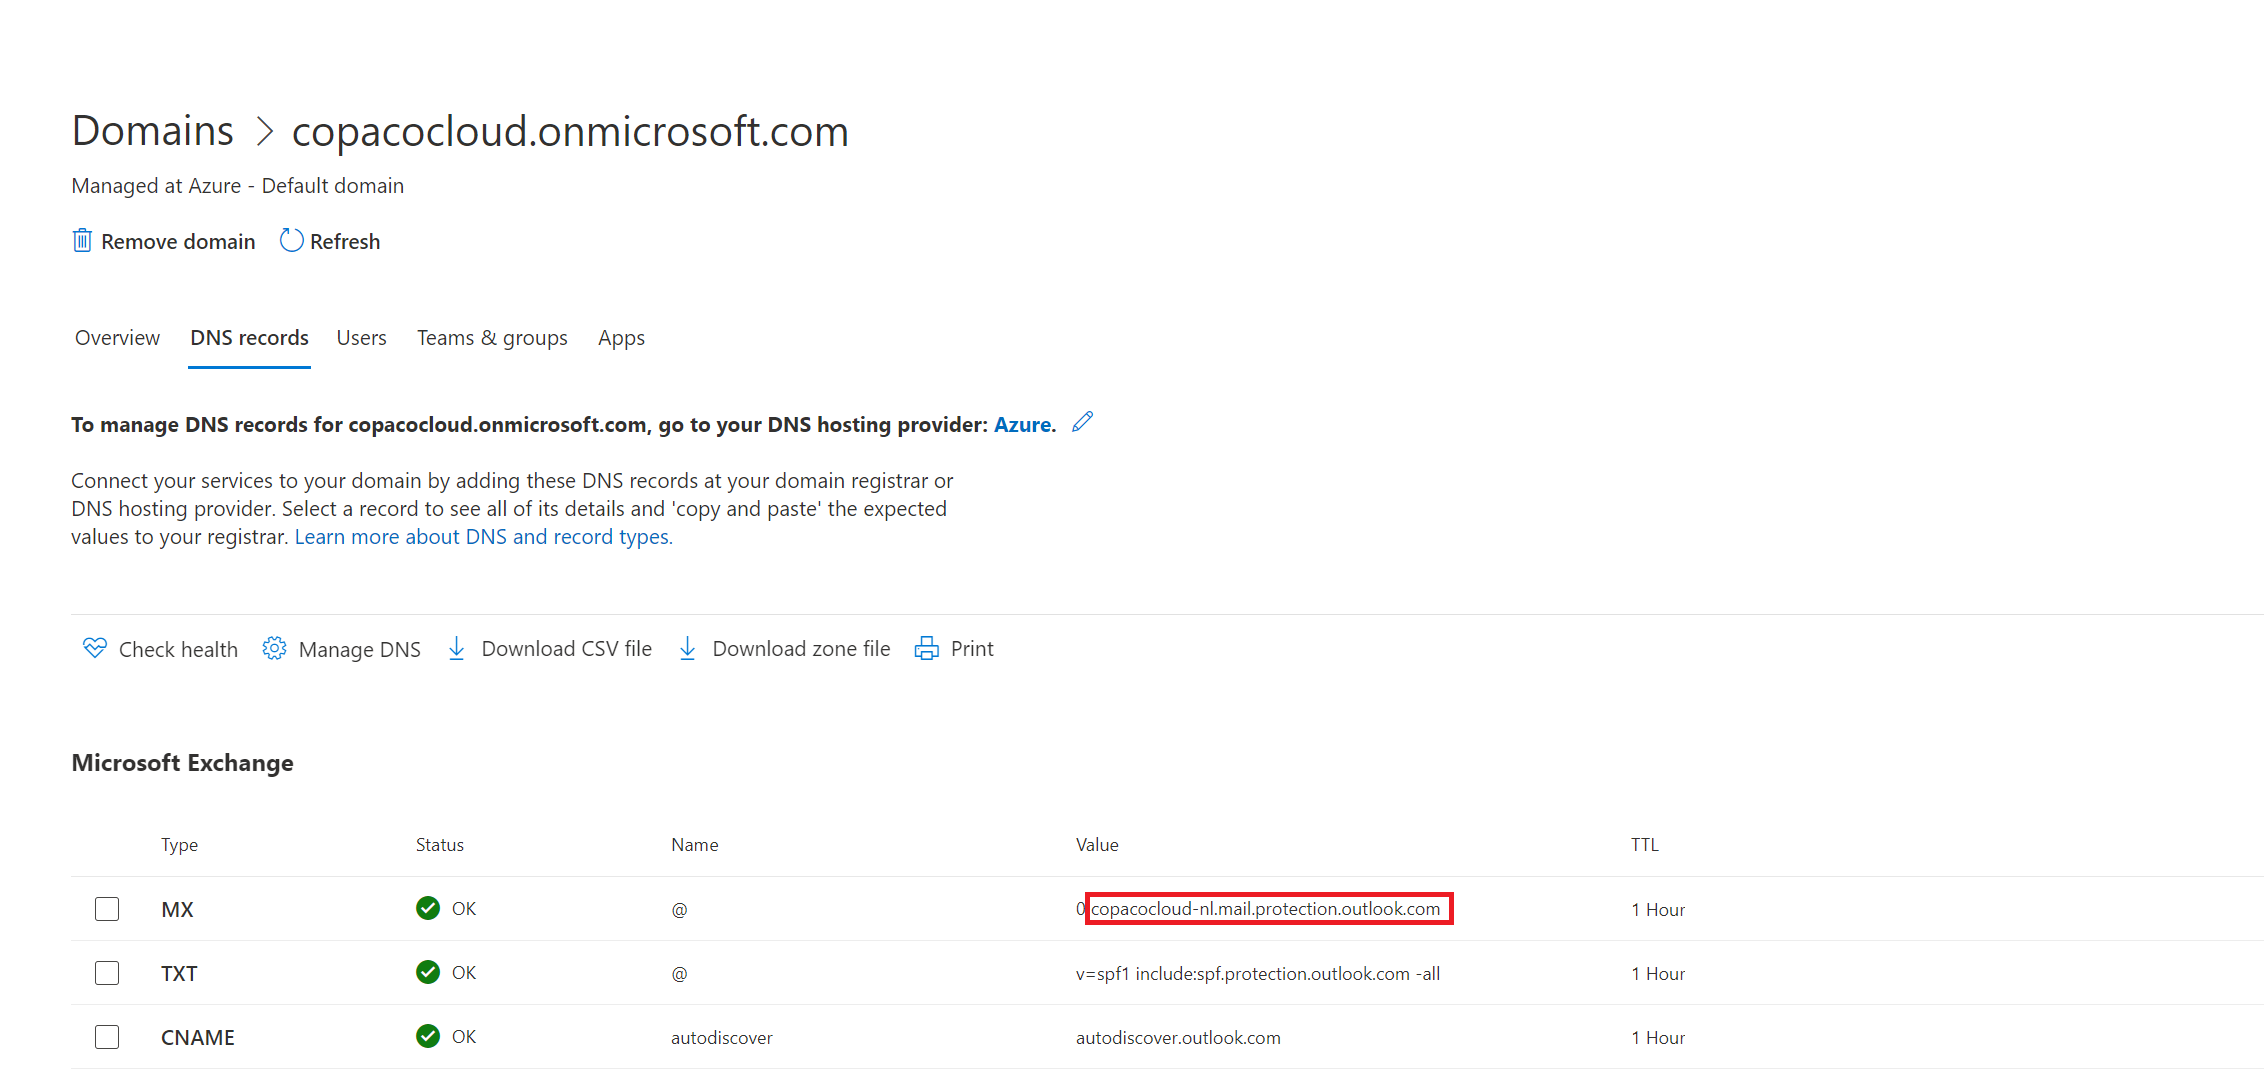
Click the domain name you wish to use as relay SMTP.
Write down the the value of the MX record. This will be the mail relay in the SMTP configuration in our Veeam backup for Microsoft 365.
Configure the SMTP in the Veeam backup for Microsoft 365 Portal
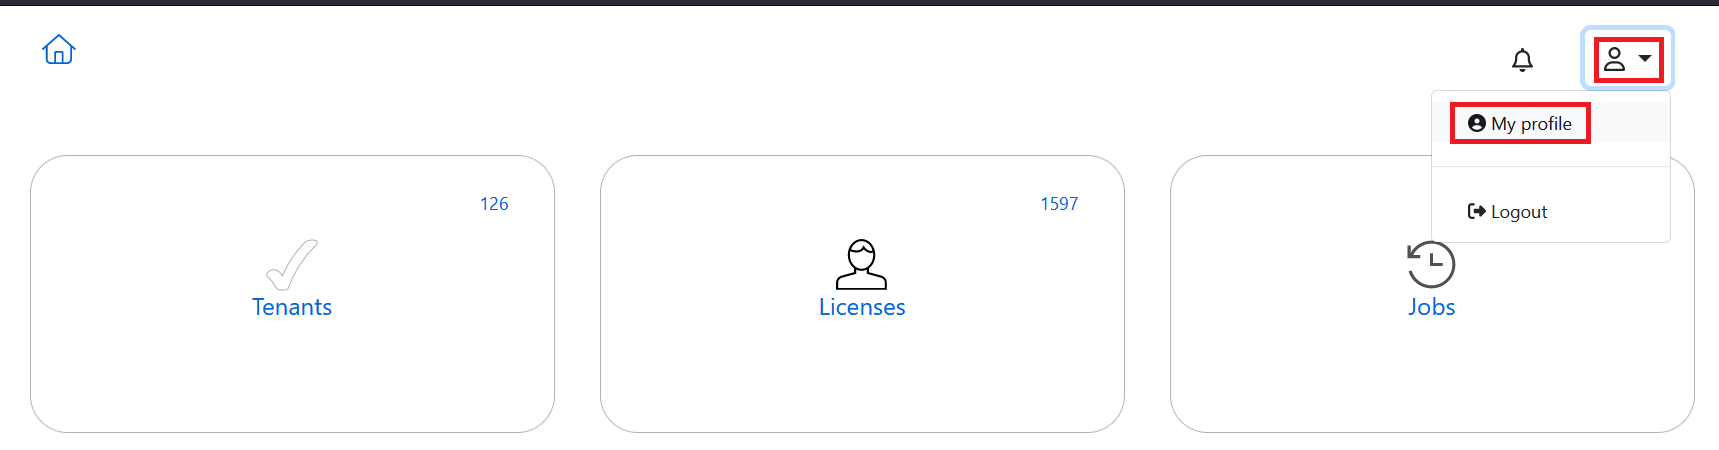
Log in on the Veeam backup for Microsoft 365 portal as reseller.
Click person icon and click My profile.
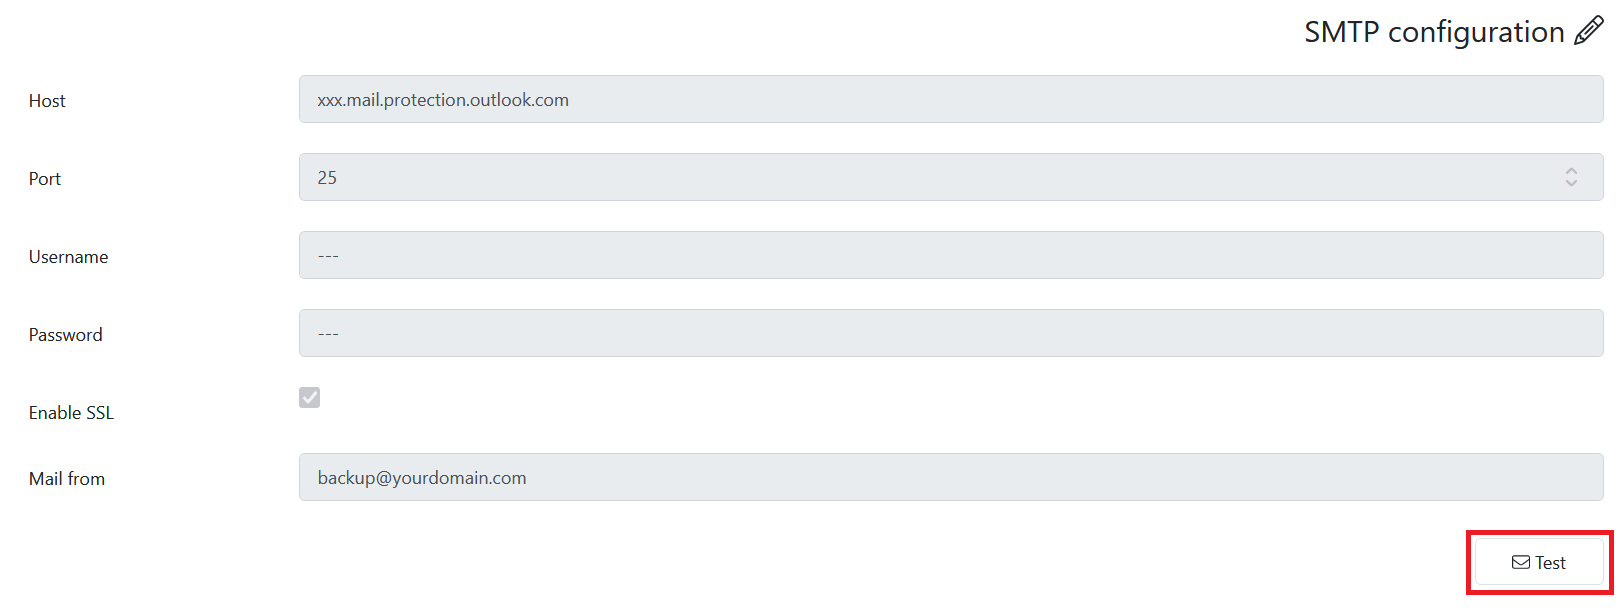
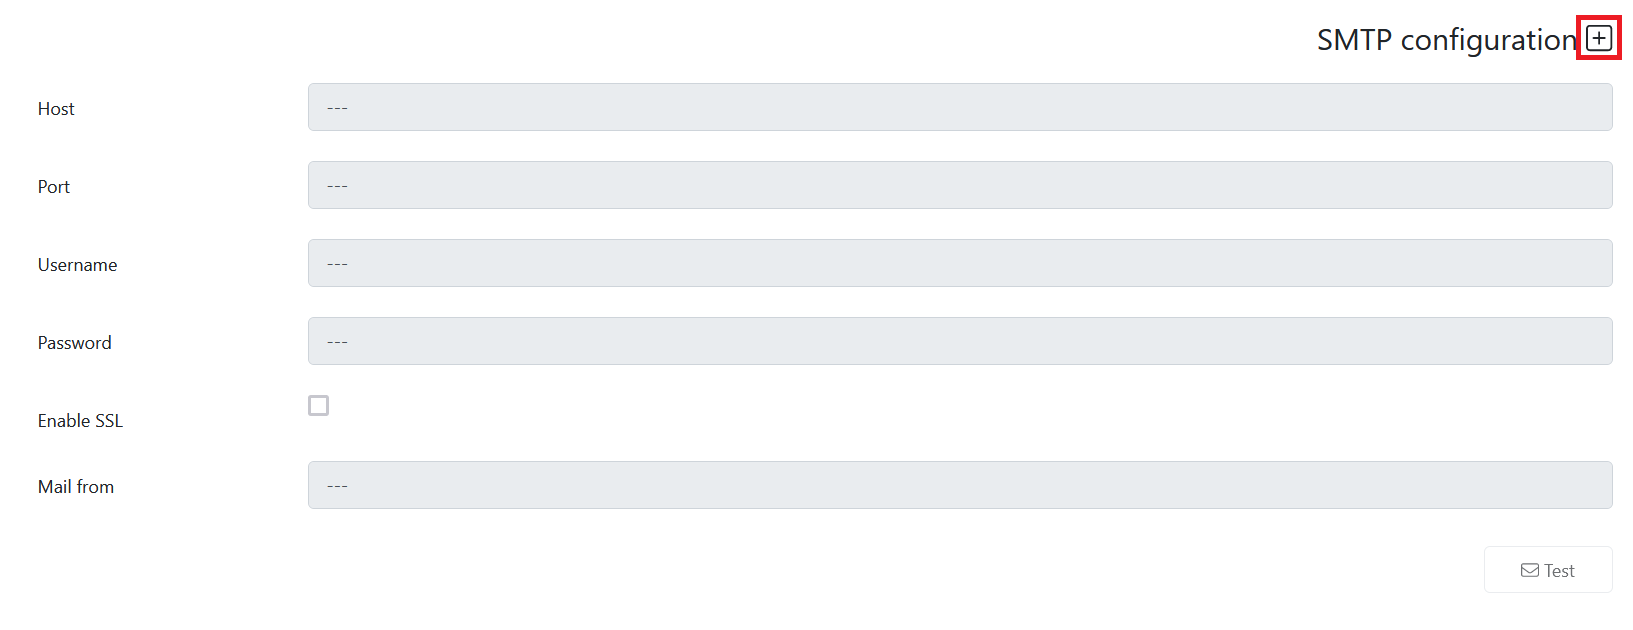
On the left side of your screen, expand Mailing and click SMTP configuration.
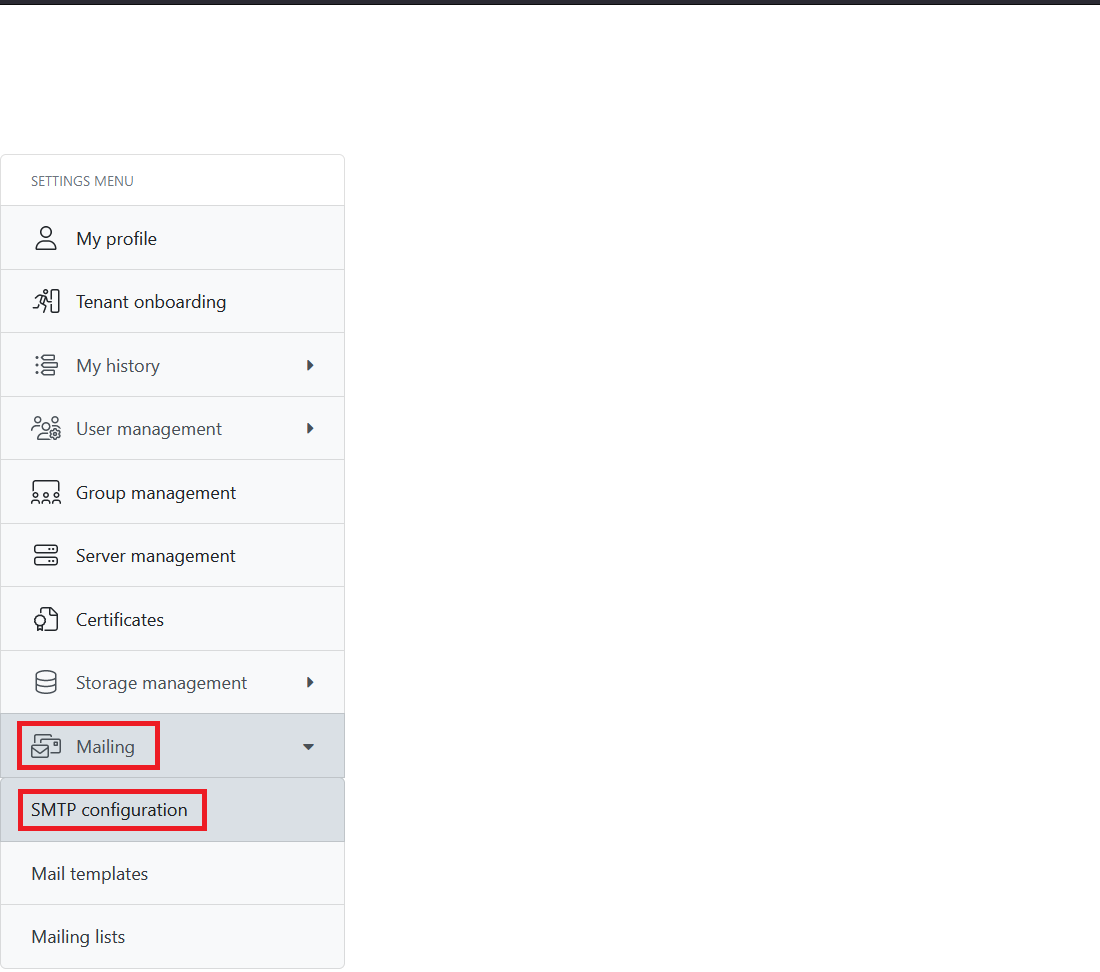
Click the + icon next to SMTP configuration.
Fill in the following information and click Save.
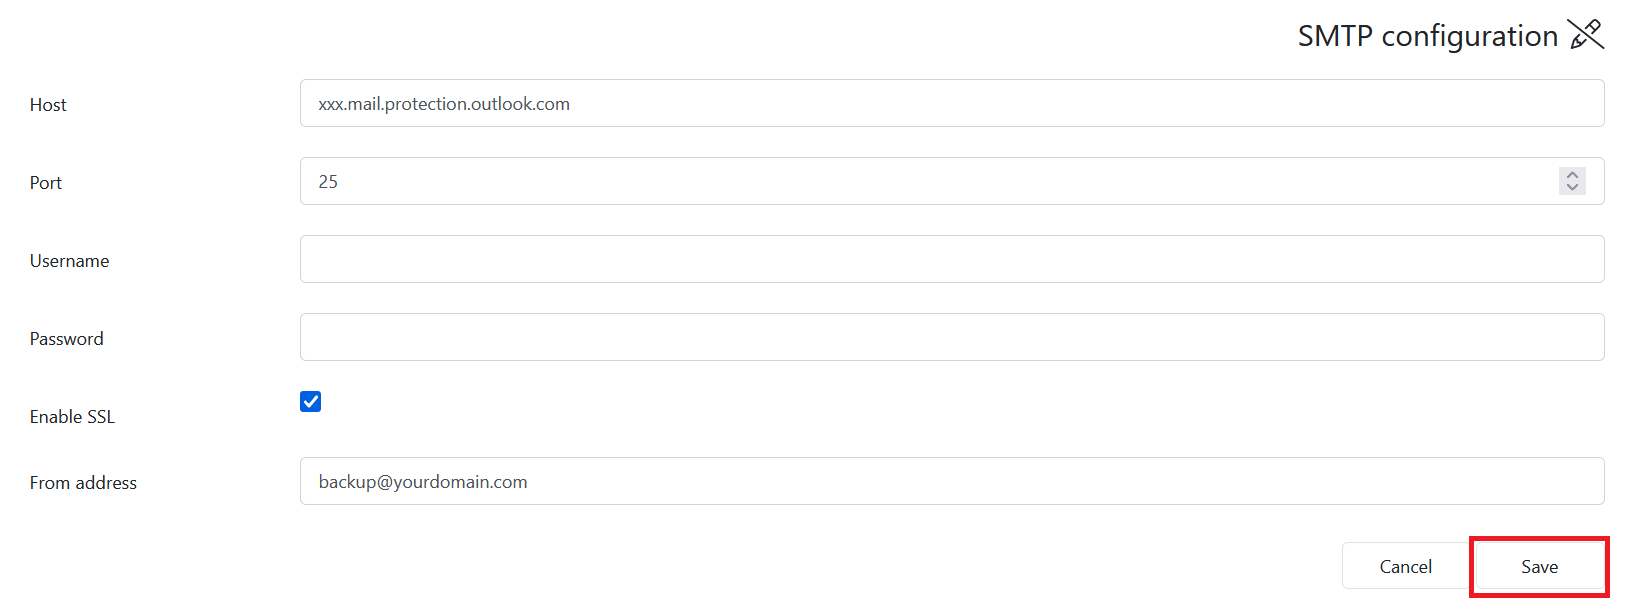
Test the configuration by clicking Test.